
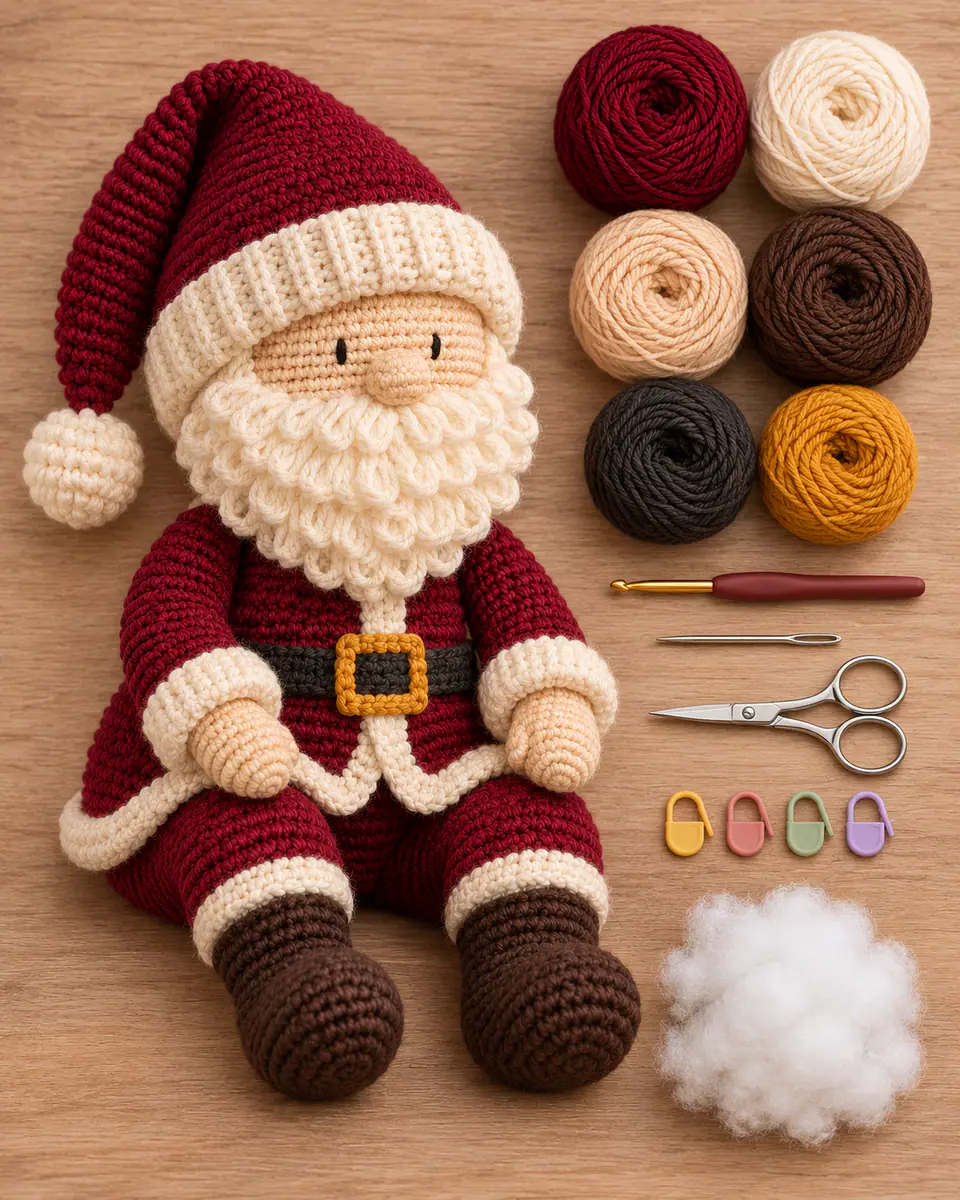
This amigurumi Santa sits steadily because the wide body is weighted with firm stuffing and the bent legs are sewn across the lower front. Embroidered eyes keep the face simple, while a separate loop-stitch beard adds volume without making the head oversized.
A Seated Santa with Stable Proportions
The body has a broad 36-stitch base and tapers only near the shoulders. Separate legs give the doll a natural seated pose and make stuffing easier to control. The head and body are closed independently, then joined through a full circle of stitches for a firm neck.
Materials You'll Need
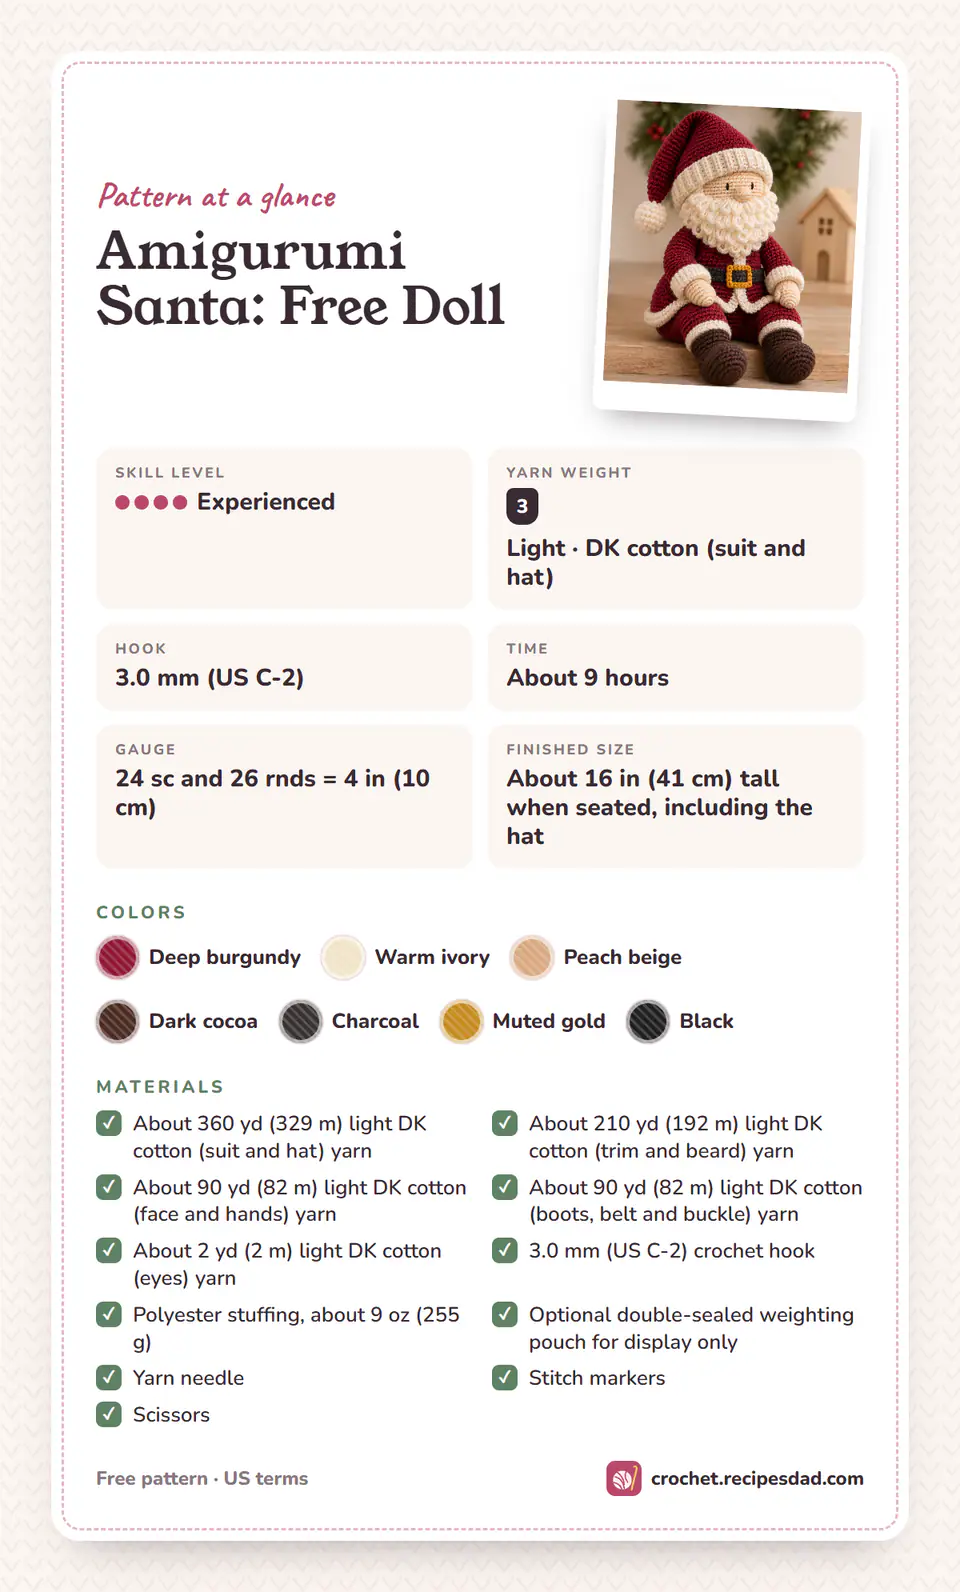
- About 360 yd (329 m) DK cotton (suit and hat), 100% cotton, in Deep burgundy.
- About 210 yd (192 m) DK cotton (trim and beard), 100% cotton, in Warm ivory.
- About 90 yd (82 m) DK cotton (face and hands), 100% cotton, in Peach beige.
- About 90 yd (82 m) DK cotton (boots, belt and buckle), 100% cotton, in Dark cocoa and Charcoal and Muted gold.
- About 2 yd (2 m) DK cotton (eyes), 100% cotton, in Black.
- 3.0 mm (US C-2) crochet hook.
- Polyester stuffing, about 9 oz (255 g).
- Optional double-sealed weighting pouch for display only.
- Yarn needle.
- Stitch markers.
- Scissors.
Use smooth cotton for clear facial stitches. If the doll is intended for display only, a small fabric pouch of plastic pellets can sit at the base; keep it double sealed and omit it for children.
Gauge and Finished Measurements
- Skill level: Experienced.
- Gauge: 24 sc and 26 rnds = 4 in (10 cm).
- Finished size: About 16 in (41 cm) tall when seated, including the hat.
- Working time: About 9 hours.
Stuffing must not show through the fabric. Make the head first and change hook size before continuing if gaps appear around the increase rounds.
Abbreviations and Special Stitches
Instructions use US crochet terms. Count at the end of every numbered row or round before moving on.
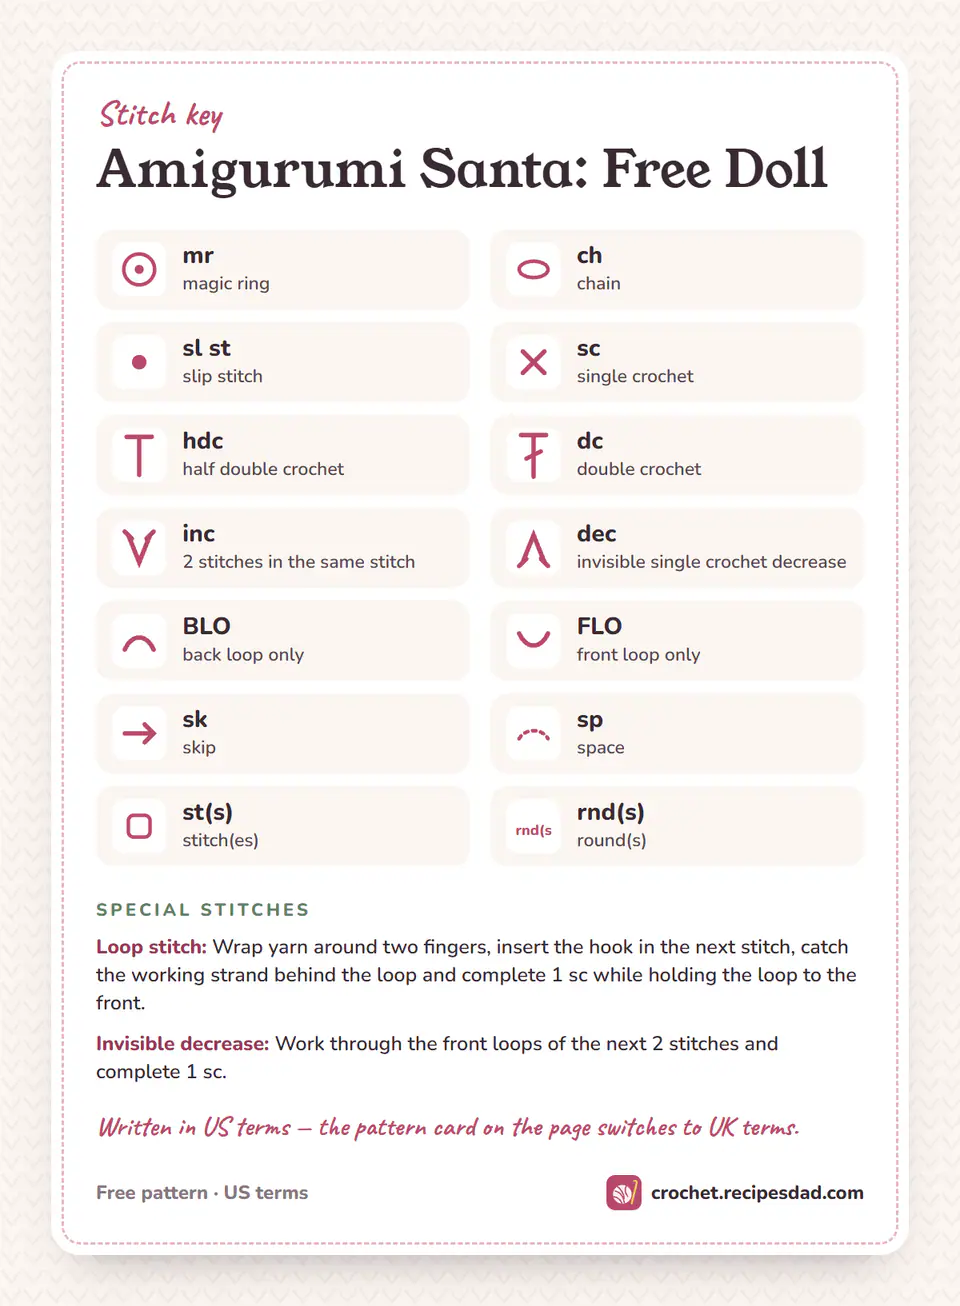
- mr: magic ring.
- ch: chain.
- sl st: slip stitch.
- sc: single crochet.
- hdc: half double crochet.
- dc: double crochet.
- inc: 2 stitches in the same stitch.
- dec: invisible single crochet decrease.
- BLO: back loop only.
- FLO: front loop only.
- sk: skip.
- sp: space.
- st(s): stitch(es).
- rnd(s): round(s).
Loop stitch: Wrap yarn around two fingers, insert the hook in the next stitch, catch the working strand behind the loop and complete 1 sc while holding the loop to the front.
Invisible decrease: Work through the front loops of the next 2 stitches and complete 1 sc.
Pattern Notes
- Work all stuffed pieces in continuous spirals.
- Embroider the eyes; do not use safety eyes for the pictured version.
- Make exactly 2 arms and 2 legs.
Mark the front of the body after Round 10. Belt, coat trim and leg placement all use that mark, which prevents the finished doll from twisting.
How to Crochet an Amigurumi Santa
The head and torso use standard six-stitch increase circles. Arms begin with the hands, and legs begin at the boots. The hat grows by three stitches every other round, producing a long cone that bends to one side.
The loop beard is a flat panel. Make each loop around two fingers, then lock it with a single crochet. Shorter upper rows fit under the nose; the widest loops sit along the jaw.
Assembly Order for a Balanced Doll
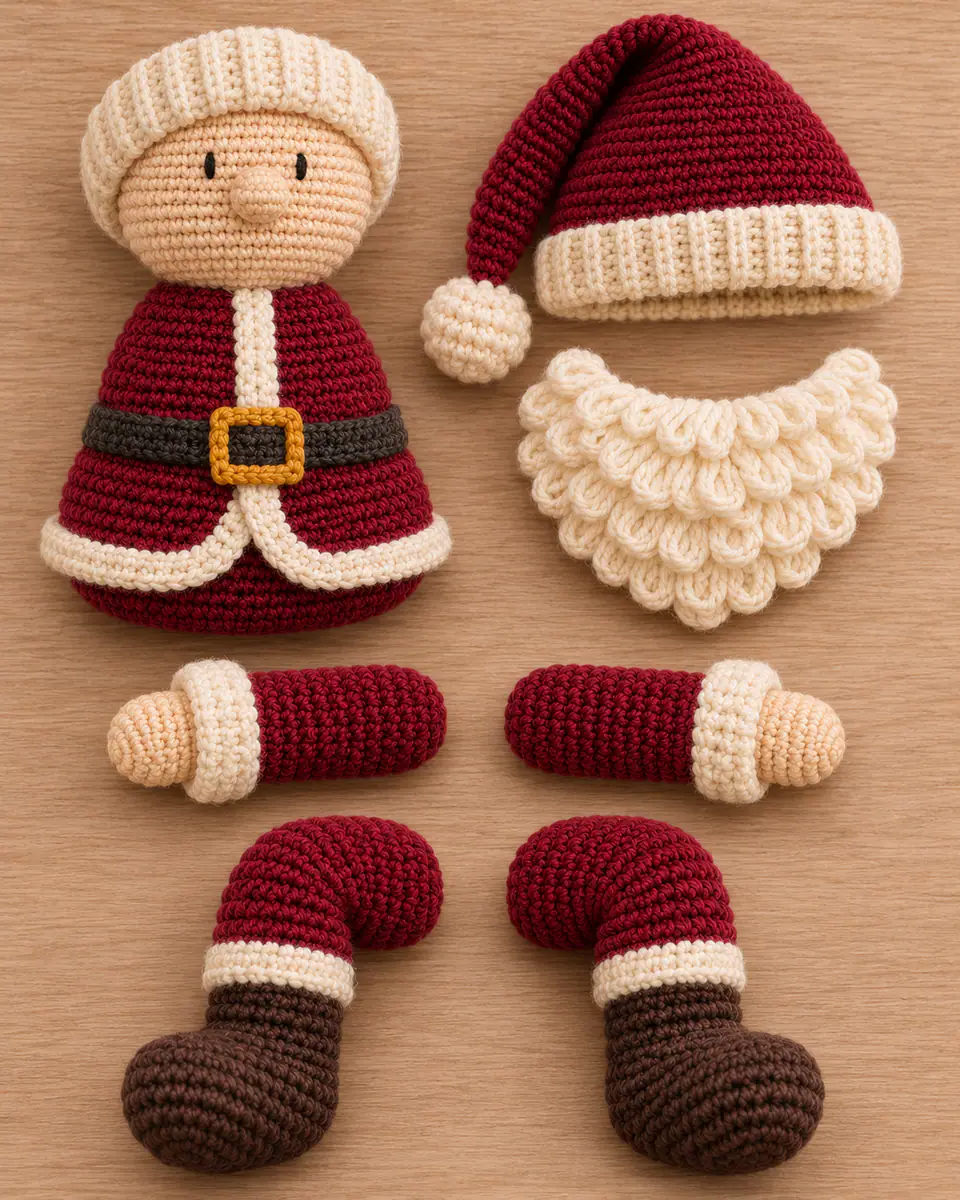
- Sew the closed head to the top of the body through 18 evenly spaced stitches.
- Attach both legs across the lower front so the boots rest flat when the body is seated.
- Sew both arms one round below the neck with the thumbs facing inward.
- Wrap the belt around Body Round 14 and place the buckle at the marked front.
- Attach the beard, hat brim and hat, then embroider the eyes and secure the coat trim.
Set the doll on a flat surface after pinning each pair of limbs. Adjust placement before sewing the second side.
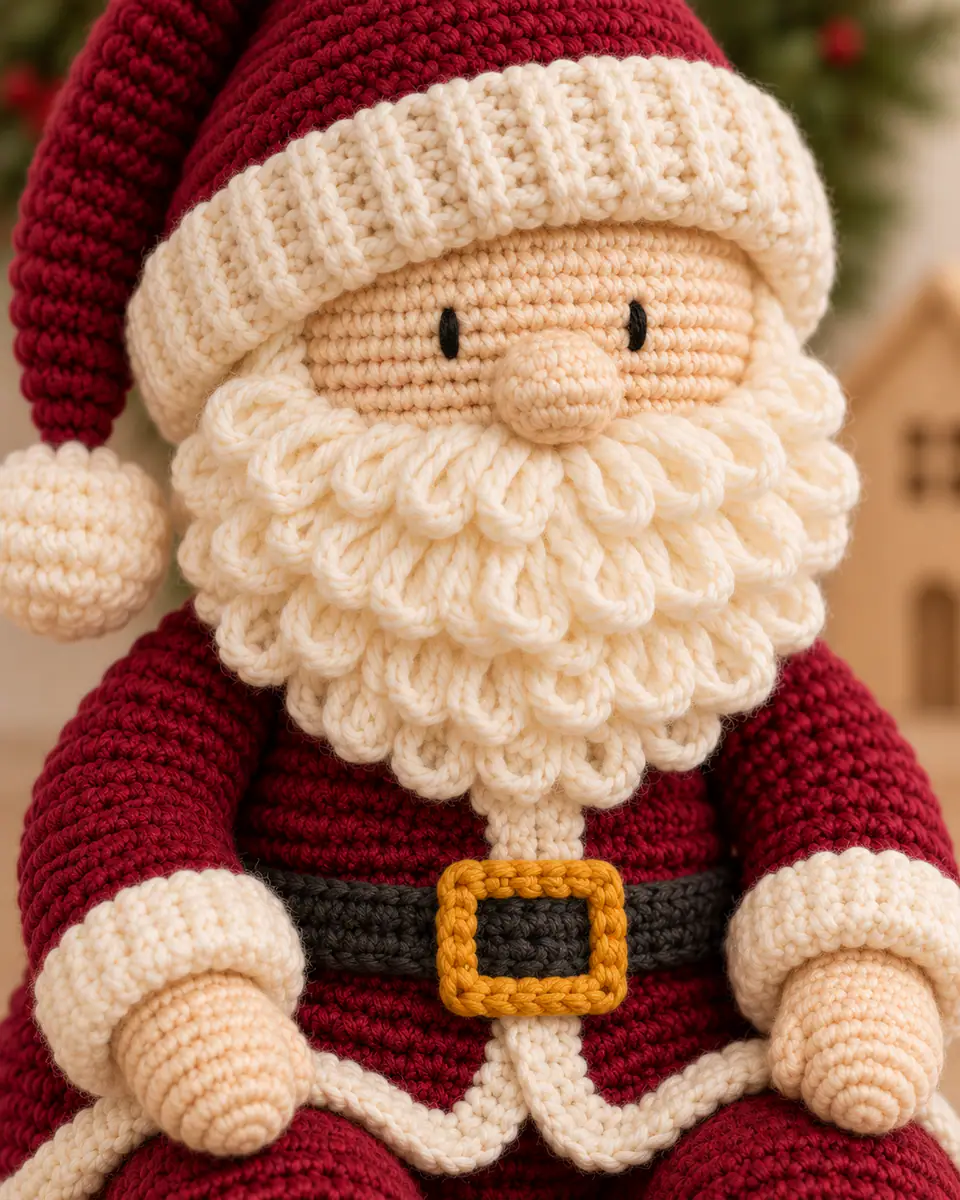
Avoiding Extra Bulk at the Neck
- Keep the final head rounds lightly stuffed.
- Flatten the upper body before joining the head.
- Sew through one head stitch and one body stitch at a time.
- Hide beard and brim tails under their own panels.
Changing the Crochet Santa Palette
Burgundy gives the suit a muted holiday color. Classic red works with the same ivory trim, while charcoal boots and belt can be swapped for deep brown. Keep strong contrast between the beard and face so the embroidered features remain clear.
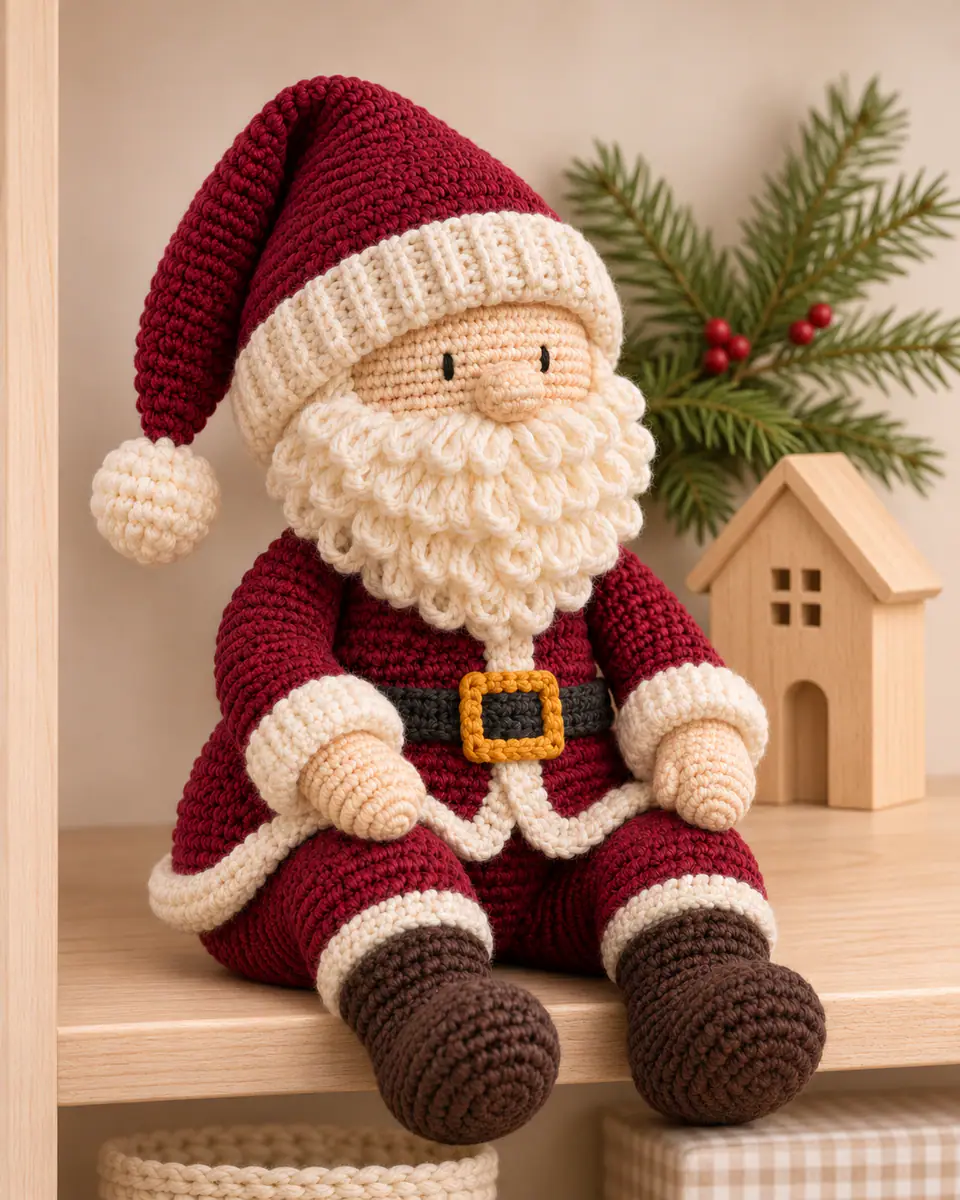
Care and Storage
Spot clean and air dry. Do not machine wash a weighted doll. This display piece has long fibers and small attached parts; supervise children and omit pellets for any toy.
Frequently Asked Questions
Can I use safety eyes for Santa?
Embroidered eyes are recommended. They remain flat under the hat brim and avoid detachable plastic parts.
Why does the doll tip forward?
The head is overstuffed or the legs sit too low. Remove a little head filling and pin the thighs higher on the body.
How is the beard texture made?
A loop-stitch panel is sewn over the lower face, with shorter rows near the nose and longer loops along the jaw.
Can I make the legs straight?
Yes, but the doll will not sit in the same pose. Work the leg tube without bending and attach it at the body base.
How long does the doll take?
Allow about 9 hours, including assembly and embroidery. Sorting and labeling the paired limbs saves time later.
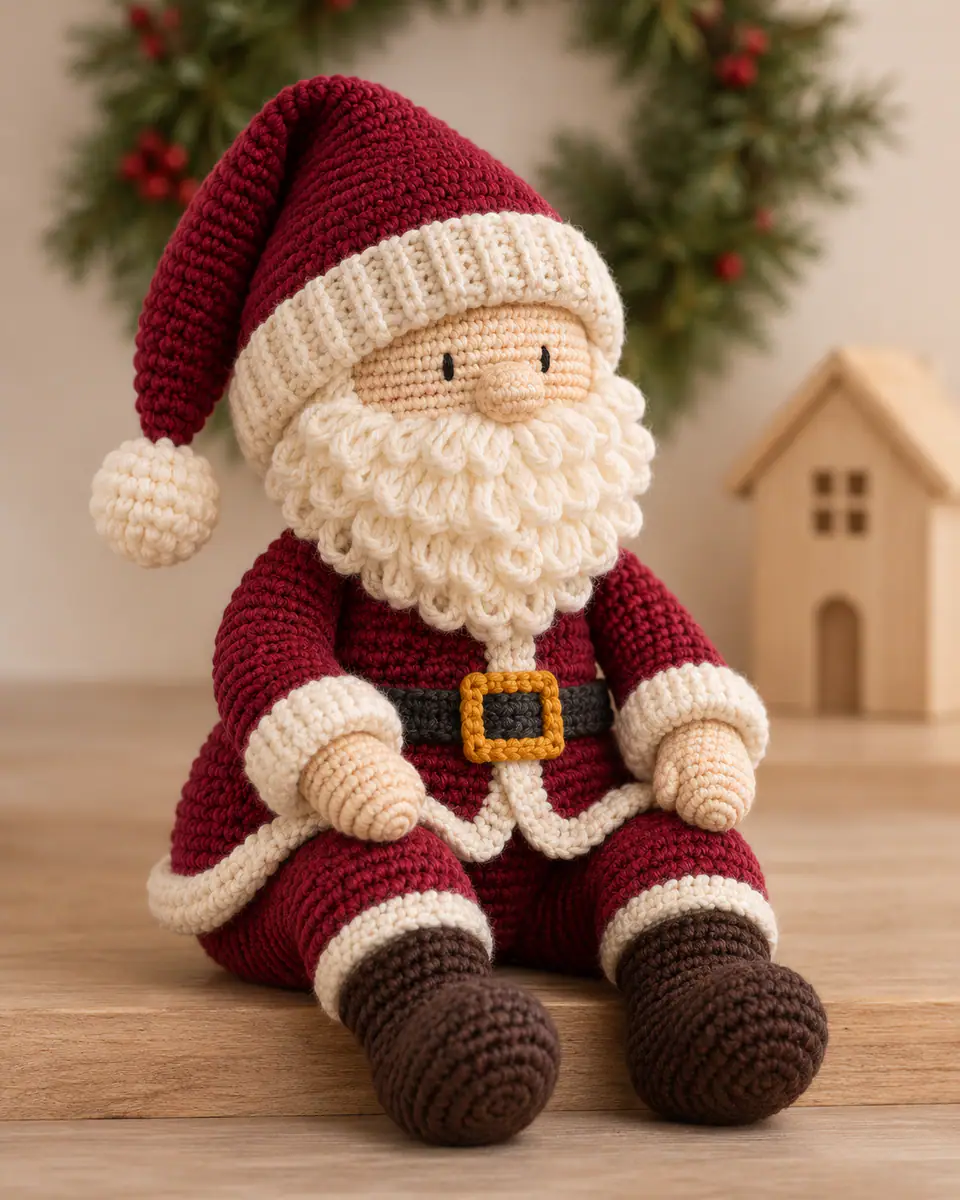
Amigurumi Santa: Free Crochet Doll Pattern
Crochet a seated Santa doll with embroidered eyes, a loop-stitch beard, bent legs and a fitted belt. Exact shaping and assembly points are included.
Pattern by Clara Parker · Crochet Mom
Materials
Abbreviations (US)
| mr | magic ring |
|---|---|
| ch | chain |
| sl st | slip stitch |
| sc | single crochet |
| hdc | half double crochet |
| dc | double crochet |
| inc | 2 stitches in the same stitch |
| dec | invisible single crochet decrease |
| BLO | back loop only |
| FLO | front loop only |
| sk | skip |
| sp | space |
| st(s) | stitch(es) |
| rnd(s) | round(s) |
Special stitches
- Loop stitch
- Wrap yarn around two fingers, insert the hook in the next stitch, catch the working strand behind the loop and complete 1 sc while holding the loop to the front.
- Invisible decrease
- Work through the front loops of the next 2 stitches and complete 1 sc.
Pattern notes
- Work all stuffed pieces in continuous spirals.
- Embroider the eyes; do not use safety eyes for the pictured version.
- Make exactly 2 arms and 2 legs.
The pattern
Tap a row to tick it off — your place is saved on this device.
Body (burgundy)
0/11Stuff firmly at the base and moderately at the shoulders.
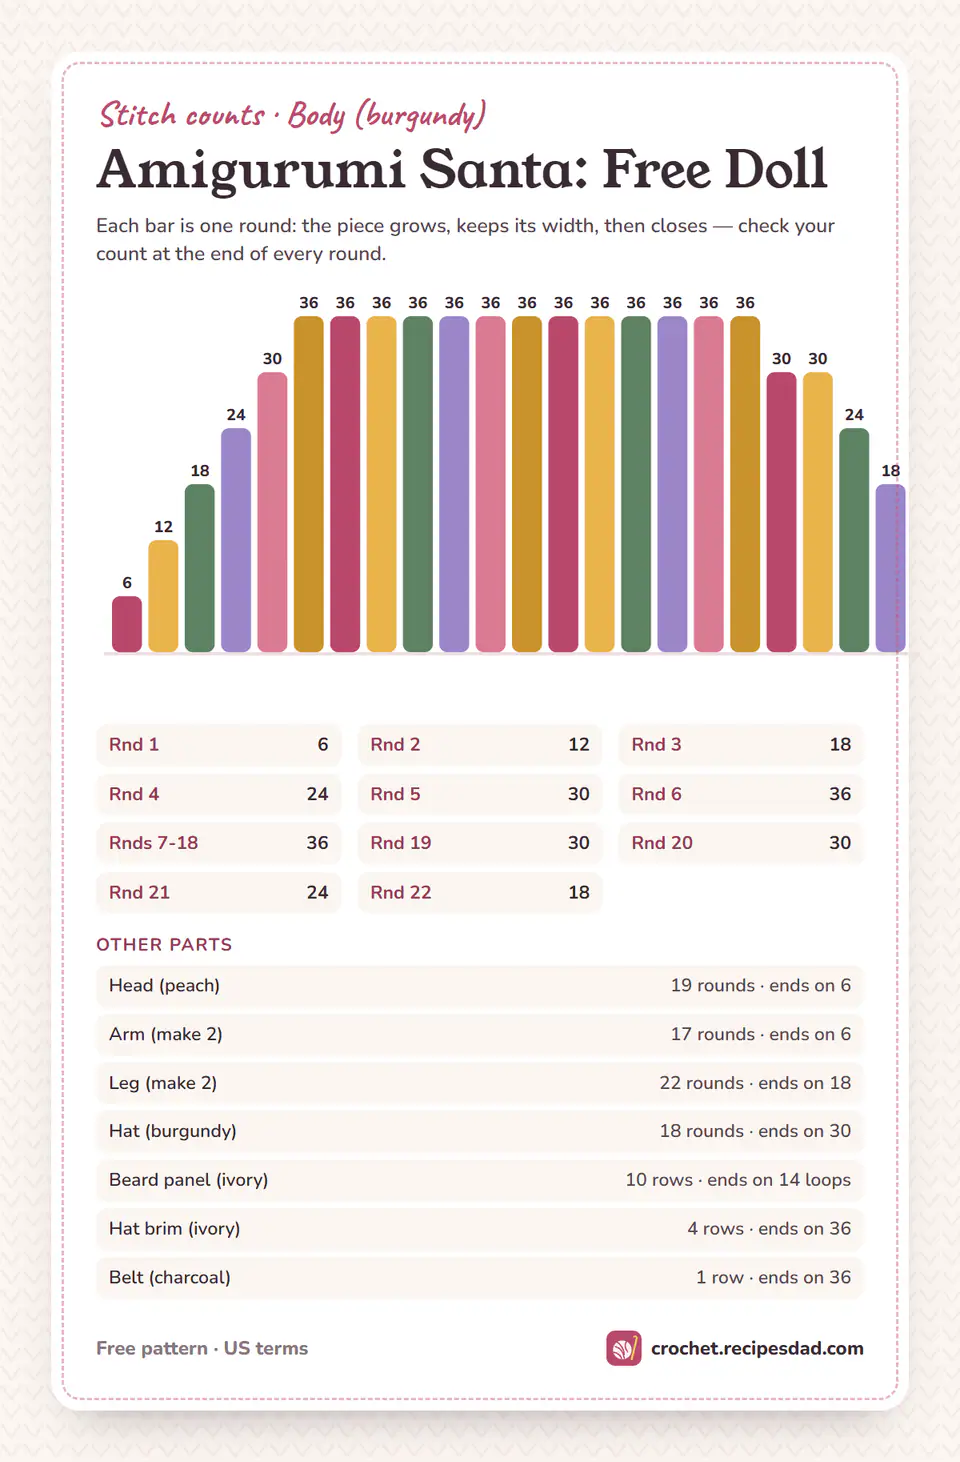
- Rnd 1 Make a mr and work 6 sc in the ring. (6)
- Rnd 2 Inc in each st around. (12)
- Rnd 3 (Sc in the next st, inc) 6 times. (18)
- Rnd 4 (Sc in the next 2 sts, inc) 6 times. (24)
- Rnd 5 (Sc in the next 3 sts, inc) 6 times. (30)
- Rnd 6 (Sc in the next 4 sts, inc) 6 times. (36)
- Rnds 7-18 Sc in each st around. (36)
- Rnd 19 (Sc in the next 4 sts, dec) 6 times. (30)
- Rnd 20 Sc in each st around. (30)
- Rnd 21 (Sc in the next 3 sts, dec) 6 times. (24)
- Rnd 22 (Sc in the next 2 sts, dec) 6 times. (18)
Head (peach)
0/12Stuff evenly.
- Rnd 1 Make a mr and work 6 sc in the ring. (6)
- Rnd 2 Inc in each st around. (12)
- Rnd 3 (Sc in the next st, inc) 6 times. (18)
- Rnd 4 (Sc in the next 2 sts, inc) 6 times. (24)
- Rnd 5 (Sc in the next 3 sts, inc) 6 times. (30)
- Rnd 6 (Sc in the next 4 sts, inc) 6 times. (36)
- Rnds 7-14 Sc in each st around. (36)
- Rnd 15 (Sc in the next 4 sts, dec) 6 times. (30)
- Rnd 16 (Sc in the next 3 sts, dec) 6 times. (24)
- Rnd 17 (Sc in the next 2 sts, dec) 6 times. (18)
- Rnd 18 (Sc in the next st, dec) 6 times. (12)
- Rnd 19 Dec 6 times. Close the opening. (6)
Arm (make 2)
0/6Start with peach, use ivory for Round 6 and burgundy after Round 6.
- Rnd 1 With peach, make a mr and work 6 sc in the ring. (6)
- Rnd 2 Inc in each st around. (12)
- Rnds 3-5 Sc in each st around. (12)
- Rnd 6 With ivory, sc in each st around. (12)
- Rnds 7-16 With burgundy, sc in each st around. (12)
- Rnd 17 Dec 6 times. Fasten off. (6)
Leg (make 2)
0/6Start with cocoa, use ivory for Round 9 and burgundy after Round 9.
- Rnd 1 With cocoa, make a mr and work 6 sc in the ring. (6)
- Rnd 2 Inc in each st around. (12)
- Rnd 3 (Sc in the next st, inc) 6 times. (18)
- Rnds 4-8 Sc in each st around. (18)
- Rnd 9 With ivory, sc in each st around. (18)
- Rnds 10-22 With burgundy, sc in each st around. Fasten off. (18)
Hat (burgundy)
0/18Increase every other round.
- Rnd 1 Make a mr and work 6 sc in the ring. (6)
- Rnd 2 Sc in each st around. (6)
- Rnd 3 (Sc in the next st, inc) 3 times. (9)
- Rnd 4 Sc in each st around. (9)
- Rnd 5 (Sc in the next 2 sts, inc) 3 times. (12)
- Rnd 6 Sc in each st around. (12)
- Rnd 7 (Sc in the next 3 sts, inc) 3 times. (15)
- Rnd 8 Sc in each st around. (15)
- Rnd 9 (Sc in the next 4 sts, inc) 3 times. (18)
- Rnd 10 Sc in each st around. (18)
- Rnd 11 (Sc in the next 5 sts, inc) 3 times. (21)
- Rnd 12 Sc in each st around. (21)
- Rnd 13 (Sc in the next 6 sts, inc) 3 times. (24)
- Rnd 14 Sc in each st around. (24)
- Rnd 15 (Sc in the next 7 sts, inc) 3 times. (27)
- Rnd 16 Sc in each st around. (27)
- Rnd 17 (Sc in the next 8 sts, inc) 3 times. (30)
- Rnd 18 Sc in each st around. Fasten off. (30)
Beard panel (ivory)
0/6Use Loop stitch in the marked rows.
- Row 1 Ch 19, sc in the second ch and each ch across. Turn. (18)
- Rows 2-5 Ch 1, work Loop stitch in each st across. Turn. (18 loops)
- Row 6 Ch 1, dec, sc in the next 14 sts, dec. Turn. (16)
- Rows 7-8 Ch 1, work Loop stitch in each st across. Turn. (16 loops)
- Row 9 Ch 1, dec, sc in the next 12 sts, dec. Turn. (14)
- Row 10 Ch 1, work Loop stitch in each st across. Fasten off. (14 loops)
Hat brim (ivory)
0/2Work back-loop ribbing.
- Row 1 Ch 37, sc in the second ch and each ch across. Turn. (36)
- Rows 2-4 Ch 1, BLO sc in each st across. Turn. Fasten off after Row 4. (36)
Belt (charcoal)
0/1Sew around the body.
- Row 1 Ch 37, sc in the second ch and each ch across. Fasten off. (36)
Finishing
- Join and stuff the body parts.
- Sew on 2 arms and 2 legs.
- Attach belt, buckle, beard, brim and hat.
- Embroider both eyes and add coat trim.
Made one? Leave a note below and tell us about your colours — or save the pattern to Pinterest for later. You are welcome to sell items you make from this pattern; please don’t republish the pattern itself.
© 2026 Crochet Mom · crochet.recipesdad.com/amigurumi-santa-pattern/

Clara Parker
I’m Clara — a mom who is never without a hook, and the crochet half of the Recipes Dad family. I write cozy, practical patterns you can actually finish.
More about Clara
Maker notes
Made this pattern? Tell us about your yarn and colors, or ask a question about a row — Clara reads every note.