
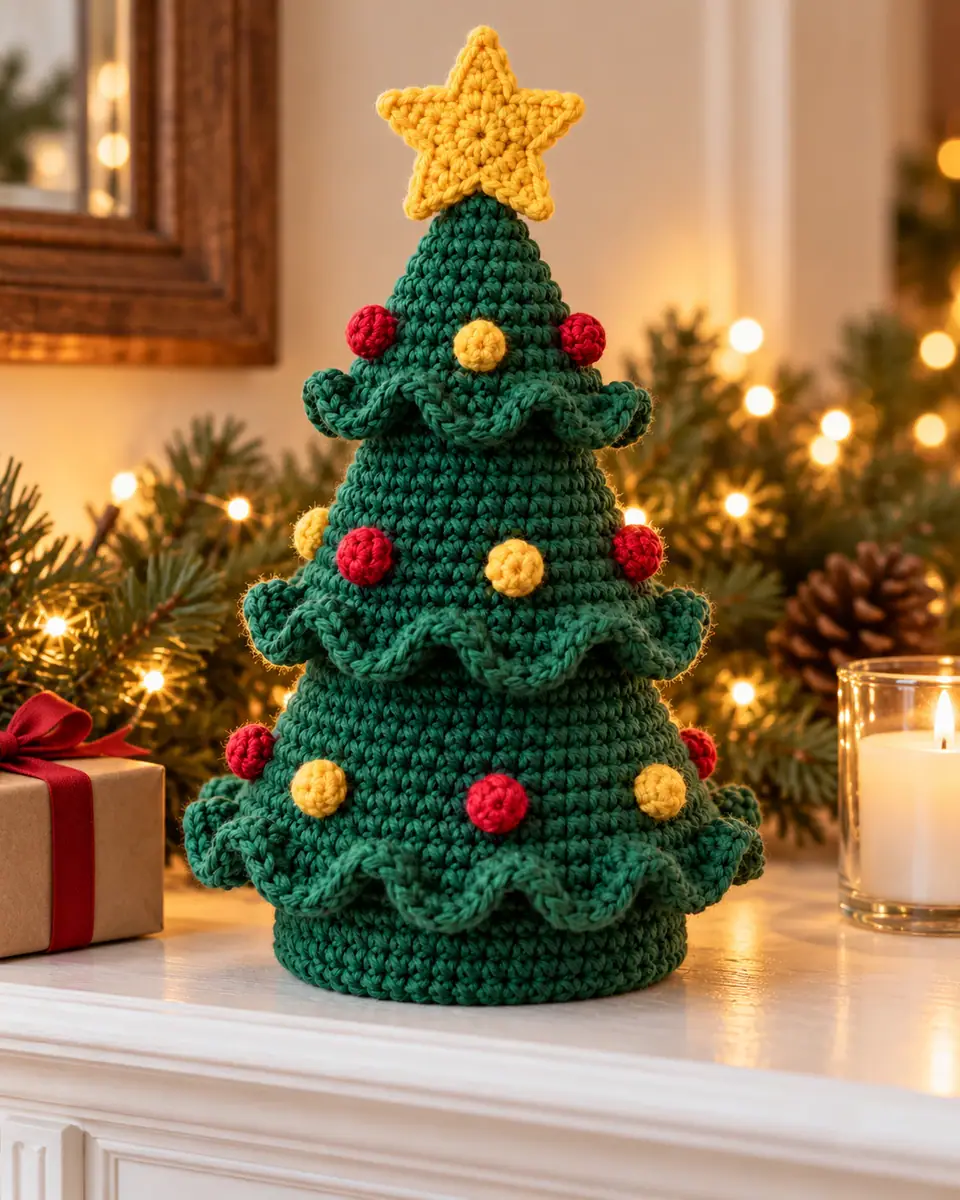
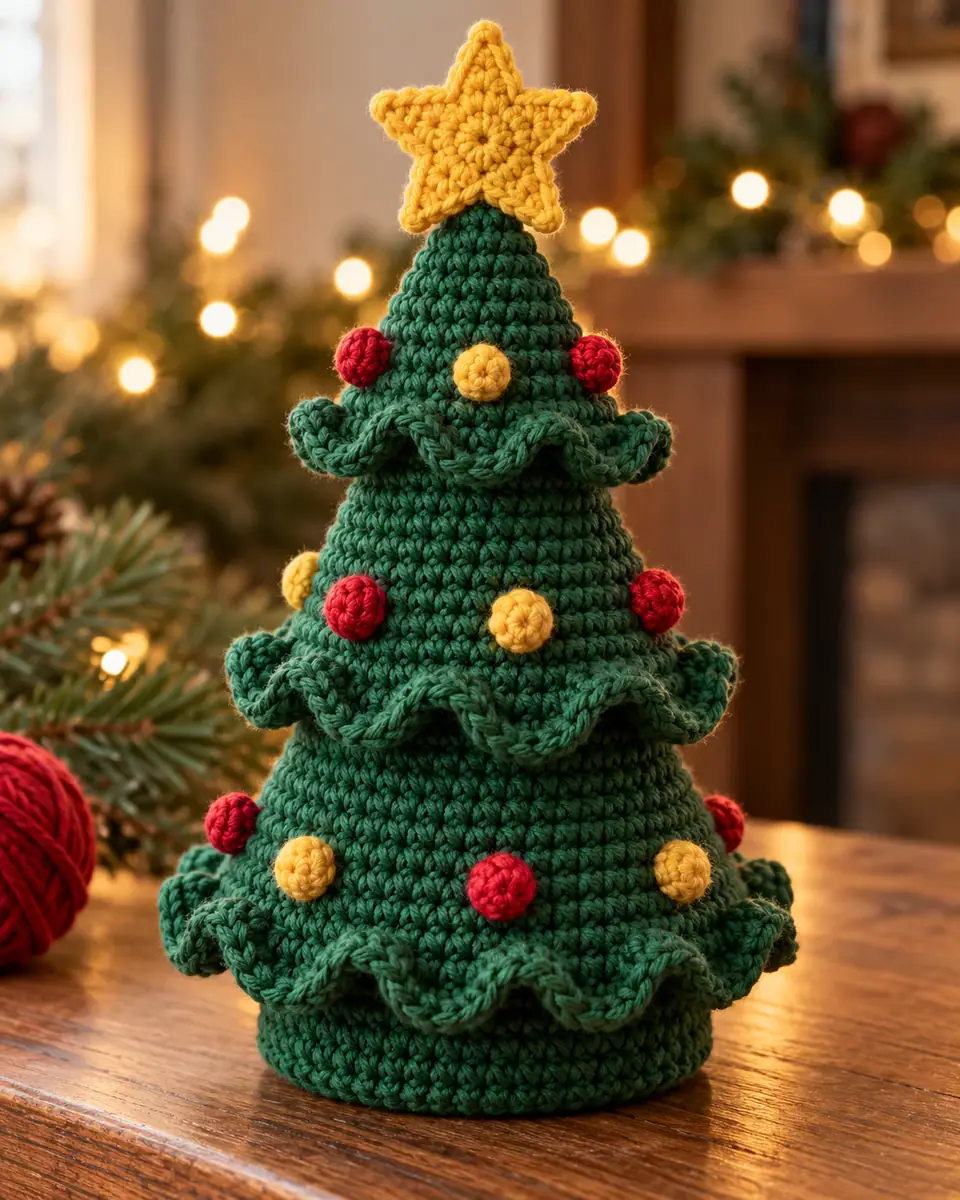
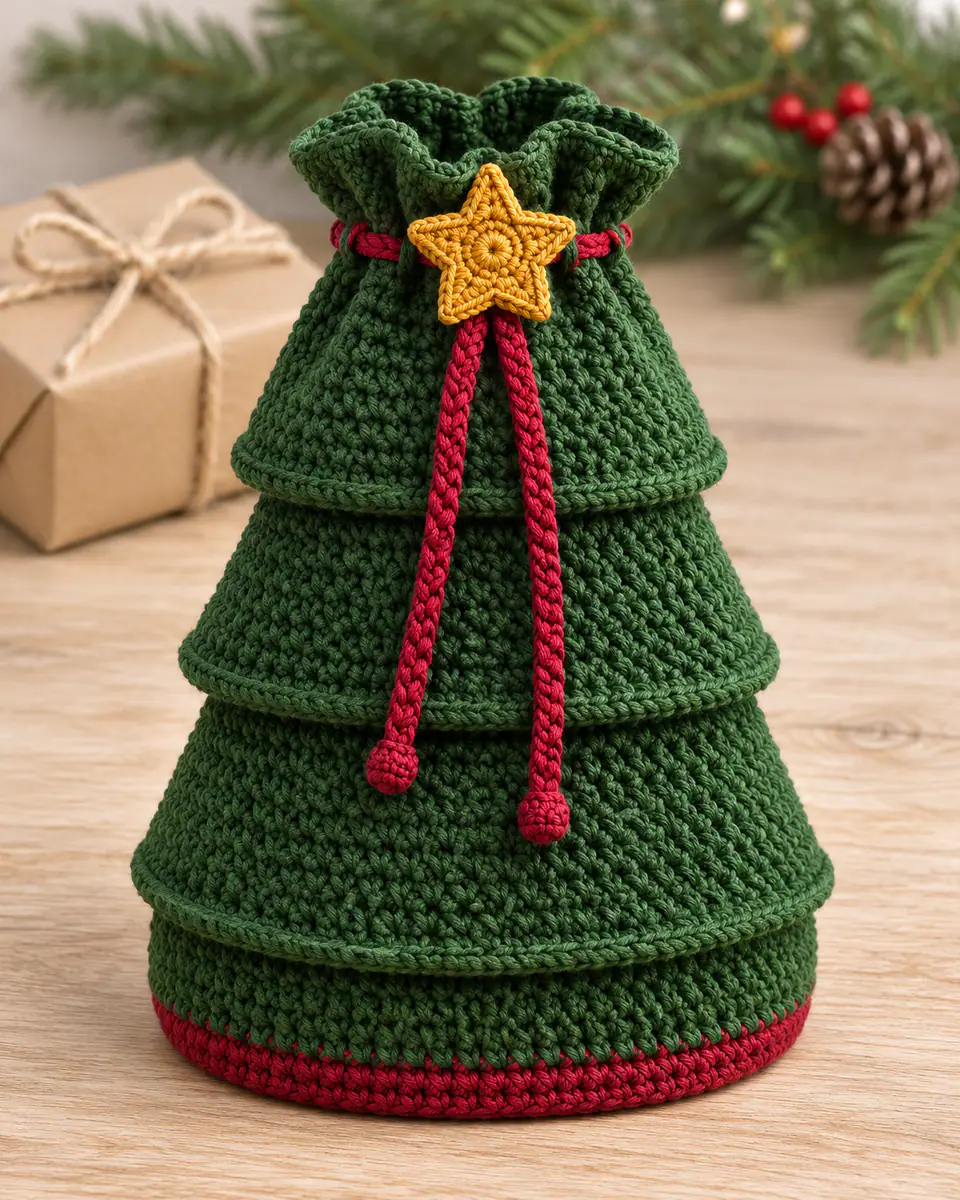
This crochet Christmas tree stands about 7½ in (19 cm) tall with its star, with three ruffled tiers, eighteen little ball ornaments in cherry red and golden yellow, and a flat base that keeps it upright. It is an easy amigurumi in worsted cotton with a 3.5 mm hook and takes about four hours.
The cone is worked from the tip down in single crochet, and three rounds in back loops only leave the loops for the ruffles exactly where the tiers go. Every round has its stitch count, and the assembly section shows where each ornament sits.
Why You’ll Love This Crochet Christmas Tree
- It stands on its own. A cardboard circle hidden in the flat base keeps the tree straight on a shelf, a mantel or the middle of the table.
- Three real tiers. The ruffles are worked into loops left free in the cone, so they sit exactly where they should and never come loose.
- Only single crochet for the tree. The ruffles use double crochet, and that is the only taller stitch in the whole project.
- Quick to finish in December. One evening for the cone, one for the ruffles, ornaments and star.
Materials You’ll Need
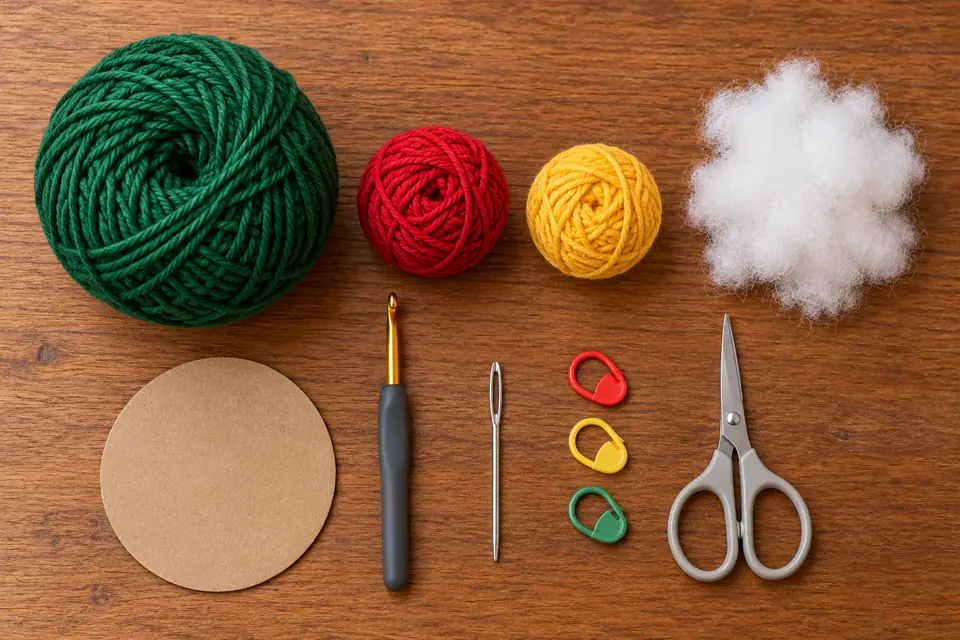
- Worsted weight (4) cotton yarn in three colors: forest green for the tree (about 90 yd / 82 m), cherry red for the ornaments (about 15 yd / 14 m) and golden yellow for the ornaments and the star (about 20 yd / 18 m).
- 3.5 mm (US E-4) crochet hook. It is smaller than the yarn label suggests, to make a firm fabric that holds its cone shape. The hook size chart has the other sizing systems.
- Polyester fiberfill, about 1½ oz (40 g).
- A circle of stiff cardboard 3½ in (9 cm) across, for the base.
- Locking stitch markers, a yarn needle and scissors.
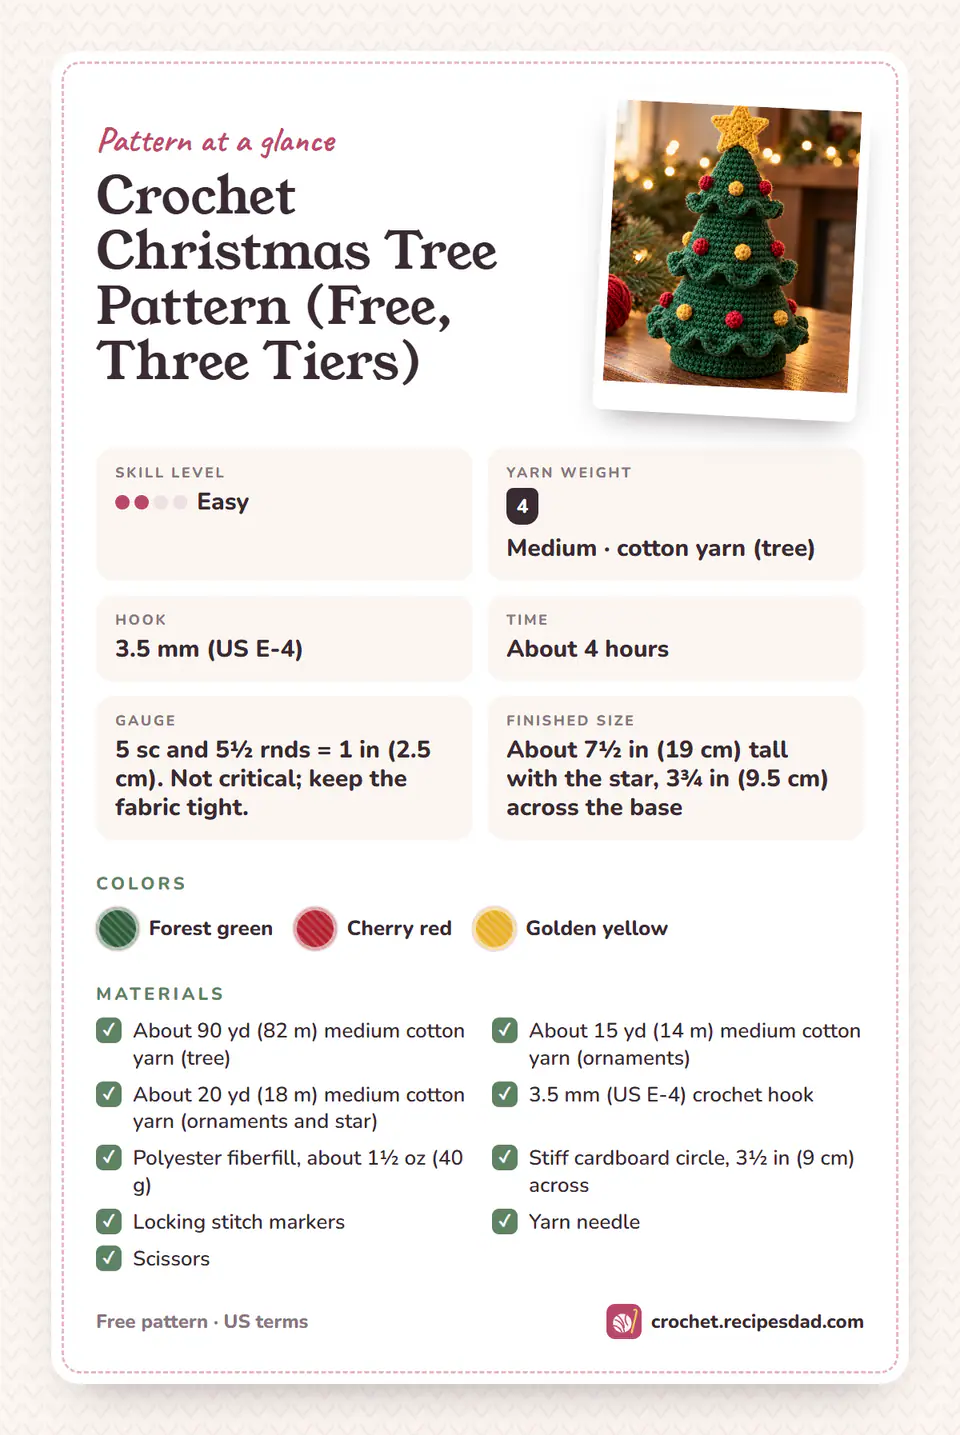
Gauge, Size and Skill Level
- Skill level: Easy. You should know single crochet in a spiral; the rest is explained step by step.
- Finished size: about 7½ in (19 cm) tall with the star, 3¾ in (9.5 cm) across the base and about 5 in (13 cm) across the bottom ruffle.
- Gauge: 5 sc and 5½ rounds = 1 in (2.5 cm). It is not critical, but the fabric should be tight enough that the stuffing does not show.
Abbreviations and Special Stitches
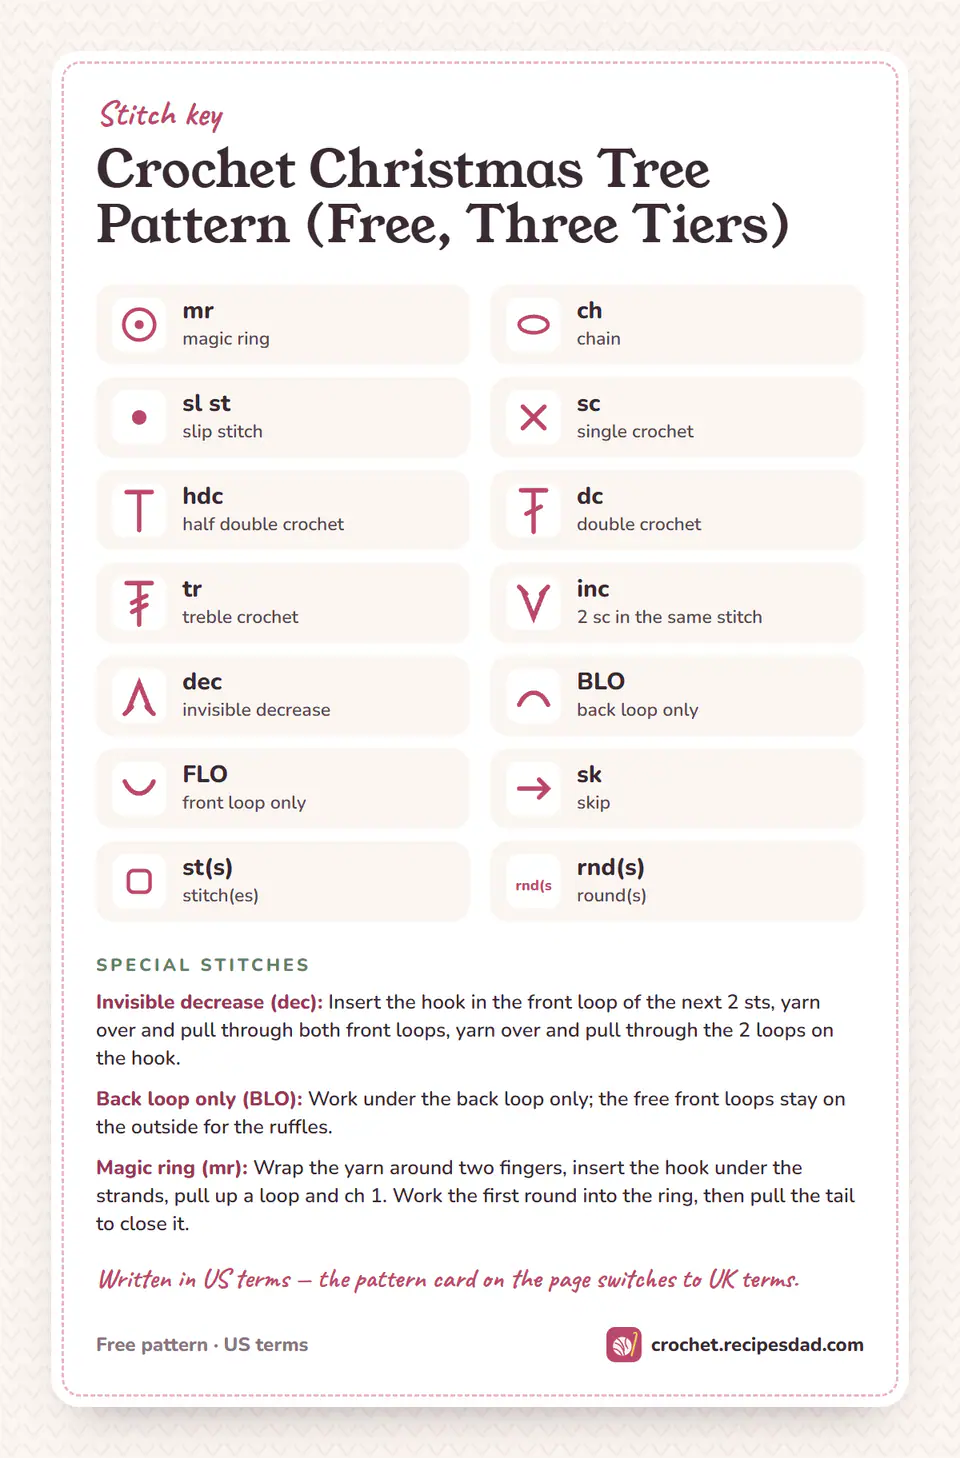
US terms throughout. The US/UK stitch converter translates them if you learned UK terms.
- Magic ring (mr). Wrap the yarn around two fingers, insert the hook under the strands, pull up a loop and chain 1. Work the first round into the ring and pull the tail to close it.
- Invisible decrease (dec). Insert the hook in the front loop of the next stitch and the front loop of the one after it, yarn over and pull through both, then yarn over and pull through the 2 loops on the hook.
- Back loop only (BLO). Work under the back loop of each stitch. The front loops you skip stay on the outside as a row of free loops, and the ruffles are worked into them later.
- Front loop only (FLO). Work under the front loop only, the one closest to you.
Pattern Notes
- The cone is worked from the tip down in a continuous spiral. Do not join the rounds; move the marker up to the first stitch of each round.
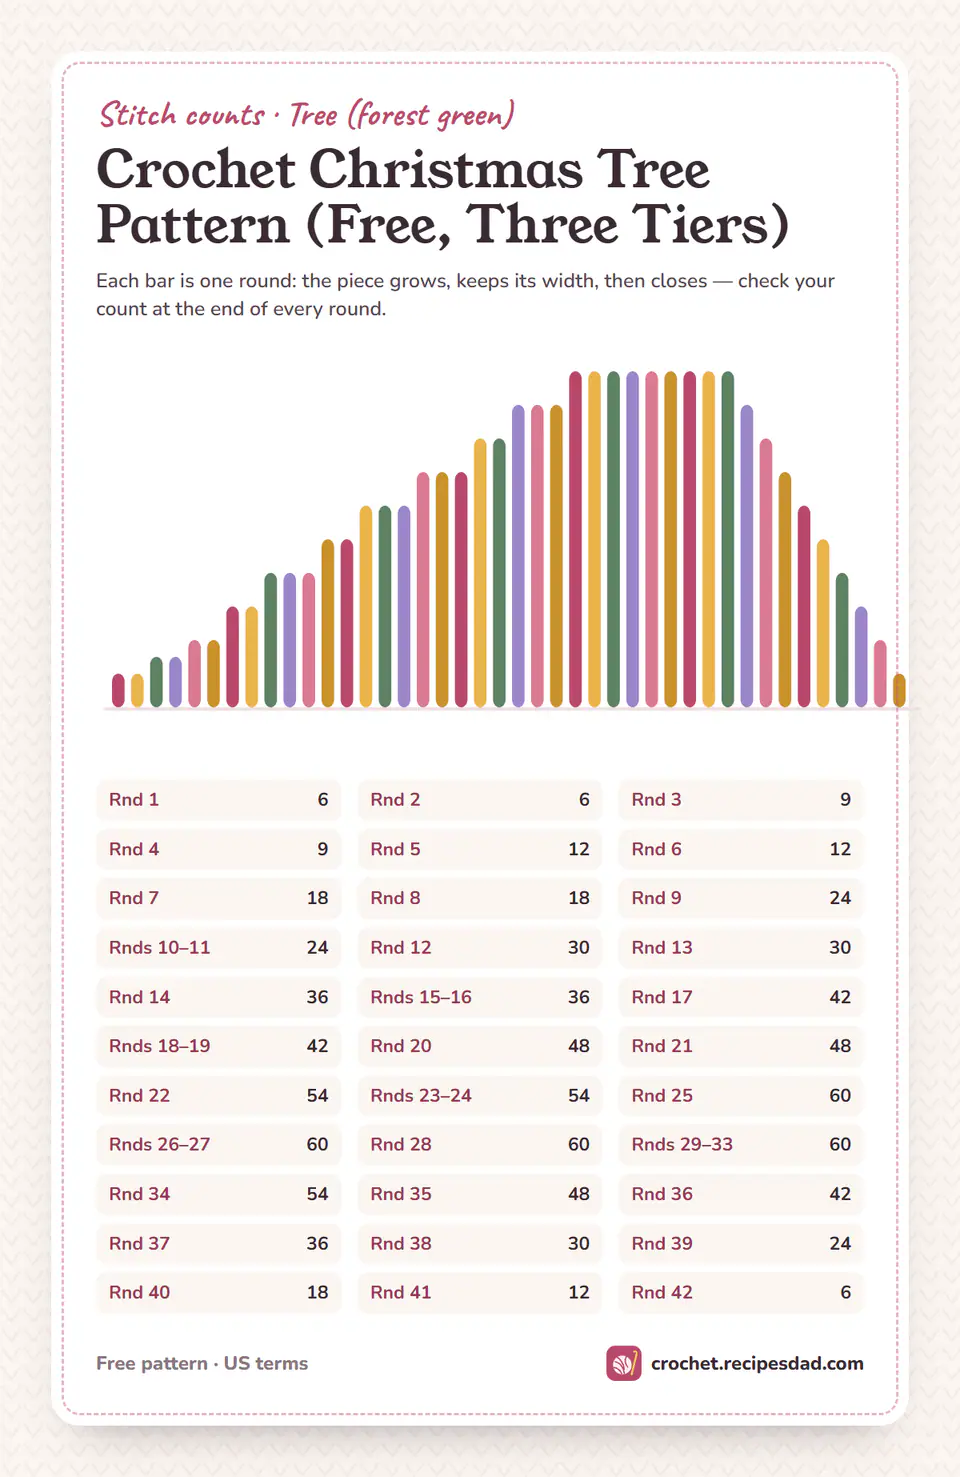
- Only every second or third round increases, which gives the tree its slim shape. Count after each increase round.
- The ruffles, ornaments and star are made after the cone is closed.
- The number in parentheses at the end of each round is its stitch count.
How to Crochet a Christmas Tree
This crochet Christmas tree pattern makes the tree in one long piece: a cone from the tip to the base, then a flat bottom. The ruffles, the 18 ornaments and the star come afterwards.
The tip starts with only 6 stitches and grows slowly, three or six stitches every second round. After 11 rounds it is a small cone about 2 in (5 cm) tall.
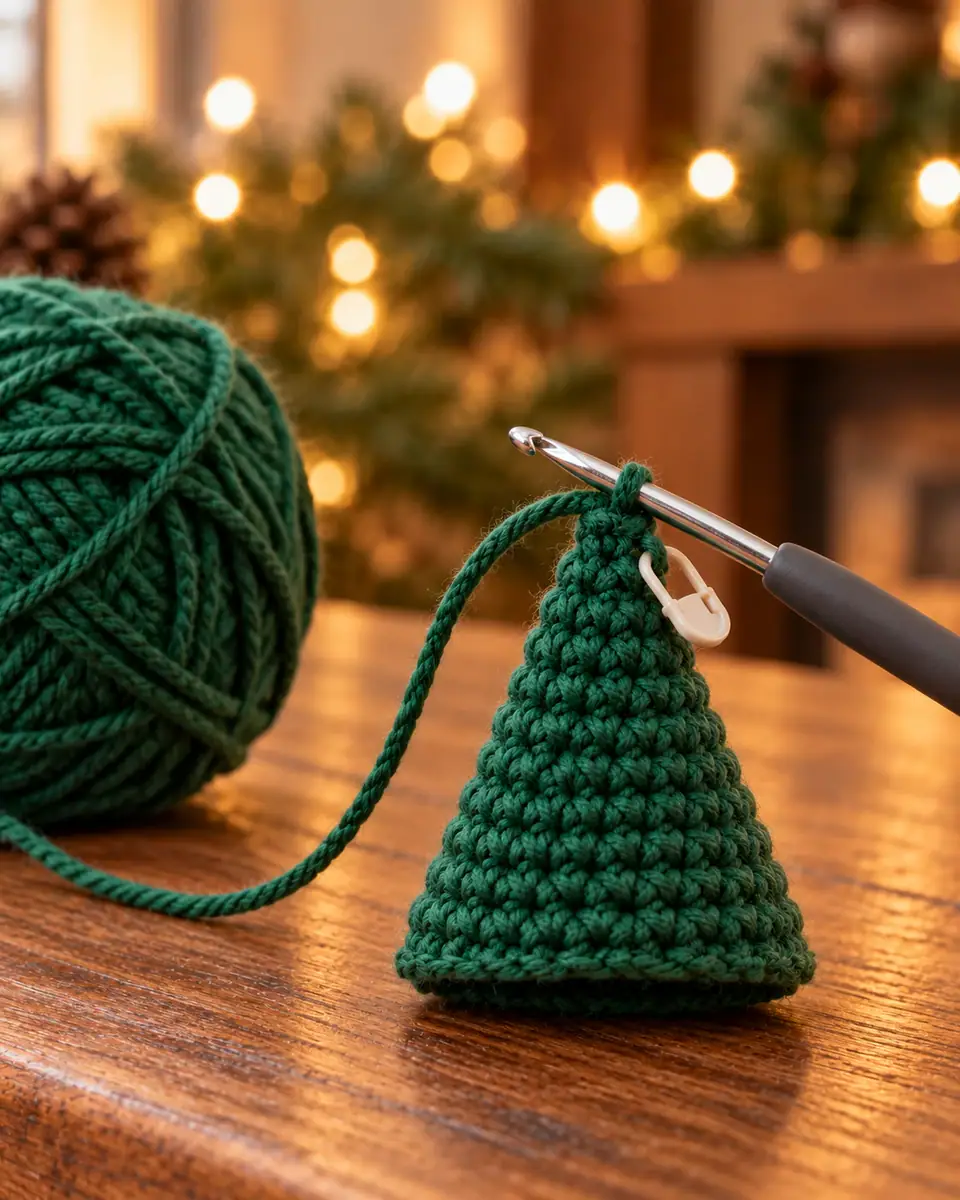
The tiers. Rounds 12, 20 and 28 are worked in back loops only. Each one leaves a ring of free front loops on the outside of the round before it (Rounds 11, 19 and 27), and you can see the three lines clearly on the finished cone.
The base. Round 34, again in back loops, turns the corner and the bottom closes flat. Stuff the cone firmly at Round 35, put the cardboard circle on the stuffing, and keep decreasing until the hole closes.
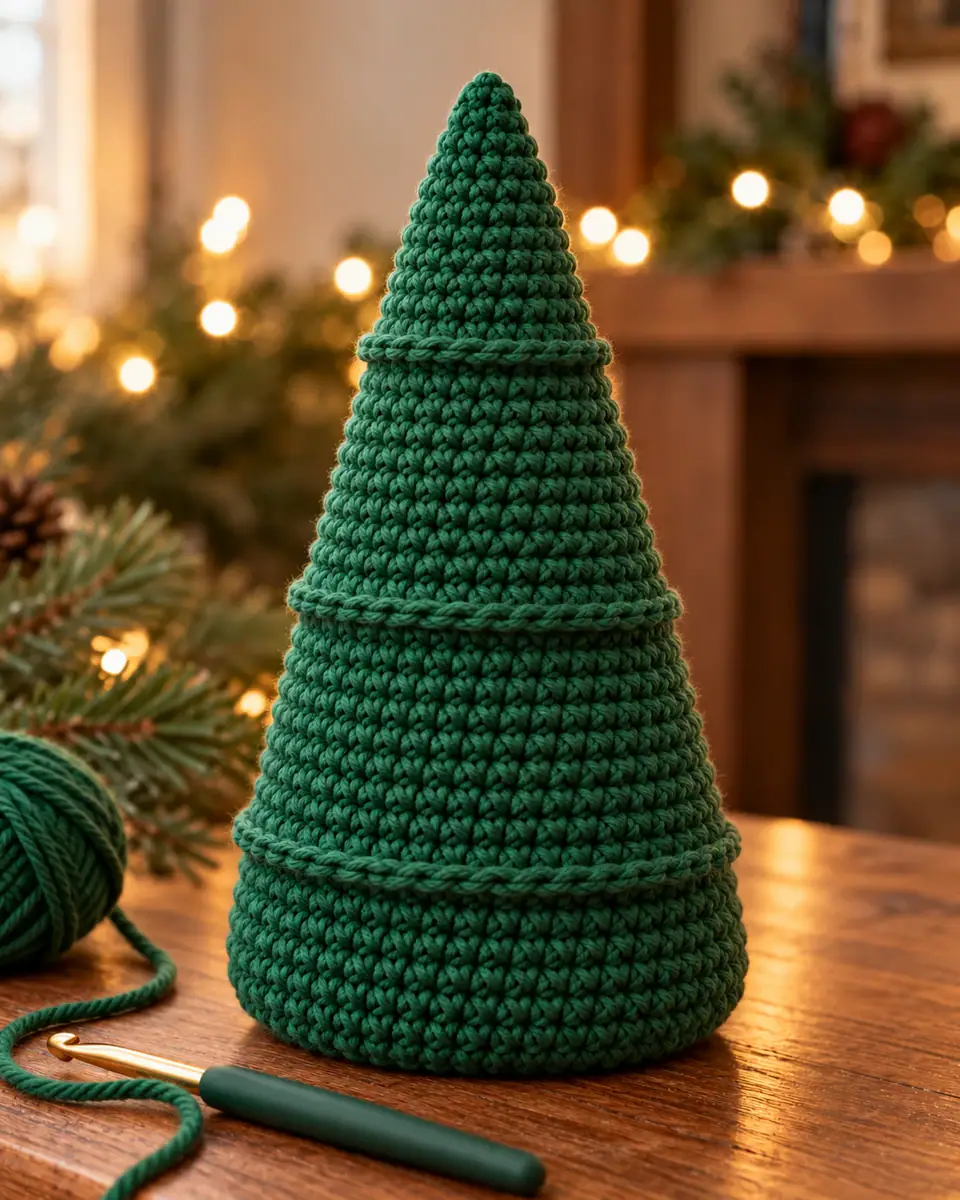
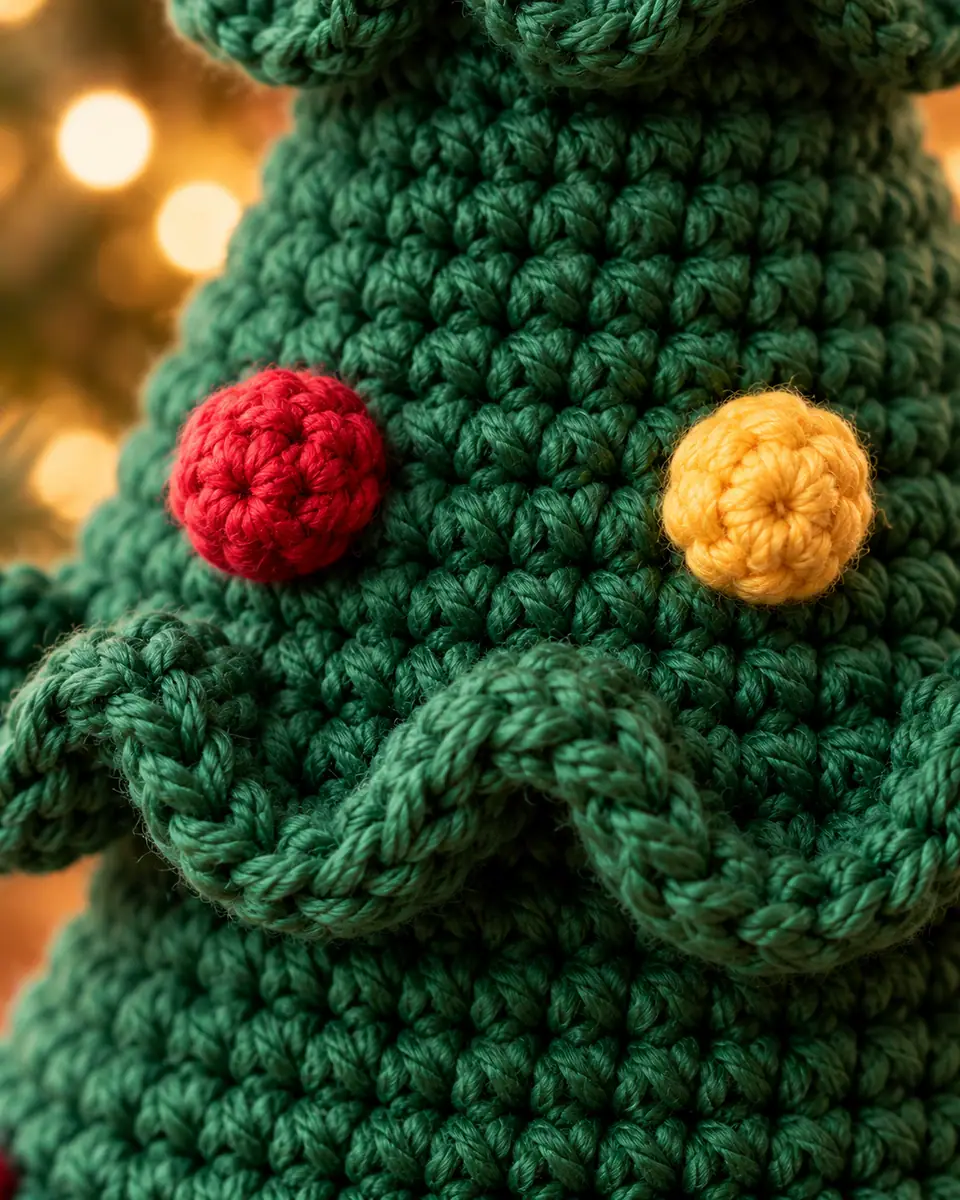
The ruffles grow out of those three lines. Look closely at one: it is a thin ridge of loops on the outside of the cone, one loop for every stitch of the round. Each ruffle is crocheted straight into these loops, so there is no chain to start and nothing to sew on.
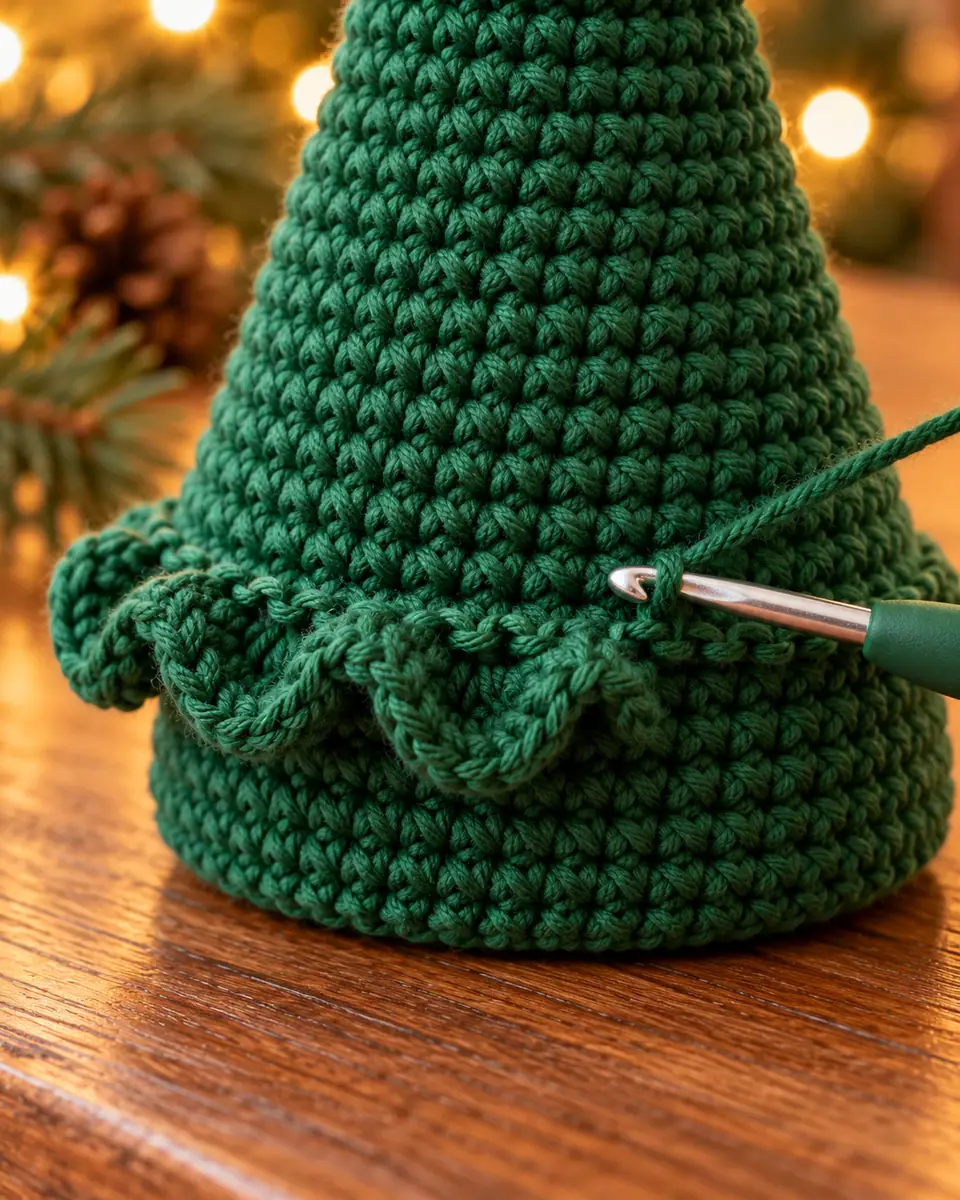
- Hold the tree upside down, base up, so the bottom line is easy to reach. Join green with a slip stitch in any loop of that line.
- Work 5 double crochets in the next loop. They fan out into a small shell, and that is the first scallop.
- Slip stitch in the next loop. It holds the ruffle flat against the cone between two scallops.
- Repeat steps 2 and 3 all the way round: the bottom line has 60 loops, so you get 30 scallops. Slip stitch in the loop where you joined and fasten off.
- Work the middle line the same way (42 loops, 21 scallops), then the top line (24 loops, 12 scallops).
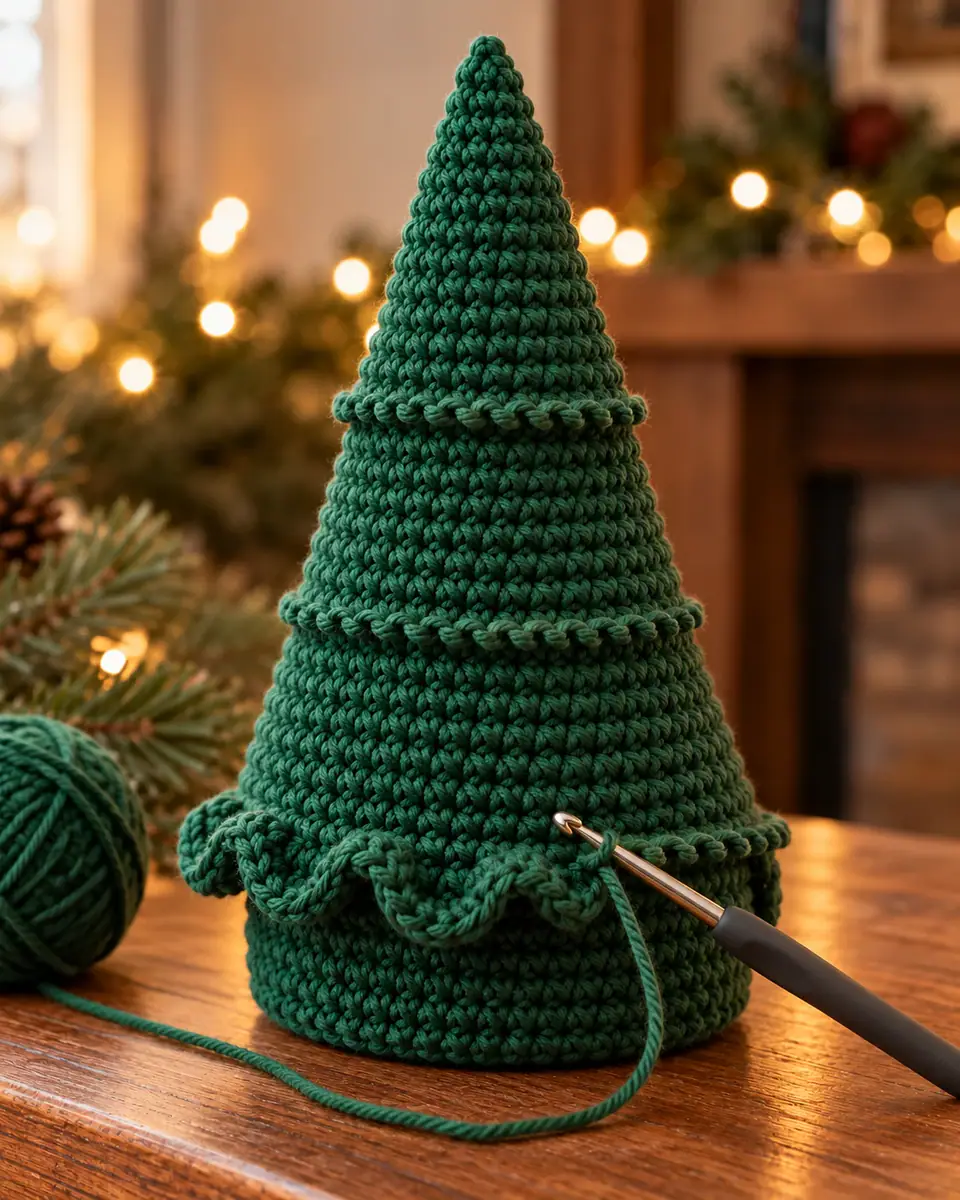
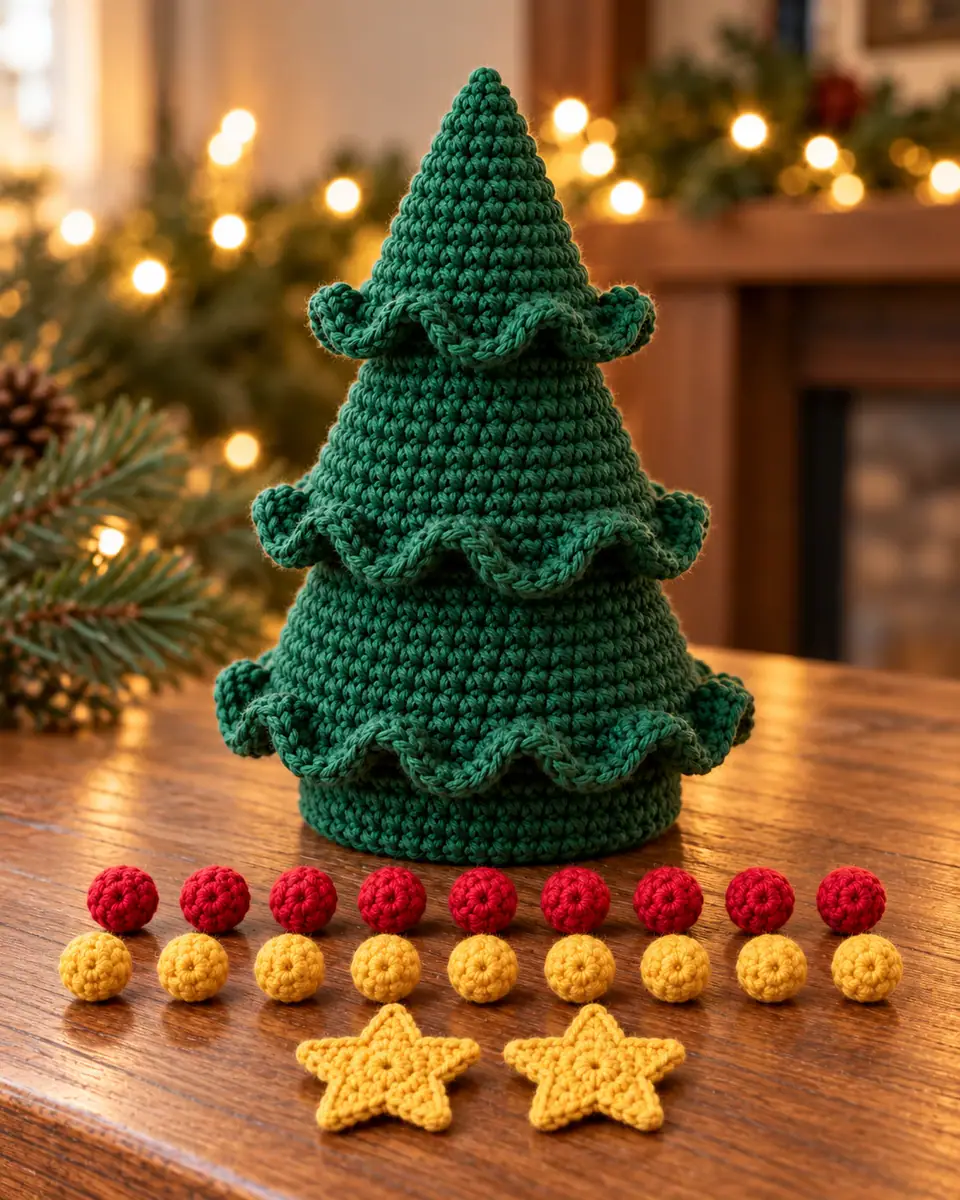
The ornaments are tiny balls of 12 stitches. Make all of them before sewing, and set them out around each tier to see the spacing before you sew the first one.
Assembly and Finishing
- Ornaments. Sew 4 of them around the top tier just above the top ruffle, alternating red and yellow. Sew 6 around the middle tier and 8 around the bottom tier in the same way, always just above the ruffle and evenly spaced.
- Star. Place the two stars together, wrong sides in, and whipstitch around the edge with yellow, adding a small pinch of stuffing before you close the last point. Sew the bottom point of the star over the tip of the tree, front and back, so it stands straight.
- Ends. Weave every end through the stuffing and trim it close.
Tips for Success
- Stuff in small pieces. Pull the fiberfill apart into tufts and push them right into the tip first. Big lumps make a bumpy cone.
- Check the base before closing. Stand the tree on the table after Round 36. If it leans, move the cardboard until it sits level.
- Same tension on the ruffles. Pull the slip stitches snug; a loose slip stitch makes the wave flat instead of rounded.
- Space the ornaments by counting. On the bottom tier, with 8 ornaments, there are about 7 stitches between two ornaments; on the middle tier about 7 with 6 ornaments; on the top tier about 6 with 4.
Variations and Color Ideas
- Snowy tree. Work the ruffles in white and leave out the ornaments, so each tier looks dusted with snow.
- Scandi tree. Cream tree, red ornaments only and a natural wood bead on the top instead of the star.
- A small set. For a smaller crochet tree, work in DK yarn with a 3 mm hook: the same rounds give a tree of about 6 in (15 cm). Make three sizes for a little forest.
- An ornament. Stop the cone after Round 20, close the base in the same way (BLO round, then decreases from 48) and add a hanging loop to the star. It makes a Christmas tree ornament for the real tree.
This easy crochet Christmas tree also makes a good gift. Looking for something softer for Easter? The crochet bunny uses the same single crochet spiral.
Care Instructions
Dust the tree with a soft brush or a hair dryer on cold. If it needs washing, spot clean with a damp cloth and a little mild soap. Do not soak it, because the cardboard in the base would soften. Store it in a box with tissue paper so the ruffles keep their shape until next December.
Frequently Asked Questions
How do you crochet a Christmas tree?
Crochet a cone of single crochet from a magic ring, increasing slowly as you go down, and work three rounds in back loops only to leave rings of front loops for the ruffles. Close the base flat over a cardboard circle, crochet the ruffles into the free loops, then sew on small ball ornaments and a star.
Is this a good Christmas tree for beginners?
Yes, if you can work single crochet in a spiral. The cone is plain single crochet with increases, the ruffles are only slip stitches and double crochets, and every round has its stitch count so you can check your work.
How do I crochet a Christmas tree ornament?
Use the same pattern and stop the cone after Round 20. Work one round in back loops only, decrease to close the base, add only the top two ruffles and sew a loop of yarn to the star for hanging.
How many ornaments does the tree need?
Eighteen in total: 4 on the top tier, 6 on the middle tier and 8 on the bottom tier. Make 9 in cherry red and 9 in golden yellow and alternate the colors on each tier.
Why does my tree lean to one side?
Usually the stuffing is uneven or the cardboard circle is not flat in the base. Press the base on the table, push the stuffing toward the low side with the back of the hook, and check that the cardboard lies under the last round before you close it.
Crochet Christmas Tree Pattern (Free, Three Tiers)
A free crochet Christmas tree pattern: a standing single crochet cone with three ruffled tiers, red and yellow ball ornaments and a padded star, in worsted cotton with a 3.5 mm hook.
Pattern by Clara Parker · Crochet Mom
Materials
Abbreviations (US)
| mr | magic ring |
|---|---|
| ch | chain |
| sl st | slip stitch |
| sc | single crochet |
| hdc | half double crochet |
| dc | double crochet |
| tr | treble crochet |
| inc | 2 sc in the same stitch |
| dec | invisible decrease |
| BLO | back loop only |
| FLO | front loop only |
| sk | skip |
| st(s) | stitch(es) |
| rnd(s) | round(s) |
Special stitches
- Invisible decrease (dec)
- Insert the hook in the front loop of the next 2 sts, yarn over and pull through both front loops, yarn over and pull through the 2 loops on the hook.
- Back loop only (BLO)
- Work under the back loop only; the free front loops stay on the outside for the ruffles.
- Magic ring (mr)
- Wrap the yarn around two fingers, insert the hook under the strands, pull up a loop and ch 1. Work the first round into the ring, then pull the tail to close it.
Pattern notes
- The cone is worked from the tip down in a continuous spiral: do not join the rounds and move the marker up every round.
- The ruffles are worked with the tree upside down into the free front loops of Rnds 27, 19 and 11.
- The number in parentheses at the end of a round is its stitch count.
The pattern
Tap a row to tick it off — your place is saved on this device.
Tree (forest green)
0/33Start stuffing at Rnd 35.
- Rnd 1 Make a magic ring, 6 sc in the ring. Pull the ring closed. (6)
- Rnd 2 Sc in each st around. (6)
- Rnd 3 (Sc in the next st, inc) 3 times. (9)
- Rnd 4 Sc in each st around. (9)
- Rnd 5 (Sc in the next 2 sts, inc) 3 times. (12)
- Rnd 6 Sc in each st around. (12)
- Rnd 7 (Sc in the next st, inc) 6 times. (18)
- Rnd 8 Sc in each st around. (18)
- Rnd 9 (Sc in the next 2 sts, inc) 6 times. (24)
- Rnds 10–11 Sc in each st around (2 rounds). (24)
- Rnd 12 Working in BLO: (sc in the next 3 sts, inc) 6 times. The front loops of Rnd 11 stay free for the top ruffle. (30)
- Rnd 13 Sc in each st around. (30)
- Rnd 14 (Sc in the next 4 sts, inc) 6 times. (36)
- Rnds 15–16 Sc in each st around (2 rounds). (36)
- Rnd 17 (Sc in the next 5 sts, inc) 6 times. (42)
- Rnds 18–19 Sc in each st around (2 rounds). (42)
- Rnd 20 Working in BLO: (sc in the next 6 sts, inc) 6 times. The front loops of Rnd 19 stay free for the middle ruffle. (48)
- Rnd 21 Sc in each st around. (48)
- Rnd 22 (Sc in the next 7 sts, inc) 6 times. (54)
- Rnds 23–24 Sc in each st around (2 rounds). (54)
- Rnd 25 (Sc in the next 8 sts, inc) 6 times. (60)
- Rnds 26–27 Sc in each st around (2 rounds). (60)
- Rnd 28 Working in BLO: sc in each st around. The front loops of Rnd 27 stay free for the bottom ruffle. (60)
- Rnds 29–33 Sc in each st around (5 rounds). This is the plain band at the base. (60)
- Rnd 34 Working in BLO: (sc in the next 8 sts, dec) 6 times. The base turns flat here. (54)
- Rnd 35 (Sc in the next 7 sts, dec) 6 times. Stuff the cone firmly up to the tip, then lay the cardboard circle on top of the stuffing, inside the base. (48)
- Rnd 36 (Sc in the next 6 sts, dec) 6 times. (42)
- Rnd 37 (Sc in the next 5 sts, dec) 6 times. (36)
- Rnd 38 (Sc in the next 4 sts, dec) 6 times. (30)
- Rnd 39 (Sc in the next 3 sts, dec) 6 times. (24)
- Rnd 40 (Sc in the next 2 sts, dec) 6 times. (18)
- Rnd 41 (Sc in the next st, dec) 6 times. (12)
- Rnd 42 Dec 6 times. Fasten off, thread the tail through the front loops of the last 6 sts, pull tight and weave it in. (6)
Ruffles (forest green)
0/3Hold the tree upside down. Work the bottom ruffle first.
- Bottom ruffle Join green with a sl st in any free front loop of Rnd 27. Working in FLO: (5 dc in the next loop, sl st in the next loop) 30 times, working the last sl st in the same loop as the join. Fasten off. (30 scallops)
- Middle ruffle Join green with a sl st in any free front loop of Rnd 19. Working in FLO: (5 dc in the next loop, sl st in the next loop) 21 times, the last sl st in the same loop as the join. Fasten off. (21 scallops)
- Top ruffle Join green with a sl st in any free front loop of Rnd 11. Working in FLO: (5 dc in the next loop, sl st in the next loop) 12 times, the last sl st in the same loop as the join. Fasten off. (12 scallops)
Ornaments (make 9 red and 9 yellow)
0/4- Rnd 1 Make a magic ring, 6 sc in the ring. (6)
- Rnd 2 Inc in each st around. (12)
- Rnd 3 Sc in each st around. Push the yarn tail inside as filling. (12)
- Rnd 4 Dec 6 times. Fasten off, leaving an 8 in (20 cm) tail for sewing. (6)
Star (make 2, golden yellow)
0/3Join every round with a sl st to the first st.
- Rnd 1 Make a magic ring, ch 1, 5 sc in the ring. Join. (5)
- Rnd 2 Ch 1, 2 sc in each st around. Join. (10)
- Rnd 3 (Ch 5, sc in the 2nd ch from the hook, hdc in the next ch, dc in the next ch, tr in the last ch, sk the next st of Rnd 2, sl st in the next st) 5 times. Fasten off the first star; leave a 12 in (30 cm) tail on the second. (5 points)
Finishing
- Sew the ornaments just above each ruffle, alternating red and yellow: 4 on the top tier, 6 on the middle tier, 8 on the bottom tier, evenly spaced.
- Whipstitch the two stars together, wrong sides in, with a small pinch of stuffing, and sew the lower point over the tip of the tree.
- Weave in all ends through the stuffing.
Made one? Leave a note below and tell us about your colours — or save the pattern to Pinterest for later. You are welcome to sell items you make from this pattern; please don’t republish the pattern itself.
© 2026 Crochet Mom · crochet.recipesdad.com/crochet-christmas-tree-pattern/

Clara Parker
I’m Clara — a mom who is never without a hook, and the crochet half of the Recipes Dad family. I write cozy, practical patterns you can actually finish.
More about Clara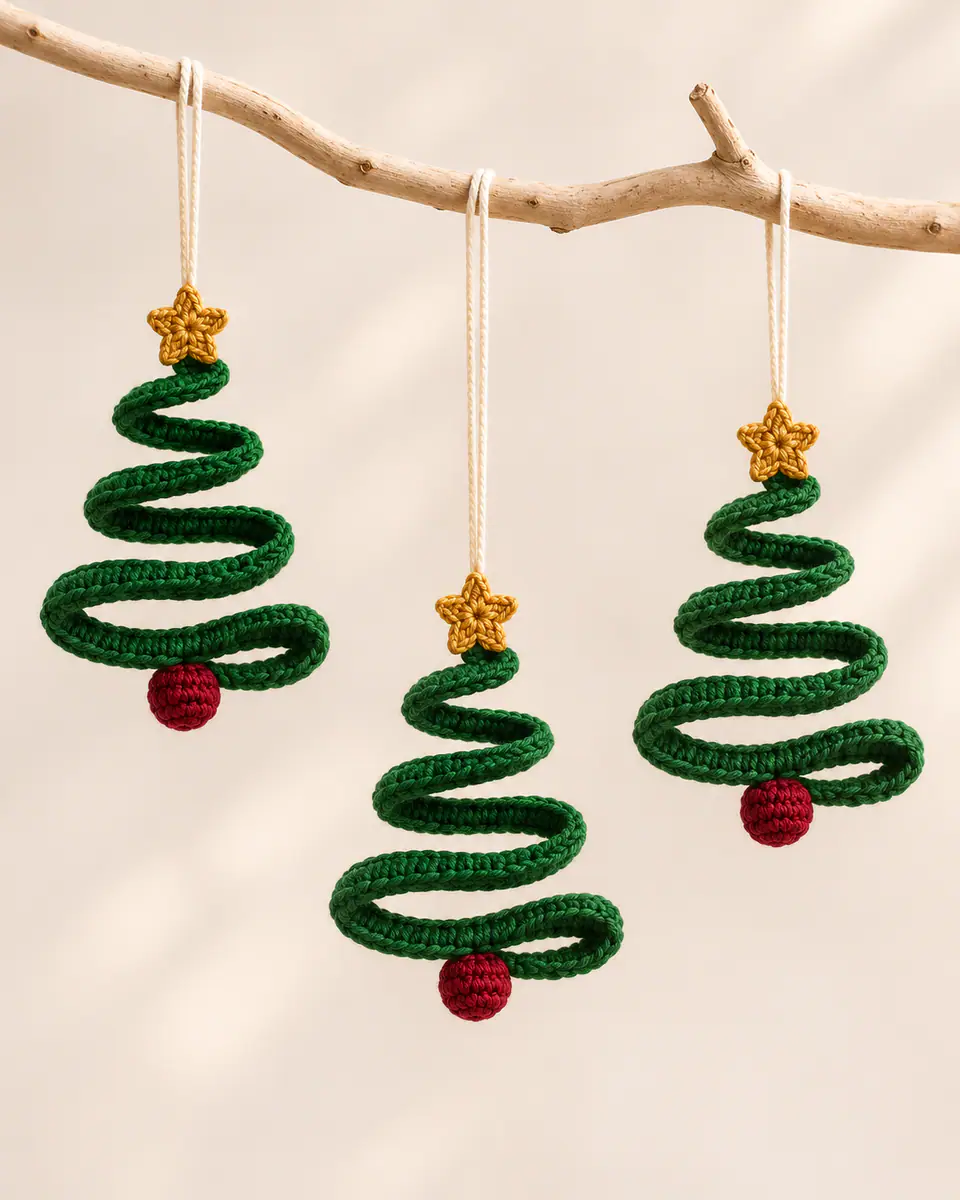
Maker notes
Made this pattern? Tell us about your yarn and colors, or ask a question about a row — Clara reads every note.