
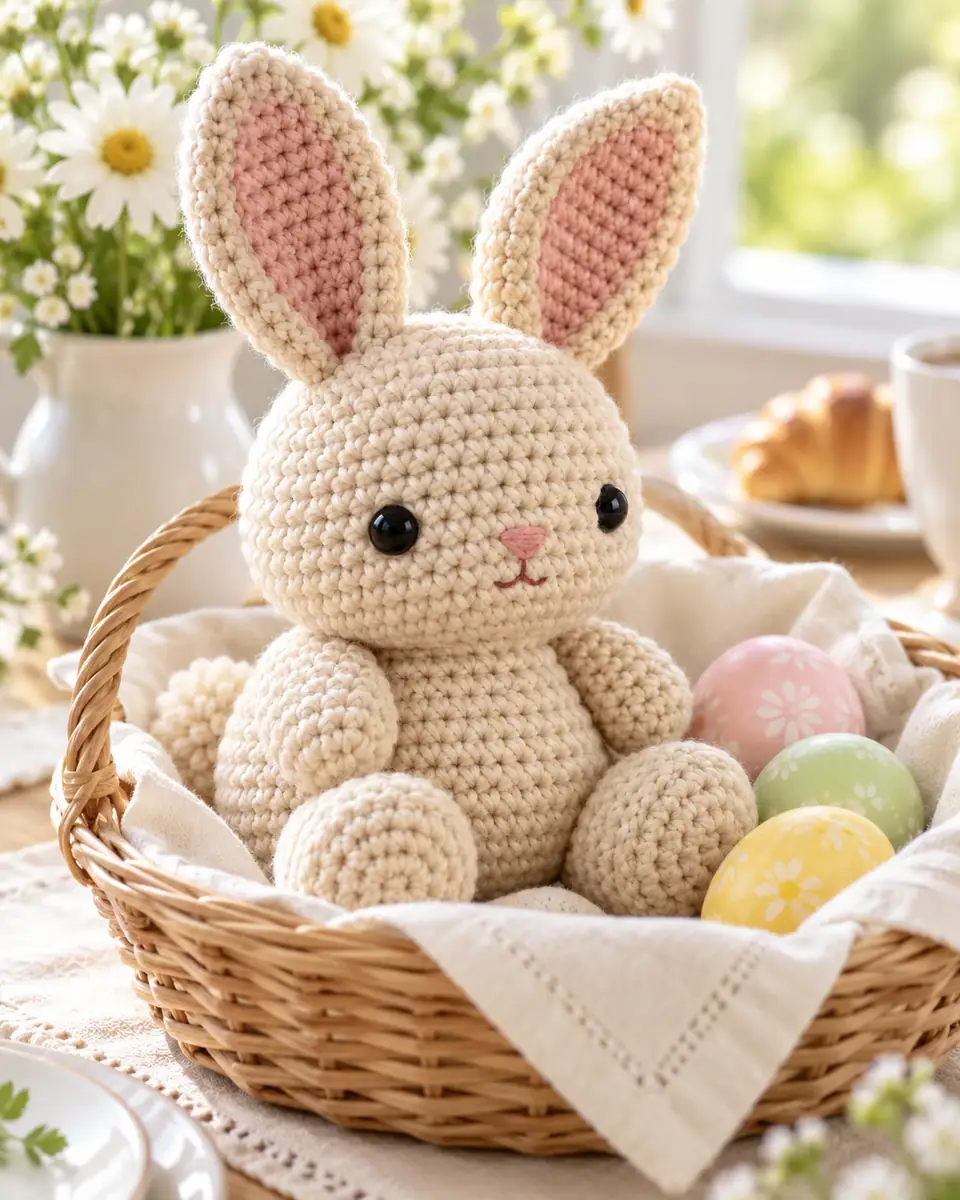
This crochet bunny sits about 7½ inches tall to the tips of its ears, with a round head, a soft pear-shaped body, little feet that point forward and long ears lined in blush pink. It is an easy amigurumi worked in single crochet with worsted-weight cotton and a 3.5 mm hook, and it takes about five hours from magic ring to the last stitch of the face.
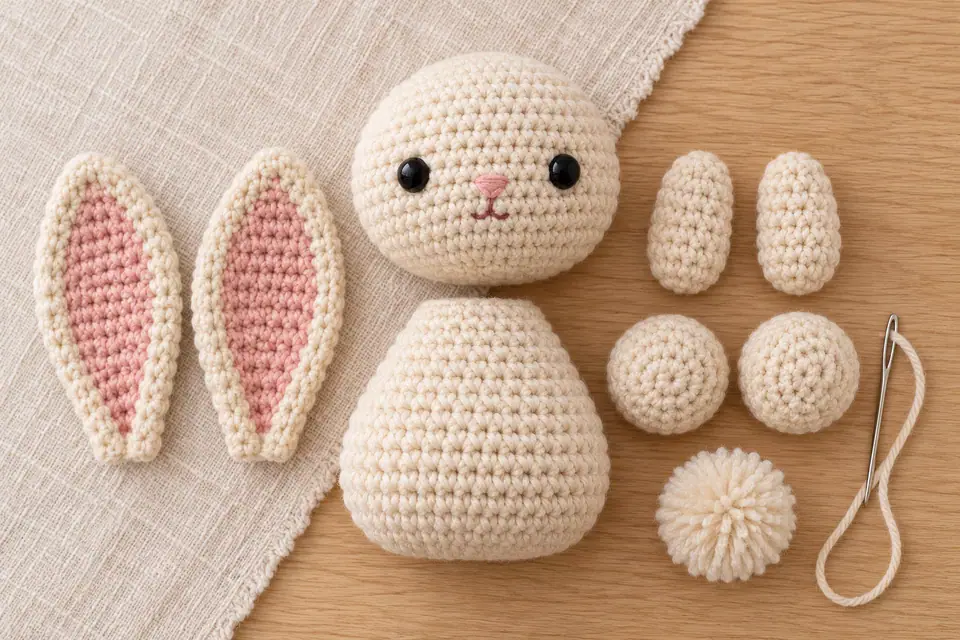
Each part is made separately: head, body, two arms, two feet and four ear pieces, plus a small pom-pom for the tail. The head and the body both end on 18 stitches, so they join stitch for stitch with no guessing. Every round below carries its stitch count, and the assembly section tells you exactly where each piece goes.
Why You’ll Love This Crochet Bunny
- Single crochet from start to finish. Add a magic ring and an invisible decrease and you have every technique the bunny needs.
- Ears with a lining. Each ear is two flat layers crocheted together, so it stands up on its own and the pink inside never curls.
- It sits by itself. A round of back-loop stitches gives the body a flat base, and the feet are set forward so the bunny stays upright on a shelf.
- A clean join at the neck. Head and body close on the same 18 stitches, which keeps the neck firm and the head straight.
- Good for gifts. In cotton it washes well and holds its shape, and it is quick enough to make one for Easter, a baby shower or a birthday.
Materials You’ll Need
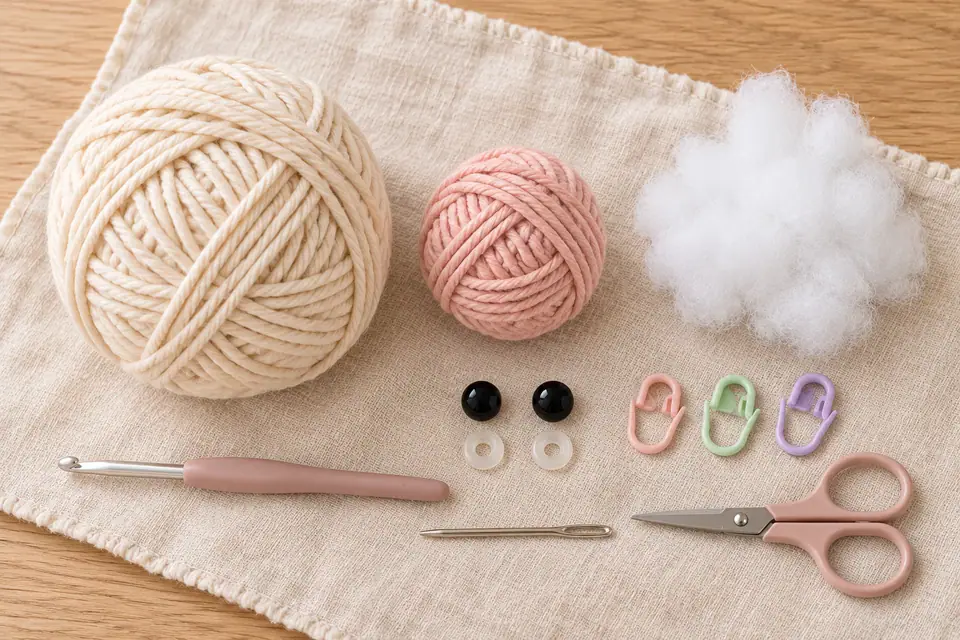
- Worsted weight (4) cotton yarn in two colors: oatmeal cream for the bunny (about 180 yd / 165 m, two 50 g balls) and blush pink for the inner ears and the face (about 15 yd / 14 m).
- 3.5 mm (US E-4) crochet hook. This is smaller than the label suggests on purpose; see the hook size chart if your hook only shows one system.
- Two 9 mm black safety eyes with their washers.
- Polyester fiberfill, about 2 oz (60 g).
- Locking stitch markers, a yarn needle, scissors and a few pins.
- Pom-pom maker or a 1½ in (4 cm) strip of cardboard for the tail.
Cotton gives the crisp, defined stitches you see in the photos. A soft acrylic works too and makes a cuddlier toy, but the stitches look rounder. If your label only says “aran” or “10 ply”, the yarn weight guide shows which names match worsted.
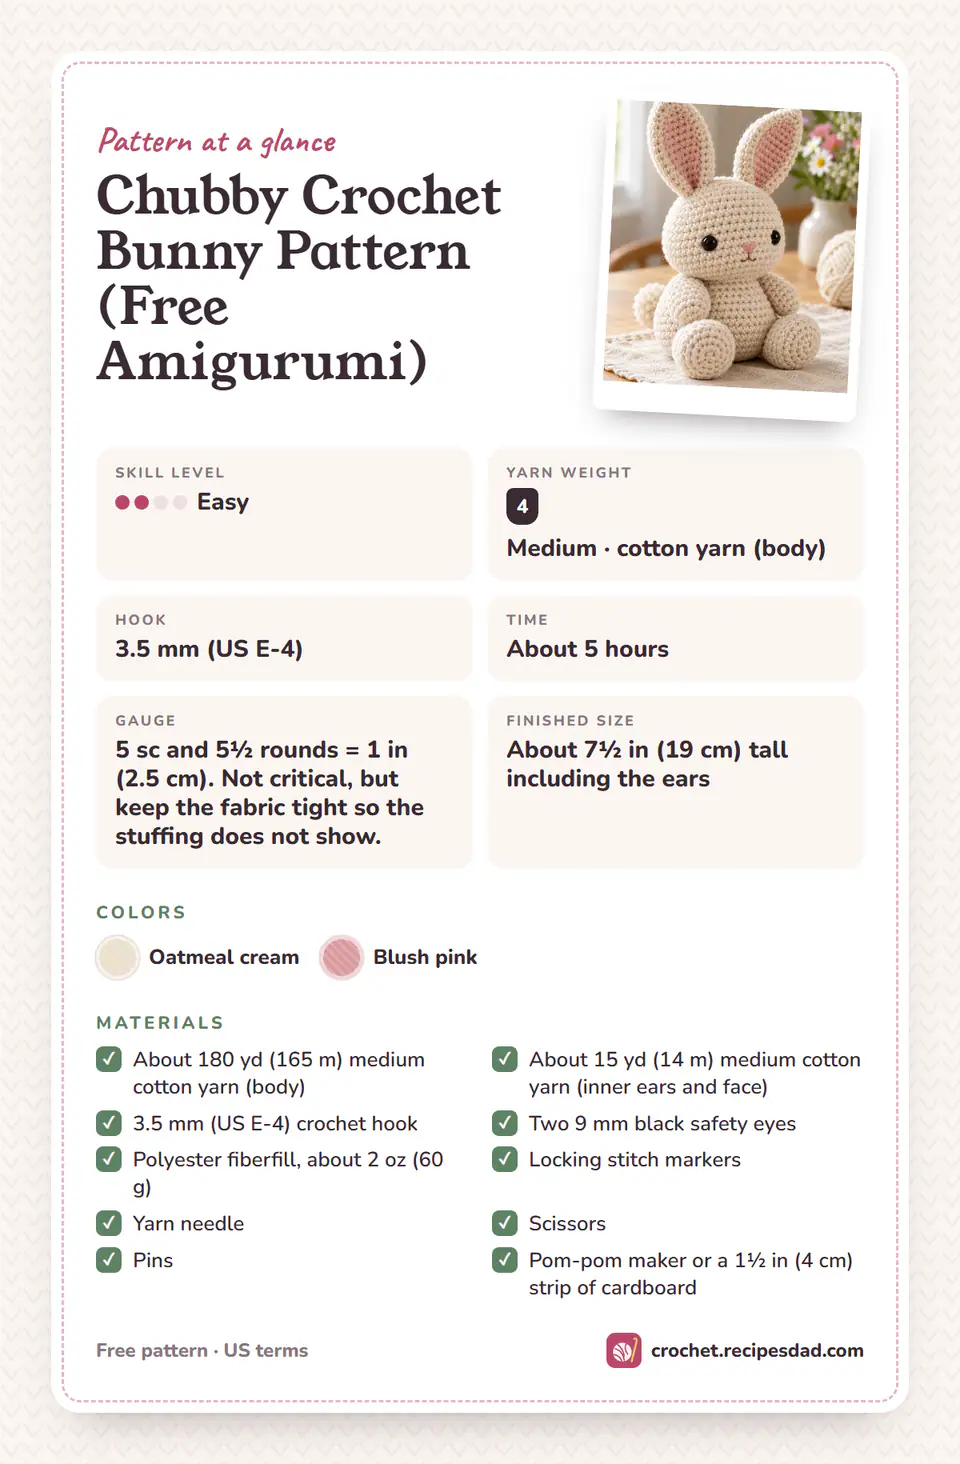
Gauge, Size and Skill Level
- Skill level: Easy. You should be comfortable with single crochet in a spiral; the rest is explained below.
- Finished size: about 7½ in (19 cm) tall including the ears, and about 4 in (10 cm) wide at the feet.
- Gauge: 5 sc and 5½ rounds = 1 in (2.5 cm). Gauge is not critical for a toy, but the fabric must be tight enough that fiberfill does not show between the stitches. If you can see white through the fabric when you stretch it a little, go down half a hook size.
Abbreviations and Special Stitches
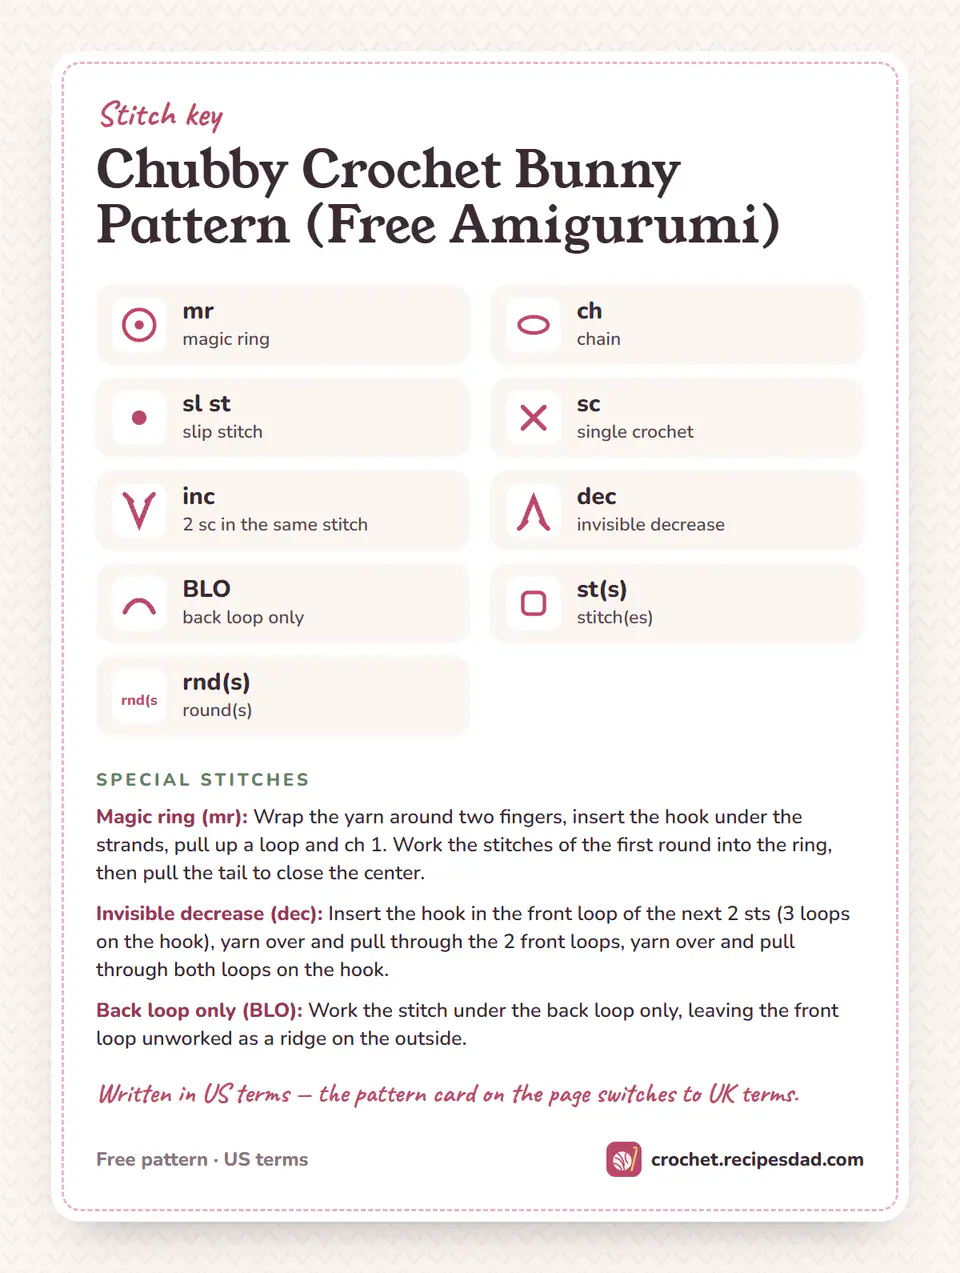
The pattern uses US terms. If you learned with UK terms, sc is a UK double crochet; the US/UK stitch converter and the full pattern terms list translate everything else.
- Magic ring (mr). Wrap the yarn around two fingers, insert the hook under the strands, pull up a loop and chain 1. Work the first round into the ring, then pull the tail to close the center completely.
- Invisible decrease (dec). Insert the hook in the front loop of the next stitch and the front loop of the stitch after it (three loops on the hook), yarn over and pull through both front loops, yarn over and pull through the two loops on the hook. It leaves no gap or bump on the outside.
- Back loop only (BLO). Insert the hook under the back loop of the stitch only. The unworked front loops form the ridge that turns the base and the soles into flat circles.
Pattern Notes
- The head, body, arms and feet are worked in a continuous spiral. Do not join the rounds; move the stitch marker up to the first stitch of every round.
- The ears are worked in joined rounds around a foundation chain, which makes the color change on the front layer clean.
- The number in parentheses at the end of each round is the stitch count for that round.
- Stuff firmly as you go. A bunny that looks full on the needle settles a little after a few days, so add one more pinch than you think you need.
How to Crochet a Bunny, Step by Step
This crochet bunny pattern is worked in pieces, in this order: head, body, arms, feet, ears, then the tail. Making the head first lets you place the eyes and embroider the face while the opening is still wide, which is much easier than doing it on a closed ball.
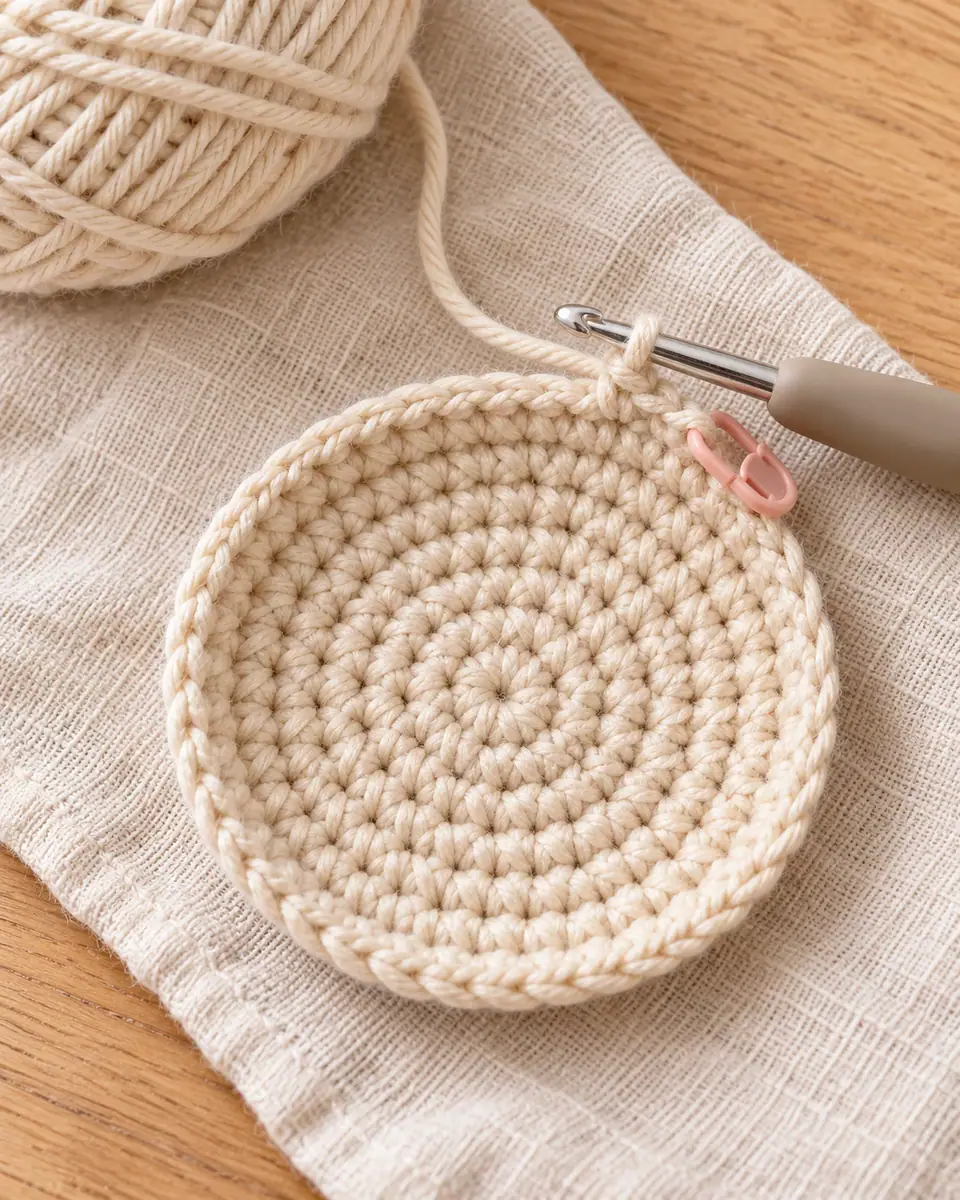
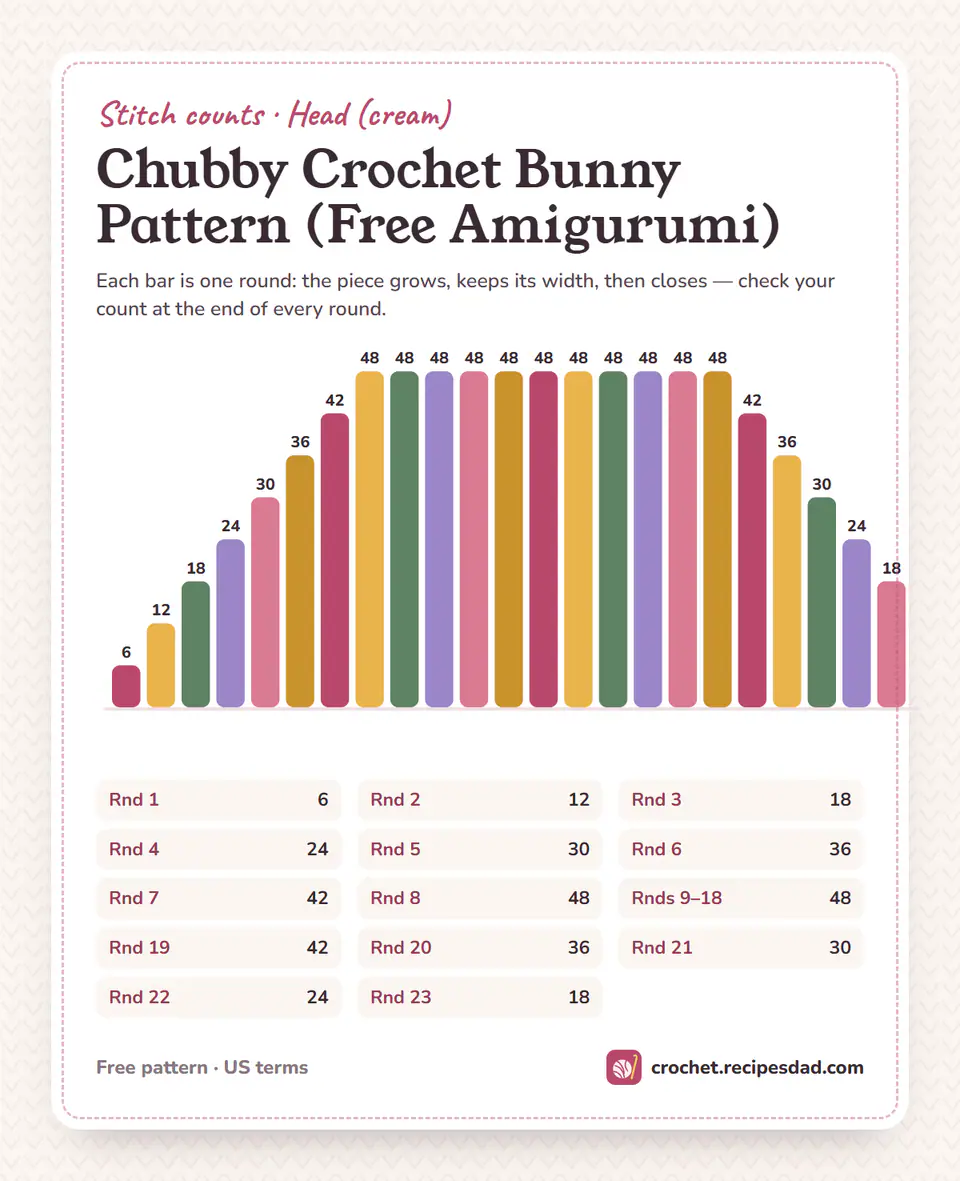
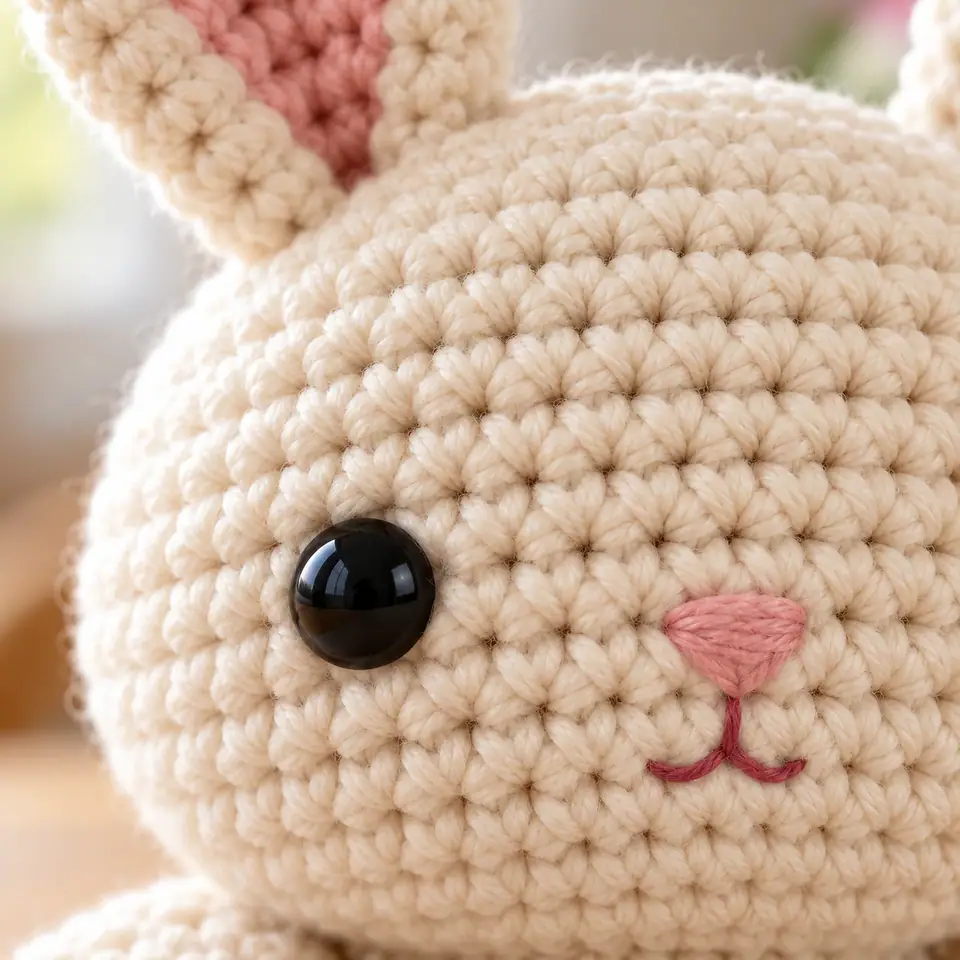
The head starts from a magic ring and grows by six stitches a round until it reaches 48 stitches. At Round 8 the increases stop, and the straight rounds that follow turn the flat circle into a bowl, as in the photo below. Ten straight rounds give the head its height, and the eyes go in before you start decreasing.
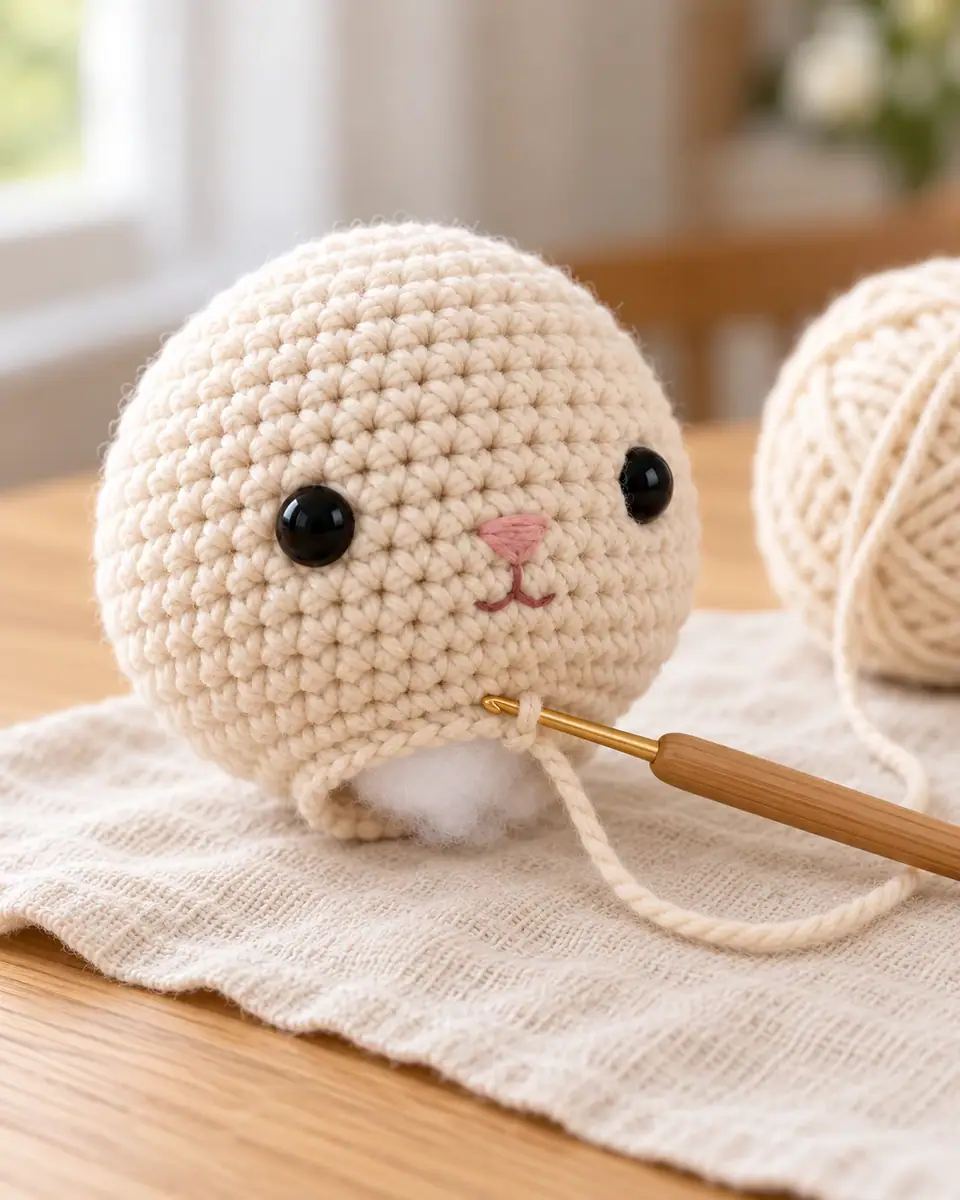
Once the eyes and nose are in, the decreases bring the head down to 18 stitches. Start stuffing at Round 21 and fill the head until it is firm and round, then leave the last round open: it is sewn to the body later.
The body also starts with a magic ring. Round 8 is worked in back loops only to turn the corner from base to sides, and the decreases at Rounds 14, 17, 20 and 22 narrow it gently into a pear shape. The arms and feet are small tubes: the arms close flat, the feet stay open and are sewn on stuffed. Each ear is two flat ovals worked around a chain, a pink-and-cream front and a plain cream back, joined with a round of single crochet.
Assembly and Finishing
Lay all the parts out before you sew anything. It is much easier to judge the ear and arm positions when you can see the whole bunny in front of you.
- Head to body. Turn the body so the jog at the end of its rounds faces the back. Hold the head on top with the face forward, line up the two open rounds and whipstitch them together through both loops, one stitch to one stitch, with the long body tail. Push a little more stuffing into the neck just before you close it.
- Ears. Pinch the bottom of each ear in half, pink side forward, and pin it on top of the head over Rounds 6 to 8, about 8 stitches apart, so each ear sits above an eye. Sew all the way around the pinched base so the ear cannot flop.
- Arms. Pin the flat top of each arm to the sides of the body over Rounds 18 and 19, just under the head, angled slightly forward. Sew along the closed edge.
- Feet. Pin the feet to the front of the body over Rounds 8 to 12 with the soles facing forward and about 5 stitches between them. Check that the bunny sits straight before you sew around the opening of each foot.
- Tail. Tie the pom-pom to the center back over Rounds 9 and 10 with its long ties, then knot them inside the body and hide the ends.
- Ends. Weave each tail through the stuffing and out the other side, pull gently and cut it close.
Tips for Success
- Keep a marker in the first stitch. In a spiral it is very easy to add or lose a stitch. Count at the end of every increase and decrease round.
- Hook the yarn the same way every time. Yarn over (not yarn under) on every single crochet gives the neat V stitches in the photos.
- Stuff in small pieces. Pull the fiberfill apart into small tufts and push them in one at a time. Large lumps leave dents you can see from outside.
- Keep the base flat. Press the bottom of the body on the table while stuffing, and put most of the fiberfill above Round 10.
- Use pins, not guesswork. Pin every piece before sewing, step back and adjust. Unpicking a sewn ear is the slowest part of any amigurumi.
Variations and Color Ideas
- A crochet Easter bunny. Make it in white with pale yellow or lilac inner ears and tie a ribbon bow at the neck.
- Classic brown bunny. Light brown body with cream inner ears and a cream pom-pom.
- Floppy ears. Sew the ears on the sides of the head instead of the top, and they will fall forward like a lop-eared rabbit.
- A softer toy. Work the same pattern in a smooth acrylic or a chenille yarn with the hook size the label recommends. The bunny grows a little and becomes very cuddly.
- A pair. One cream and one gray amigurumi bunny side by side make a lovely nursery shelf or a twin gift.
If this is your first bunny crochet pattern, try the cream and pink version first. The light color shows every stitch, so you can see exactly where you are.
Care Instructions and Safety
Spot clean with a damp cloth and a drop of mild soap, or hand wash in cool water, squeeze gently in a towel and let the bunny dry sitting upright. Do not tumble dry: heat can loosen the safety eyes.
For babies and children under 3, leave out the safety eyes and the pom-pom. Embroider the eyes with black yarn instead, and crochet a small ball for the tail. Check every seam with a firm pull before you give the toy.
Frequently Asked Questions
How long does it take to crochet a bunny like this?
About five hours: two for the head and face, one and a half for the body, and the rest for the small parts and the assembly. A confident amigurumi maker can finish it in one long afternoon.
Is this a good crochet bunny for beginners?
Yes, if you can already make a single crochet. The whole toy is single crochet in a spiral, and the only new techniques are the magic ring, the invisible decrease and back loop only, all explained above.
How do you crochet bunny ears that stand up?
Make each ear in two layers and join them with a round of single crochet, as in this pattern. The double fabric is stiff enough to stand, and pinching the base before sewing keeps it upright.
What yarn is best for an amigurumi bunny?
Worsted-weight cotton gives the crisp, tidy look of this amigurumi bunny pattern and washes well. Acrylic is softer and cheaper; chenille makes a plush toy but hides the stitches and is harder to count.
Why can I see the stuffing between my stitches?
Your fabric is too loose for the yarn. Go down half a hook size, or wrap the yarn once more around your finger to tighten the tension, and use yarn over rather than yarn under.
Can I make it bigger?
Use a bulky yarn with a 5 or 5.5 mm hook and follow the same rounds. The bunny comes out about 11 in (28 cm) tall; you will need larger safety eyes (12 mm) and about twice as much fiberfill.
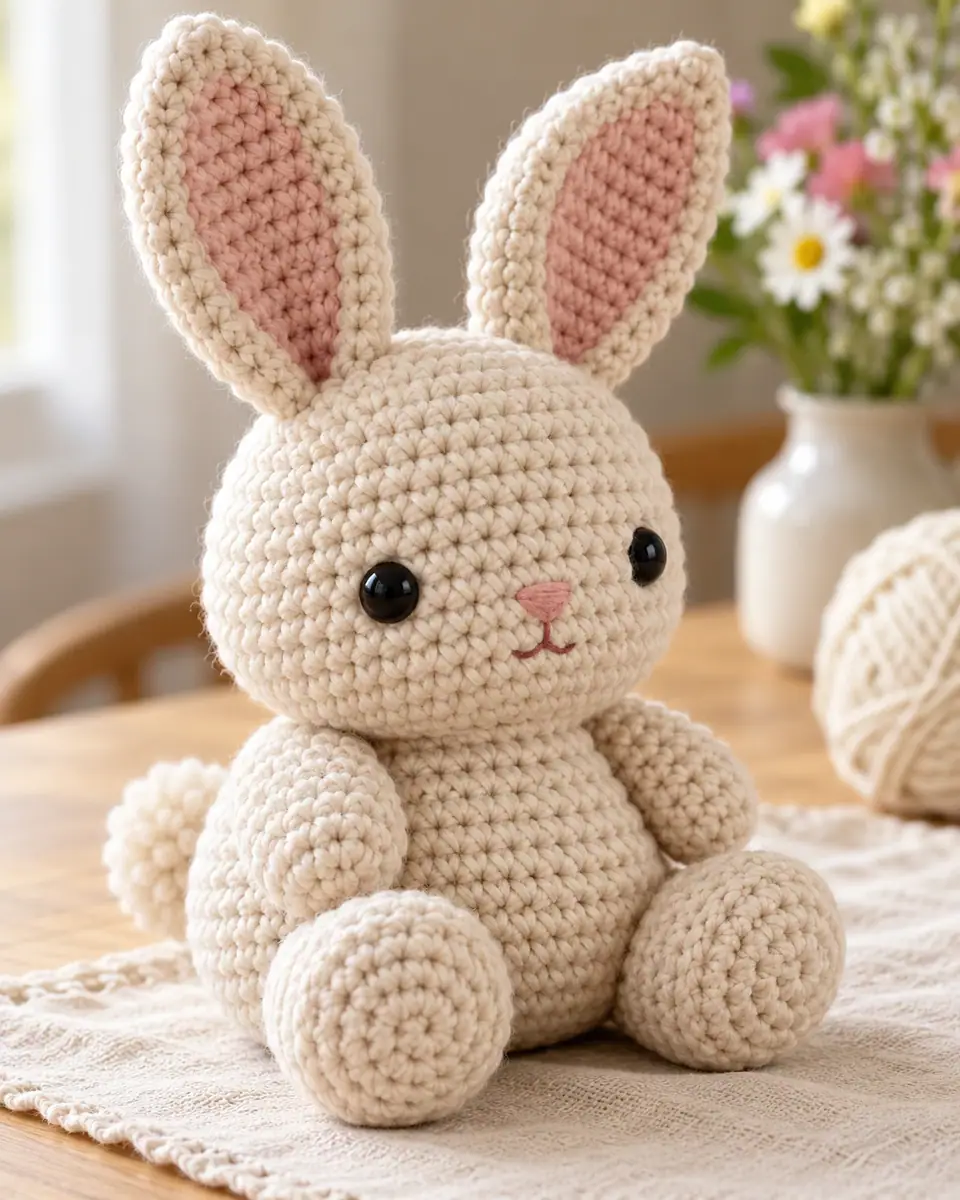
Chubby Crochet Bunny Pattern (Free Amigurumi)
A free crochet bunny pattern for a chubby sitting amigurumi bunny with long two-tone ears, worked in worsted cotton with a 3.5 mm hook. Every round has its stitch count, and the assembly is explained part by part.
Pattern by Clara Parker · Crochet Mom
Materials
Abbreviations (US)
| mr | magic ring |
|---|---|
| ch | chain |
| sl st | slip stitch |
| sc | single crochet |
| inc | 2 sc in the same stitch |
| dec | invisible decrease |
| BLO | back loop only |
| st(s) | stitch(es) |
| rnd(s) | round(s) |
Special stitches
- Magic ring (mr)
- Wrap the yarn around two fingers, insert the hook under the strands, pull up a loop and ch 1. Work the stitches of the first round into the ring, then pull the tail to close the center.
- Invisible decrease (dec)
- Insert the hook in the front loop of the next 2 sts (3 loops on the hook), yarn over and pull through the 2 front loops, yarn over and pull through both loops on the hook.
- Back loop only (BLO)
- Work the stitch under the back loop only, leaving the front loop unworked as a ridge on the outside.
Pattern notes
- Head, body, arms and feet are worked in a continuous spiral: do not join the rounds and move the stitch marker up every round.
- The ears are worked in joined rounds around a foundation chain; the ch 1 at the start of each ear round does not count as a stitch.
- The number in parentheses at the end of a round is its stitch count.
- Stuff firmly as you go.
The pattern
Tap a row to tick it off — your place is saved on this device.
Head (cream)
0/15Place the eyes after Round 18, before the decreases.
- Rnd 1 Make a magic ring, 6 sc in the ring. Pull the ring closed. (6)
- Rnd 2 Inc in each st around. (12)
- Rnd 3 (Sc in the next st, inc) 6 times. (18)
- Rnd 4 (Sc in the next 2 sts, inc) 6 times. (24)
- Rnd 5 (Sc in the next 3 sts, inc) 6 times. (30)
- Rnd 6 (Sc in the next 4 sts, inc) 6 times. (36)
- Rnd 7 (Sc in the next 5 sts, inc) 6 times. (42)
- Rnd 8 (Sc in the next 6 sts, inc) 6 times. (48)
- Rnds 9–18 Sc in each st around (10 rounds). (48)
- Face Insert the safety eyes between Rounds 13 and 14 with 8 sts between them, and fix the washers. With pink, embroider the nose over the 2 center sts between the eyes, on Rounds 14 and 15, so its top edge is level with the middle of the eyes and there are 3 sts between the nose and each eye: 6 or 7 horizontal stitches, each one a little shorter than the last, to make a small triangle pointing down. For the mouth, make one stitch straight down from the point of the nose over 1 round, then one short curved stitch out to each side.
- Rnd 19 (Sc in the next 6 sts, dec) 6 times. (42)
- Rnd 20 (Sc in the next 5 sts, dec) 6 times. (36)
- Rnd 21 (Sc in the next 4 sts, dec) 6 times. Start stuffing. (30)
- Rnd 22 (Sc in the next 3 sts, dec) 6 times. (24)
- Rnd 23 (Sc in the next 2 sts, dec) 6 times. Stuff the head firmly. Sl st in the next st and fasten off with a short tail. Leave the opening open. (18)
Body (cream)
0/16Ends on 18 sts, like the head, so the two join stitch for stitch.
- Rnd 1 Make a magic ring, 6 sc in the ring. Pull the ring closed. (6)
- Rnd 2 Inc in each st around. (12)
- Rnd 3 (Sc in the next st, inc) 6 times. (18)
- Rnd 4 (Sc in the next 2 sts, inc) 6 times. (24)
- Rnd 5 (Sc in the next 3 sts, inc) 6 times. (30)
- Rnd 6 (Sc in the next 4 sts, inc) 6 times. (36)
- Rnd 7 (Sc in the next 5 sts, inc) 6 times. (42)
- Rnd 8 Working in BLO, sc in each st around. (42)
- Rnds 9–13 Sc in each st around (5 rounds). (42)
- Rnd 14 (Sc in the next 5 sts, dec) 6 times. (36)
- Rnds 15–16 Sc in each st around (2 rounds). (36)
- Rnd 17 (Sc in the next 4 sts, dec) 6 times. Start stuffing, keeping the base flat. (30)
- Rnds 18–19 Sc in each st around (2 rounds). (30)
- Rnd 20 (Sc in the next 3 sts, dec) 6 times. (24)
- Rnd 21 Sc in each st around. (24)
- Rnd 22 (Sc in the next 2 sts, dec) 6 times. Stuff firmly. Sl st in the next st and fasten off, leaving a 24 in (60 cm) tail for sewing on the head. (18)
Arms (cream, make 2)
0/6Stuff only the lower half so the arms bend at the shoulder.
- Rnd 1 Make a magic ring, 6 sc in the ring. Pull the ring closed. (6)
- Rnd 2 Inc in each st around. (12)
- Rnds 3–4 Sc in each st around (2 rounds). (12)
- Rnd 5 (Sc in the next 4 sts, dec) 2 times. (10)
- Rnds 6–11 Sc in each st around (6 rounds). Stuff the lower half lightly. (10)
- Close Flatten the opening and work 5 sc through both layers. Fasten off, leaving a 10 in (25 cm) tail. (5)
Feet (cream, make 2)
0/7The BLO round turns the sole into a flat circle that faces forward.
- Rnd 1 Make a magic ring, 6 sc in the ring. Pull the ring closed. (6)
- Rnd 2 Inc in each st around. (12)
- Rnd 3 (Sc in the next st, inc) 6 times. (18)
- Rnd 4 Working in BLO, sc in each st around. (18)
- Rnds 5–7 Sc in each st around (3 rounds). (18)
- Rnd 8 (Sc in the next 4 sts, dec) 3 times. (15)
- Rnd 9 Sc in each st around. Stuff firmly. Fasten off, leaving a 12 in (30 cm) tail. (15)
Ears (make 2 fronts and 2 backs)
0/5Front layer: Rounds 1–2 in pink, Round 3 in cream. Back layer: all three rounds in cream.
- Chain Ch 15. (15 ch)
- Rnd 1 Sc in the 2nd ch from the hook and in the next 12 ch, 3 sc in the last ch. Rotate and work along the other side of the chain: sc in the next 12 ch, 2 sc in the last ch (the same ch as the first sc). Join with a sl st to the first sc. (30)
- Rnd 2 Ch 1, 2 sc in the first st, sc in the next 12 sts, 2 sc in each of the next 3 sts, sc in the next 12 sts, 2 sc in each of the last 2 sts. Join with a sl st to the first sc. On the front layer, make this join with cream. (36)
- Rnd 3 Ch 1, sc in the first st, inc, sc in the next 12 sts, (sc in the next st, inc) 3 times, sc in the next 12 sts, (sc in the next st, inc) 2 times. Join with a sl st to the first sc. Fasten off the front layer; keep the back layer on the hook. (42)
- Joining Place a front layer on a back layer, wrong sides together, pink side facing you. With the back layer's loop on the hook, ch 1 and sc through both layers in each st around. Join with a sl st and fasten off, leaving a 12 in (30 cm) tail. (42)
Tail (cream)
0/1- Pom-pom Wrap cream yarn 70 times around a 1½ in (4 cm) pom-pom maker or strip of cardboard. Tie the middle tightly with a 10 in (25 cm) length of yarn, cut the loops and trim into a round ball. Keep the long ties for sewing.
Finishing
- Sew the head to the body: face forward, the body's round jog at the back, whipstitch the two 18-st openings together through both loops with the body tail, adding a little stuffing to the neck before closing.
- Pinch the base of each ear in half, pink side forward, and sew it to the top of the head over Rounds 6 to 8, about 8 sts apart, each ear above an eye.
- Sew the flat top of each arm to the sides of the body over Rounds 18 and 19, angled slightly forward.
- Sew the feet to the front of the body over Rounds 8 to 12, soles forward, about 5 sts apart.
- Tie the pom-pom tail to the center back over Rounds 9 and 10 and knot the ties inside the body.
- Weave in all ends through the stuffing.
Made one? Leave a note below and tell us about your colours — or save the pattern to Pinterest for later. You are welcome to sell items you make from this pattern; please don’t republish the pattern itself.
© 2026 Crochet Mom · crochet.recipesdad.com/crochet-bunny-pattern/

Clara Parker
I’m Clara — a mom who is never without a hook, and the crochet half of the Recipes Dad family. I write cozy, practical patterns you can actually finish.
More about Clara
Maker notes
Made this pattern? Tell us about your yarn and colors, or ask a question about a row — Clara reads every note.