
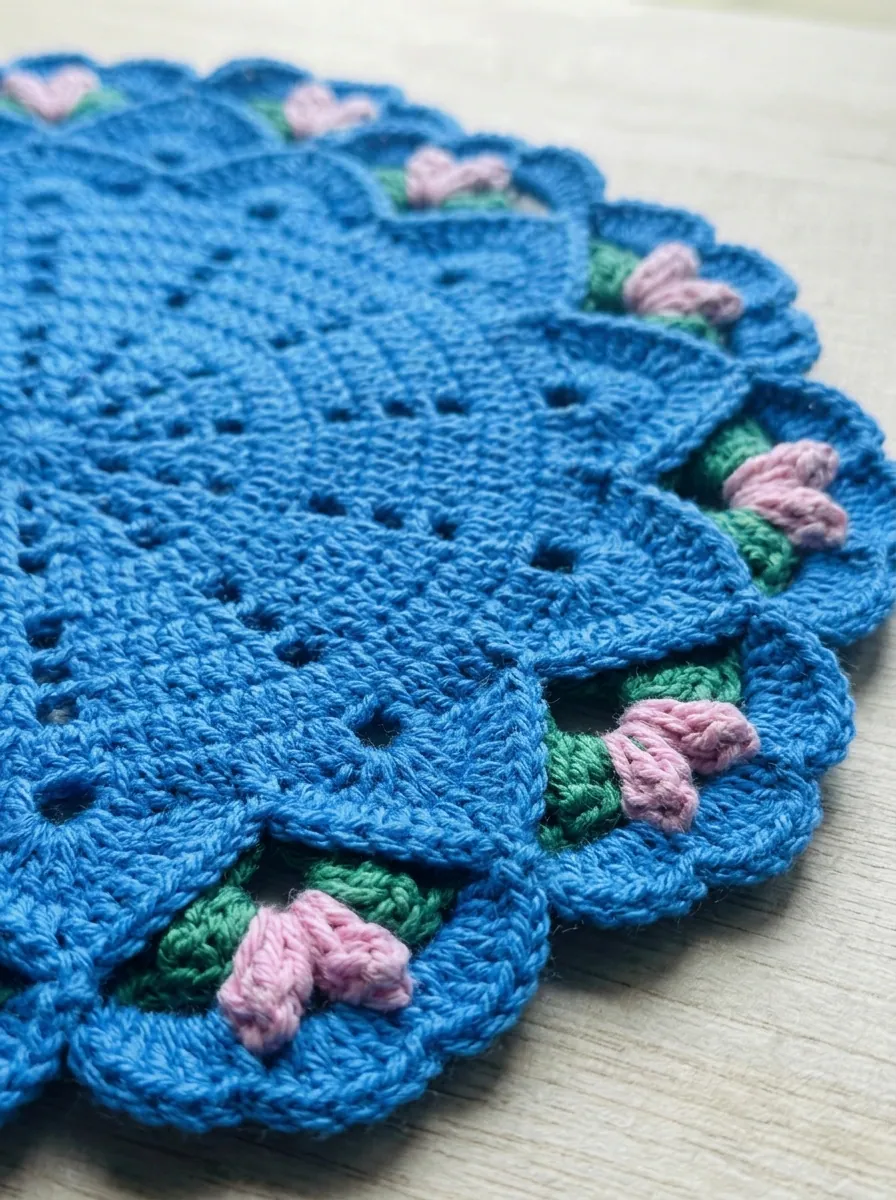
This crochet placemat pattern makes a round cotton mat with a lacy eyelet center and a border of pink tulips sitting between scalloped blue shells. It is an easy pattern in worsted-weight cotton with a 4.5 mm hook, worked in just 14 rounds, and one placemat takes about three hours.
The center is plain double crochet with twelve lines of eyelets that run from the middle to the edge, so it grows quickly and lies flat. The magic happens in the last four rounds: green leaves, pink puff-stitch tulips, blue shells and a picot edge. Every round below has its stitch count, so you can check your work as you go.
Why You’ll Love This Tulip Border Placemat
- Only four basic stitches. Chain, slip stitch, single crochet and double crochet, plus a simple puff stitch for the tulips.
- Flat by design. The center adds exactly 12 stitches every round, the standard recipe for a flat double crochet circle.
- Easy to keep track of. The eyelet lines show you where each repeat begins, so a miscount is easy to spot.
- Quick to make in sets. One mat takes an afternoon, and four make a full table setting.
- Practical. In 100% cotton the mat is washable, absorbent and sturdy enough for everyday plates and mugs.
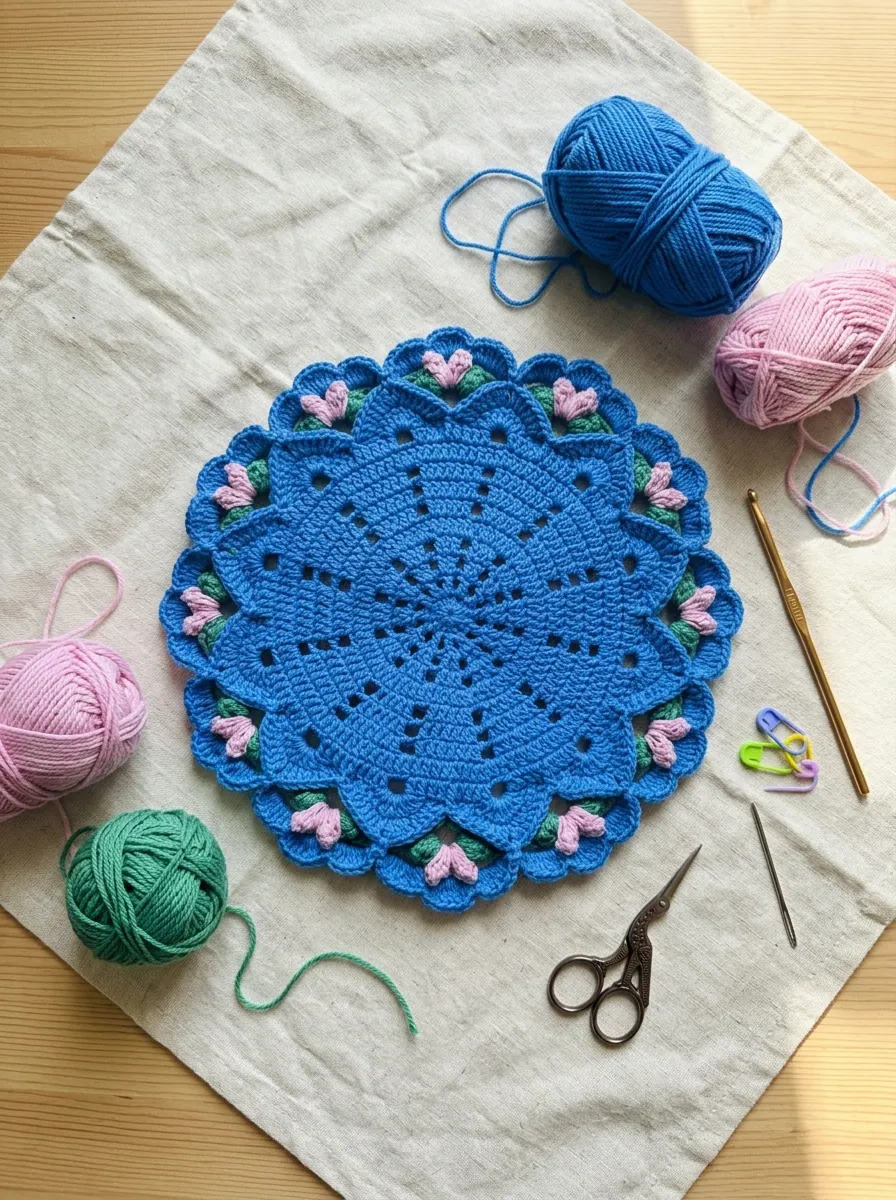
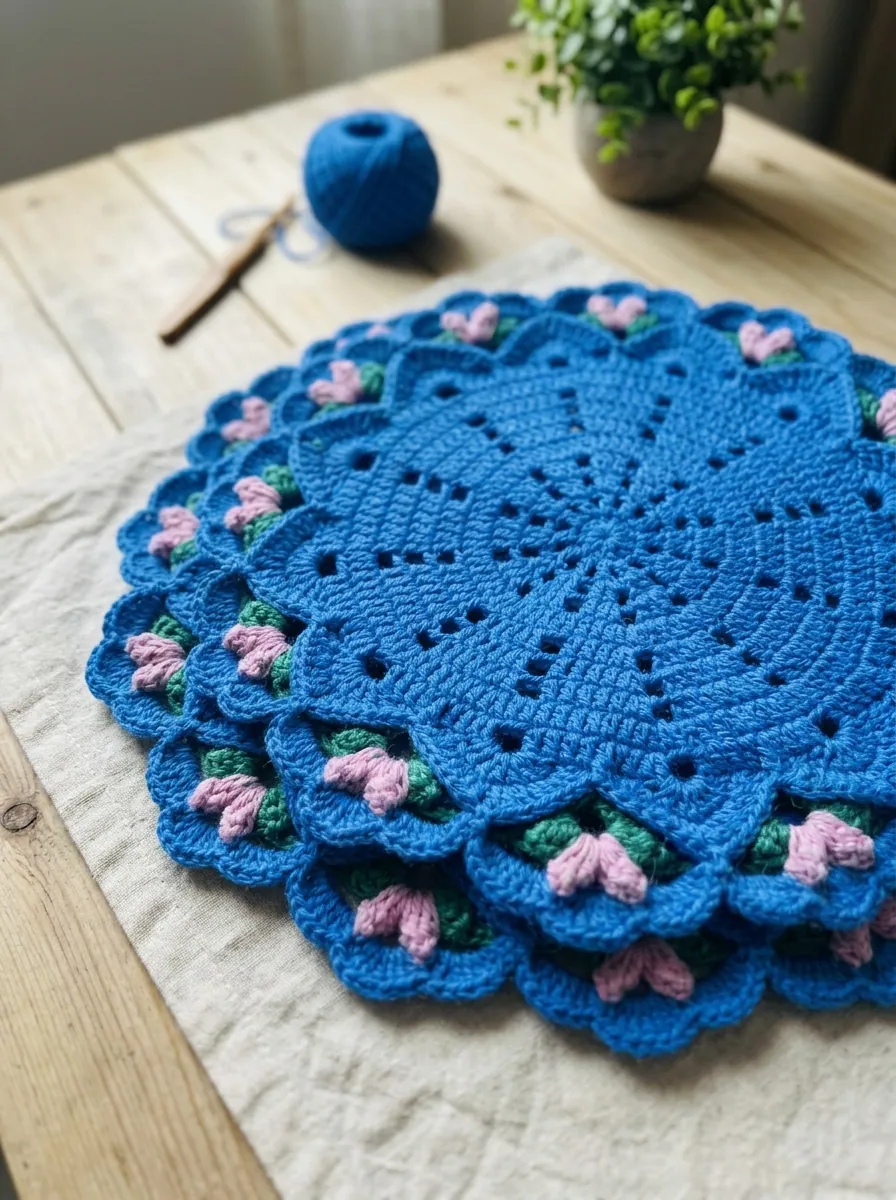
The finished placemat in natural light, with a ball of the blue cotton and the hook beside it.
Materials You’ll Need
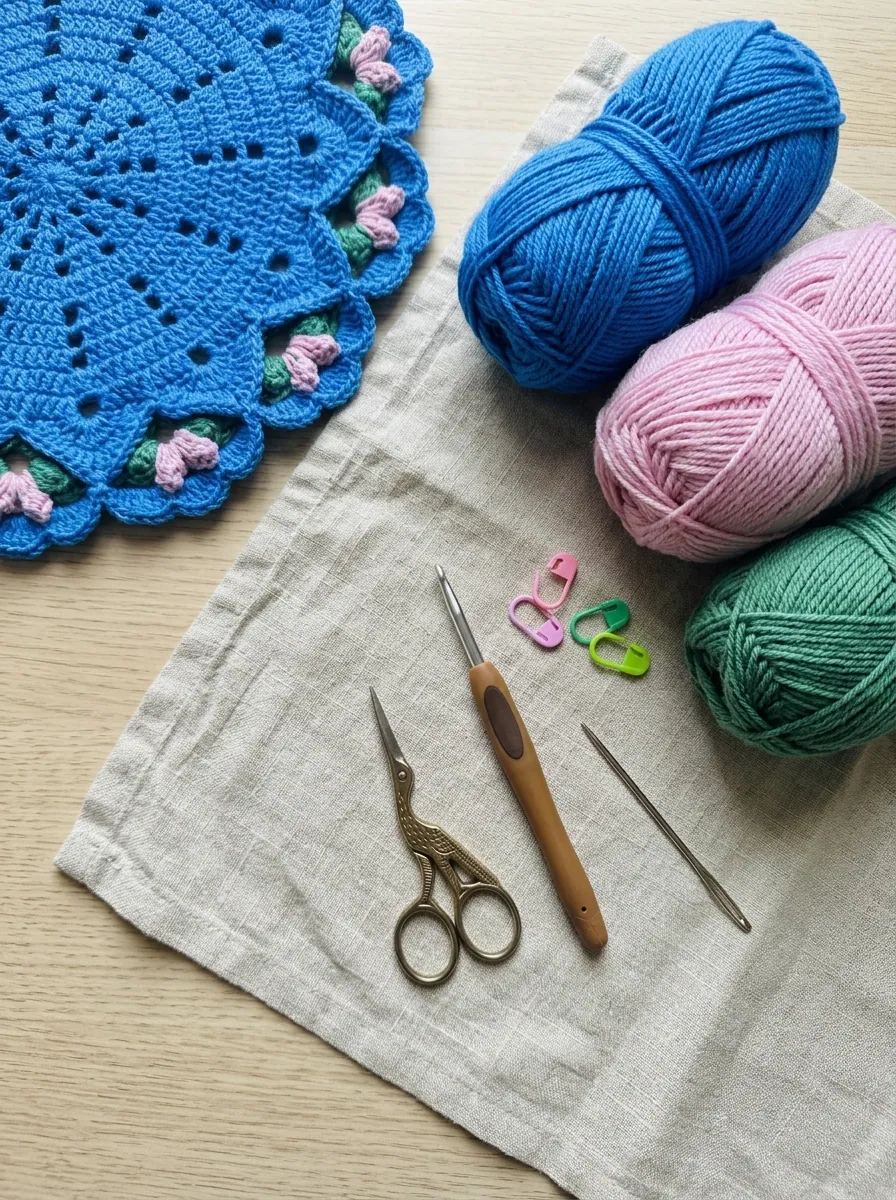
- Worsted weight (4) cotton yarn in three colors: blue (main color, about 130 yd / 120 m), green (about 15 yd / 14 m) and pink (about 20 yd / 18 m). The amounts are estimates for one mat, so one ball of each color covers it with plenty to spare. The green and pink go much further if you make a set.
- 4.5 mm (US 7) crochet hook. Check the hook size chart if your hook only shows one system.
- Yarn needle for weaving in the ends.
- Scissors.
- Stitch marker (optional), to mark the first stitch of the round.
- Blocking mat and rust-proof pins for the finishing.
Choose 100% cotton or a cotton blend for placemats. Acrylic squeaks under cutlery, melts near a hot pan and does not soak up spills. Not sure what “worsted” means on your label? The yarn weight guide lists the names each weight goes by.
Gauge, Size and Skill Level
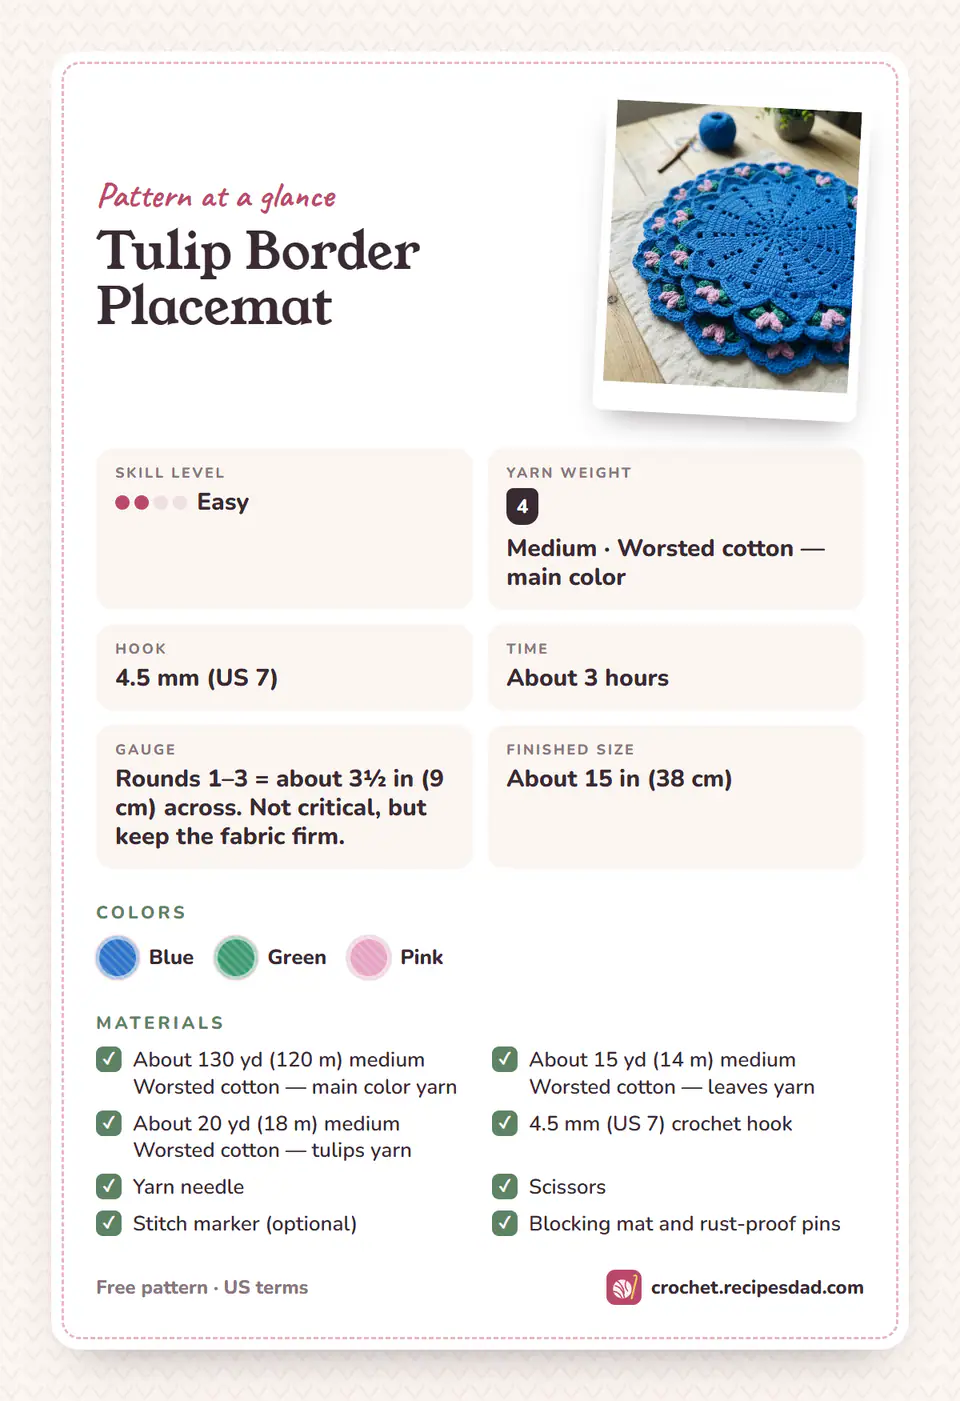
- Skill level: Easy. Basic stitches, a puff stitch and simple color changes.
- Finished size: about 15 in (38 cm) across after blocking.
- Gauge: Rounds 1–3 of the center measure about 3½ in (9 cm) across. Gauge is not critical for a placemat, but a much looser gauge makes a bigger, floppier mat and uses more yarn.
- Time: about 3 hours for one placemat.
If your first three rounds come out bigger than 3½ in, go down half a hook size. If they come out smaller, go up half a size. A firm fabric works best for a placemat.
Abbreviations and Special Stitches
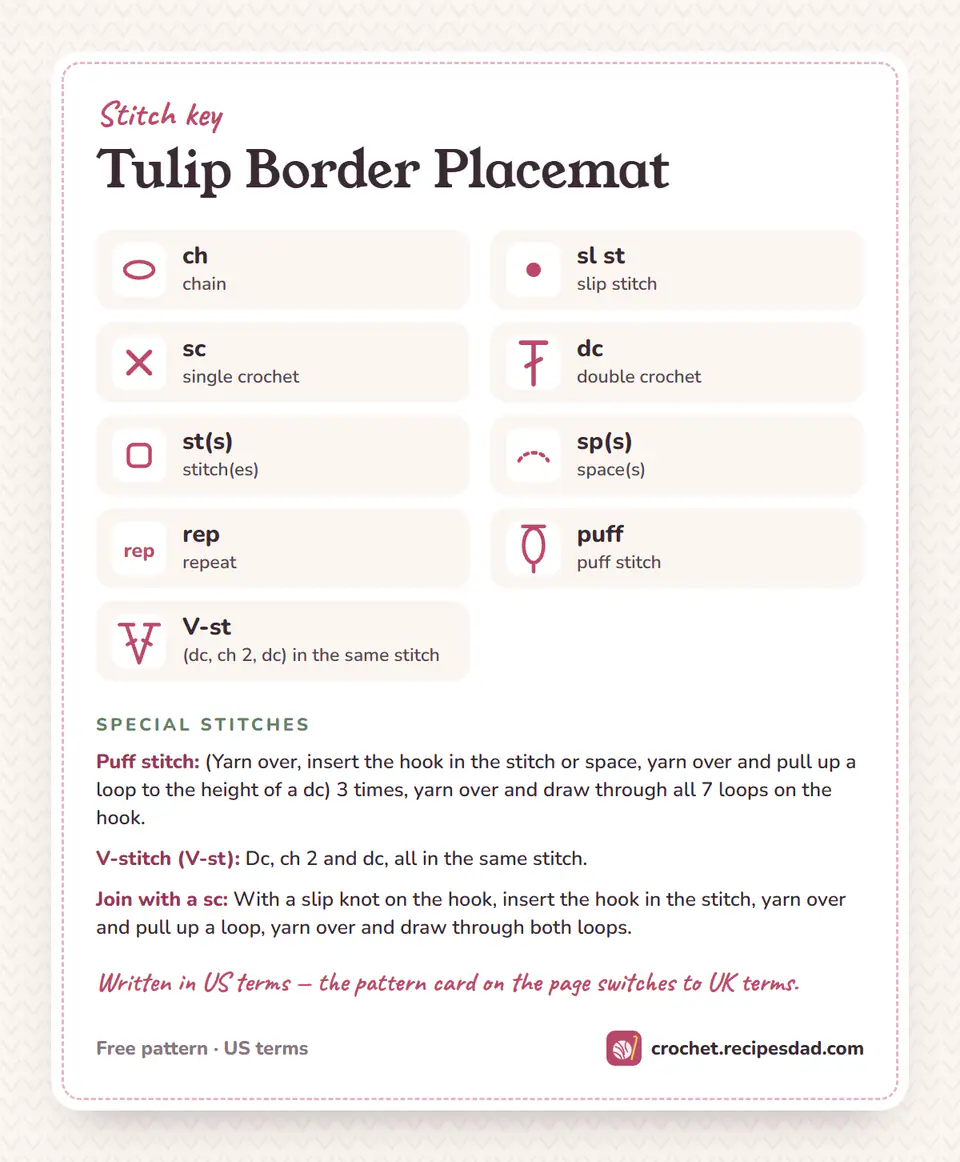
This pattern uses US crochet terms. Use the US/UK switch on the pattern card below, or the US to UK stitch converter, if you learned with UK terms.
- ch – chain
- sl st – slip stitch
- sc – single crochet
- dc – double crochet
- st(s) – stitch(es)
- sp(s) – space(s)
- rep – repeat
- puff – puff stitch (see below)
- V-st – V-stitch: (dc, ch 2, dc) in the same stitch
Puff stitch: (Yarn over, insert the hook in the stitch or space, yarn over and pull up a loop to the height of a dc) 3 times. That leaves 7 loops on the hook. Yarn over and draw through all 7 loops. Two puffs side by side with a ch 1 between them make one tulip.
Join with a sc (standing sc): Make a slip knot on the hook, insert the hook in the stitch, yarn over and pull up a loop, then yarn over and draw through both loops. It gives a neat start when you add a new color.
Pattern Notes
- The placemat is worked in joined rounds with the right side facing. Do not turn.
- The ch 3 at the start of a round counts as the first dc. Join every round with a sl st in the top of that ch 3, then begin the next round in the same stitch.
- From Round 4, each ch-1 space counts as a stitch in the stitch count.
- The center has 12 repeats. Each one begins with an increase (2 dc in one stitch) and, on even rounds, ends with an eyelet (ch 1, skip 1). Each eyelet sits right above the eyelet two rounds below, which builds the 12 straight eyelet lines.
- The border has 20 repeats of 6 stitches over the 120 stitches of Round 10. Work into a ch-1 space as if it were a stitch.
- Fasten off at each color change and weave in the ends as you go. A border with 40 loose ends is the only hard part of this pattern!
How to Crochet the Tulip Border Placemat
The full pattern, round by round with the stitch counts, is in the pattern card below. You can tick off each round as you work. Here is how the placemat comes together.
1. The eyelet center (Rounds 1–10, blue)
Start with a magic ring and 12 dc, then add 12 stitches every round. The even rounds from Round 4 on place a ch-1 eyelet at the end of every repeat, and the odd rounds close it with a dc worked into the ch-1 space. Your eyelets will look a little random for the first rounds. By Round 8 you will see twelve straight spokes running from the center to the edge.
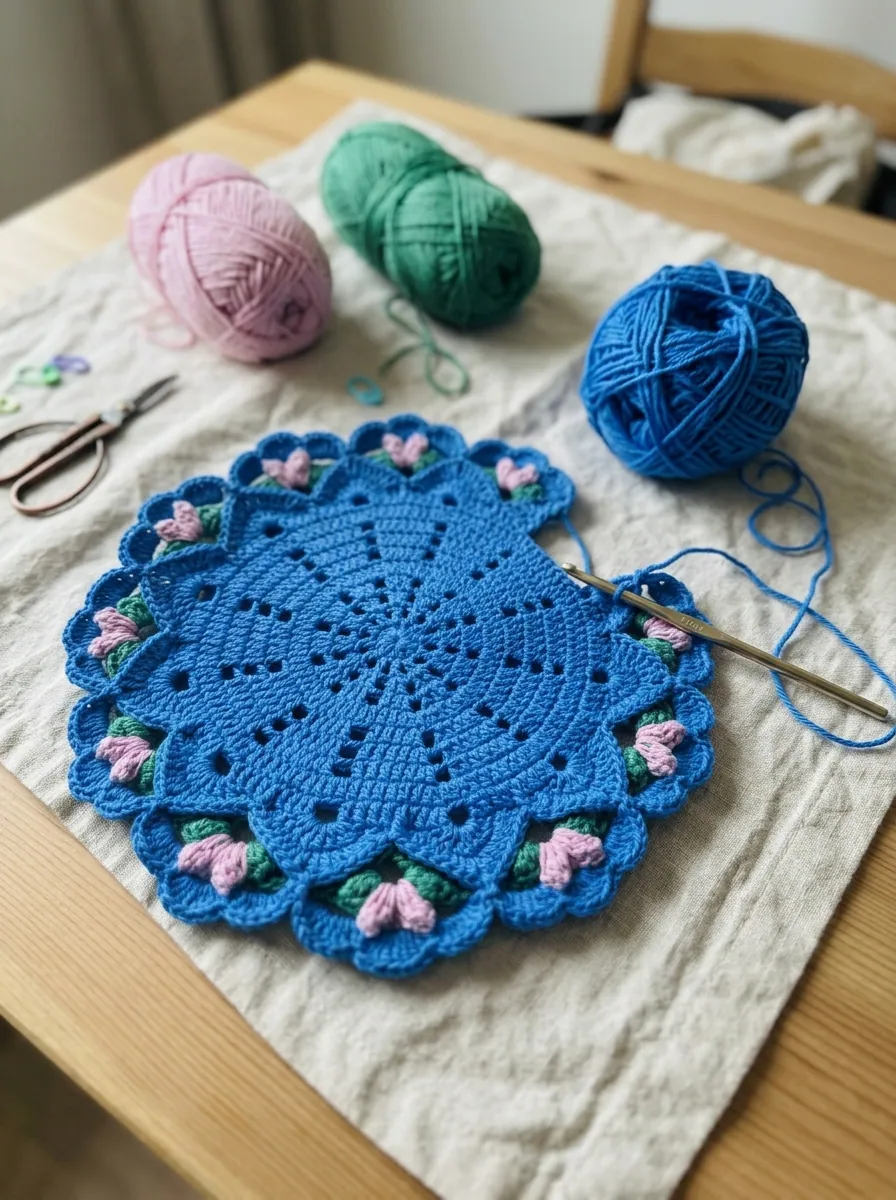
Check your count at the end of Round 10: 108 dc and 12 ch-1 spaces, 120 stitches in all. Lay the circle on the table. If it ruffles, your dc are short (go up a hook size). If it cups like a bowl, your dc are tall (go down a size).
2. The green leaves (Round 11)
Join green and work a round of single crochet and V-stitches linked by ch-3 loops, 20 repeats in all. Each V-stitch becomes the pair of leaves under a tulip.
3. The pink tulips (Round 12)
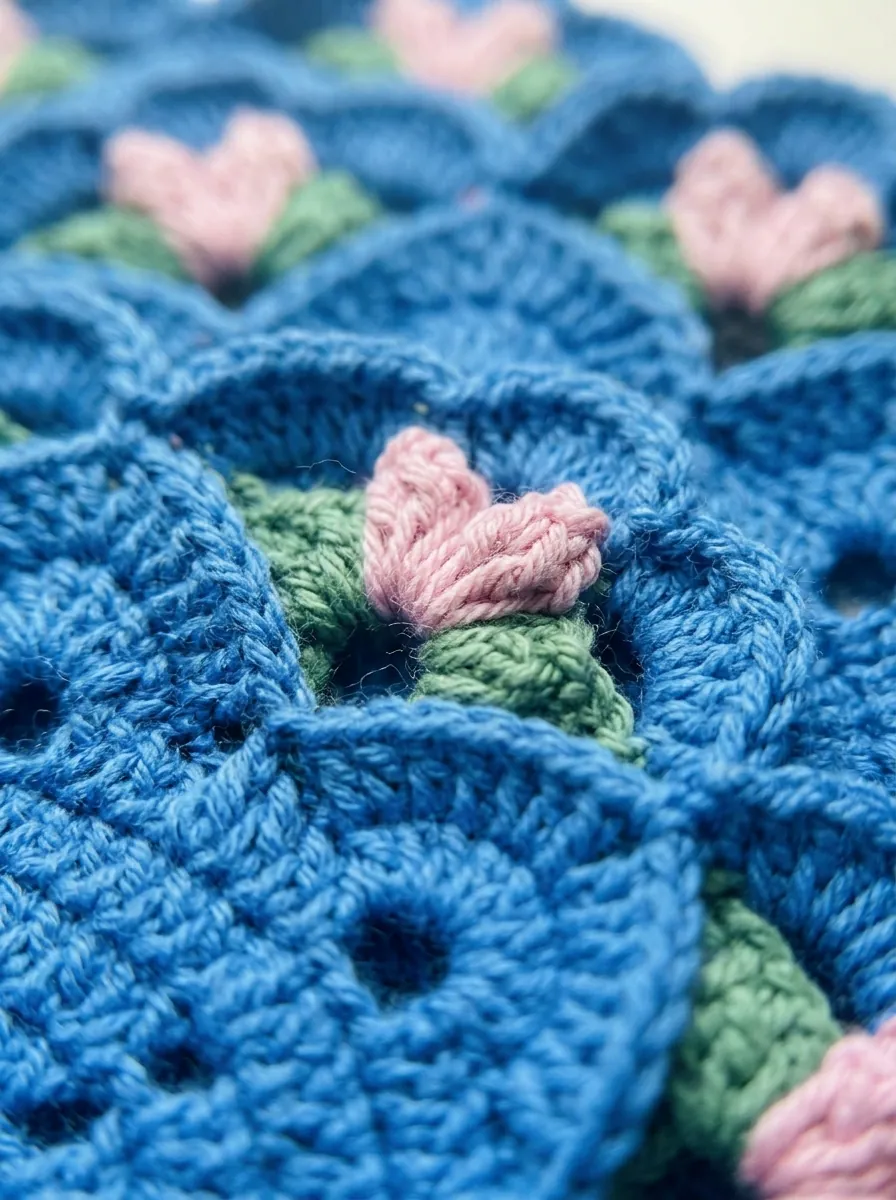
Join pink in the ch-2 space of a V-stitch and work two puff stitches with a ch 1 between them, so the tulip sits on its leaves. A ch-6 loop runs across to the next V-stitch. Keep your puffs the same height. Pull up every loop to the height of a dc before you close the stitch.
4. The blue shells and picot edge (Rounds 13–14)
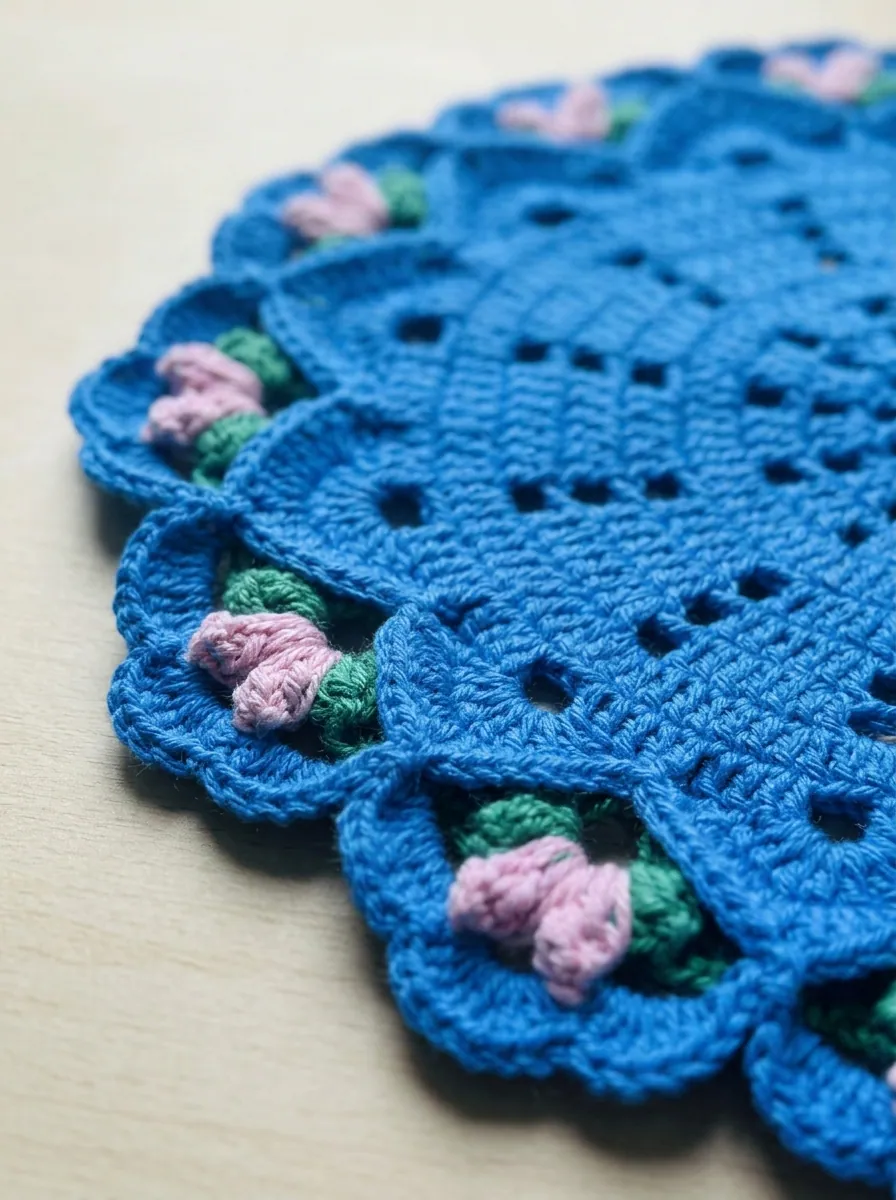
Join blue at the tip of a tulip. Work 7 dc into each ch-6 loop and anchor a sc between the two puffs of every tulip. The shells now frame each tulip. The last round is a row of single crochet with a ch-2 picot at the top of each shell. It firms up the edge and gives the border its scalloped outline.
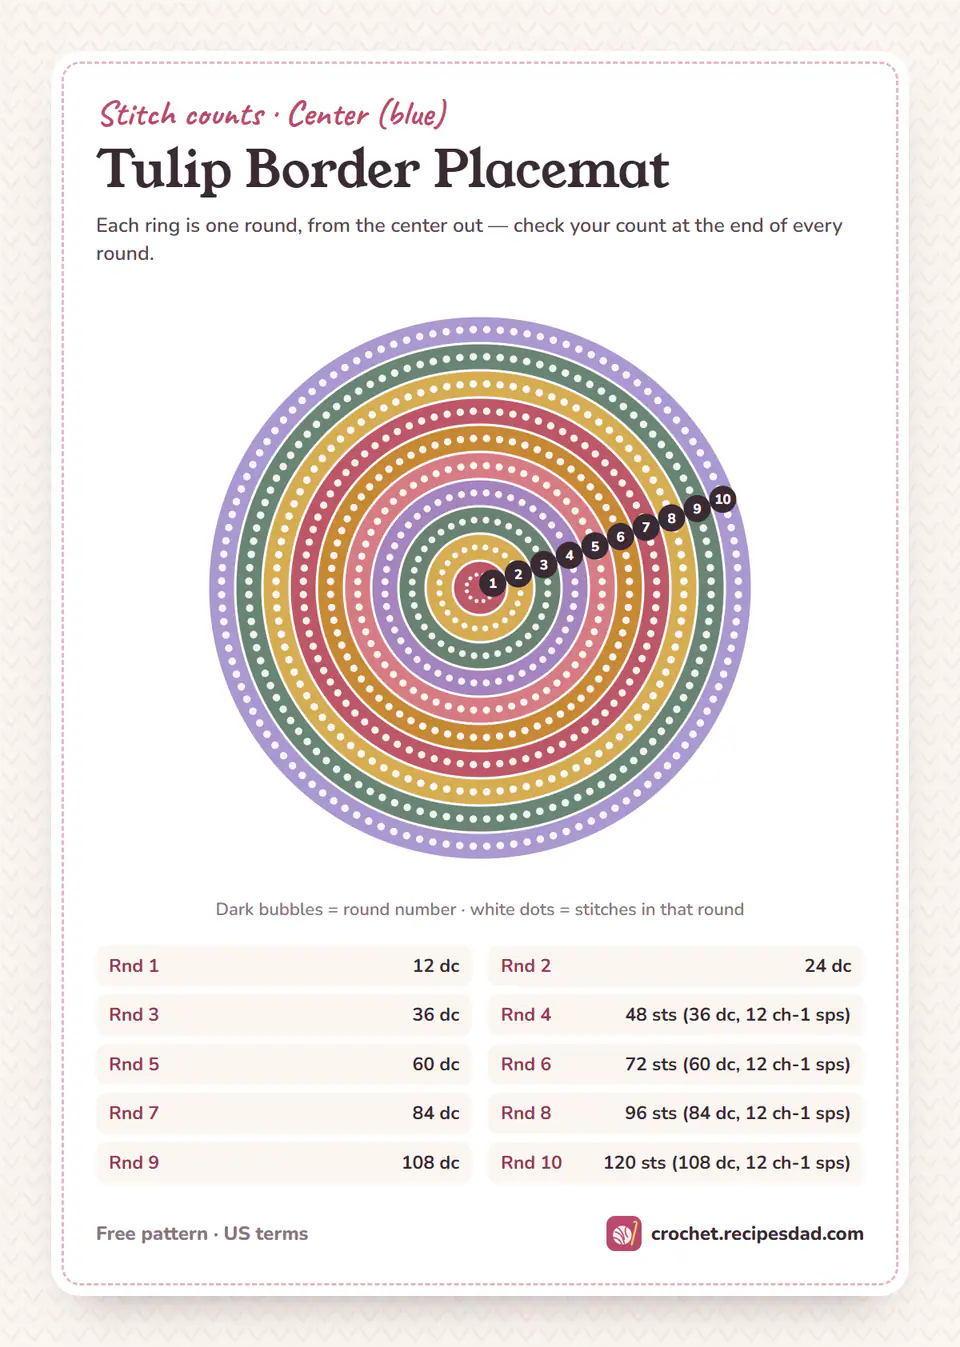
The stitch count chart sums up every round. The blue rings are the center, then the border rounds.
Finishing and Blocking
Weave in all ends on the wrong side, following the stitches of the same color so they disappear. Then block the placemat. Blocking is what turns the shells into neat scallops.
- Soak the placemat in cool water for a few minutes and gently squeeze out the water. Do not wring it.
- Roll it in a towel to remove the rest of the water.
- Pin it flat on a blocking mat in a circle about 15 in (38 cm) across, with one pin in each picot so the shells stand out evenly.
- Let it dry completely before you unpin it. With cotton you can also steam it lightly with an iron held above the fabric, then let it cool flat.
Tips for Success
- Count every round. Each round of the center adds exactly 12 stitches. Count the stitches in one repeat, not the whole round, and you will spot a mistake at once.
- Keep the joins hidden. Join each round with the sl st in the top of the ch 3, not between stitches. That keeps the seam line straight.
- Match your puffs. Pull every loop up to the same height. Uneven loops give tulips of different sizes.
- Weave the ends as you go. The border has four color changes, and twenty tulips mean a lot of tails if you leave them for the end.
- Make a set from the same dye lot. A set of four uses about 520 yd (475 m) of the main color, so buy it all at once.
Variations and Color Ideas
- Coaster size: stop the center after Round 3 (36 sts). For the border, work the same rounds with 6 repeats of 6 stitches over 36 stitches. That gives a small tulip coaster to match the mats.
- Spring palette: cream center, sage leaves and yellow tulips for an Easter table.
- Neutral table: natural or oatmeal cotton for the center and border with terracotta tulips.
- Bold kitchen: navy center with red tulips and white shells.
- Doily: work the same pattern in sport-weight (2) cotton with a 3.5 mm hook for a smaller doily or a dresser mat.
How to Use and Style Your Placemats
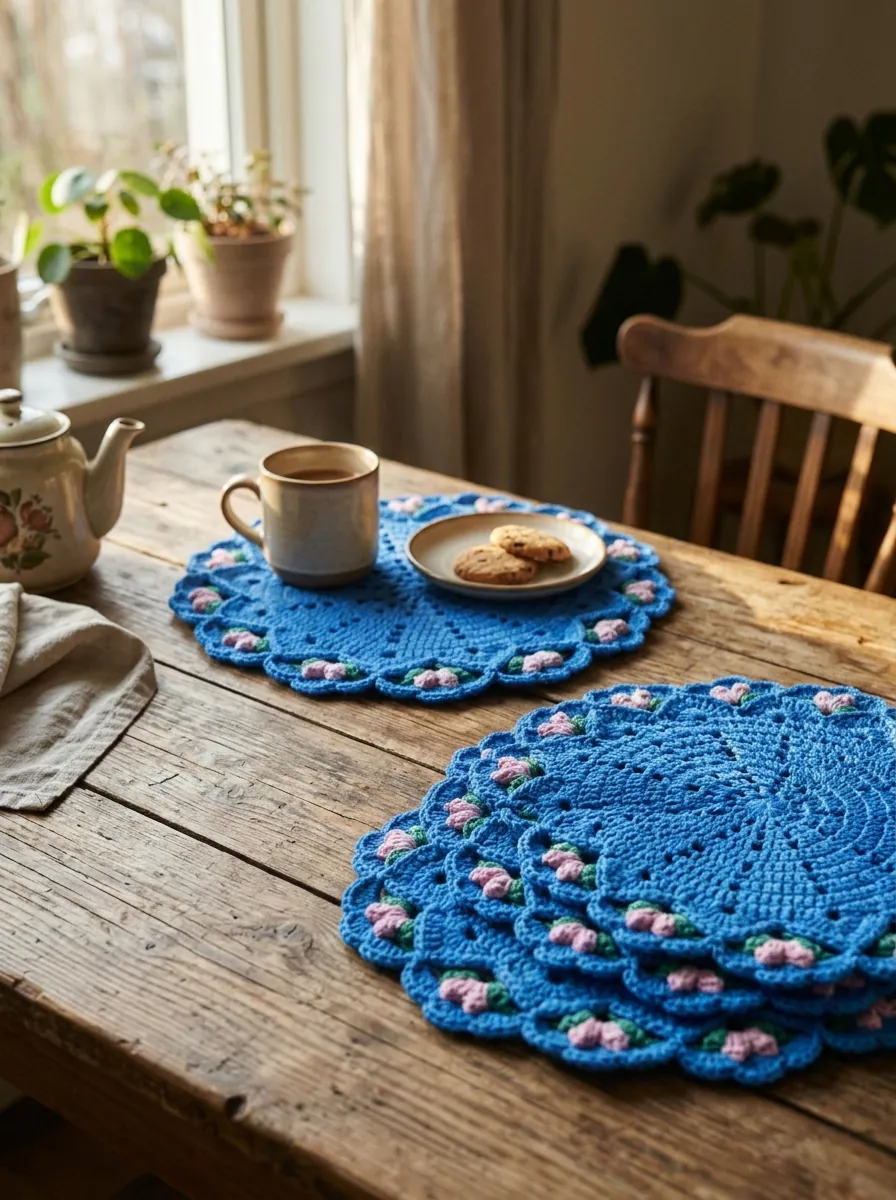
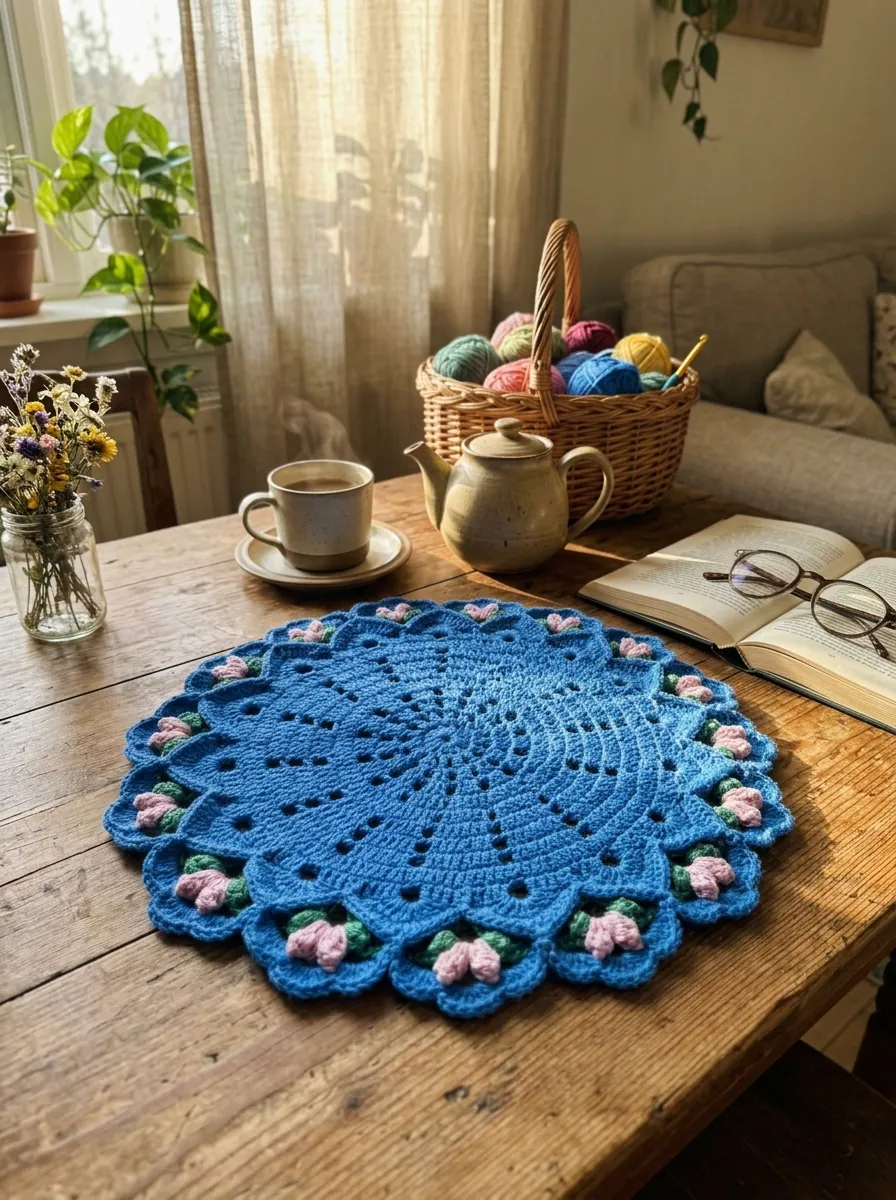
Use the placemats under plates, mugs and teapots, or as a centerpiece under a vase of flowers. Put a trivet under any dish that comes straight from the oven. Cotton handles warm plates well, but a hot baking dish can scorch it. A set of four in matching colors makes a lovely handmade gift for a new home.
Care Instructions
- Machine wash cotton placemats in a laundry bag on a gentle cycle in cool to warm water, or hand wash them.
- Lay them flat to dry and pull the shells into shape while they are damp. Tumble drying can shrink cotton and flatten the puffs.
- Pre-test a red or dark yarn for color bleeding before you use it with white or pastel colors: wet a short piece and press it on a white paper towel.
Frequently Asked Questions
Is this crochet placemat pattern good for beginners?
Yes, if you know how to chain, single crochet and double crochet. The only new stitch is the puff stitch for the tulips, and it is explained above. The stitch count after every round helps you catch mistakes early.
Why is my crochet placemat not lying flat?
Count your stitches first. Each center round must add exactly 12 stitches. If the count is right and the circle ruffles, your stitches are short for the increases, so go up a hook size. If it cups, go down a size. A good blocking also flattens small waves.
What is the best yarn for crochet placemats?
Use 100% cotton or a cotton blend in worsted weight. Cotton is absorbent, takes the heat of a warm plate and washes well. Mercerized cotton gives crisper stitches and a slight sheen. Kitchen cotton is softer and thicker.
How much yarn do I need for a set of four placemats?
Plan about 520 yd (475 m) of the main color, 60 yd (55 m) of green and 80 yd (75 m) of pink. These are estimates, so buy an extra ball of the main color from the same dye lot.
Can I make the placemat bigger?
Yes. Add rounds to the center following the same sequence. An odd round adds a dc in the ch-1 space, and an even round adds a new eyelet, always with 12 stitches more per round. For the border, the center count must be a multiple of 6. After two extra rounds (144 sts), work the border with 24 repeats instead of 20.
Can I sell placemats made from this pattern?
Yes. You are welcome to sell the placemats you make by hand. Please do not share or sell the written pattern or the photos, and link back to this page instead. The details are on our pattern use page.
Tulip Border Crochet Placemat Pattern
A round cotton placemat with a spoked eyelet center and a border of little pink tulips tucked between blue shells. Easy, worked in 14 rounds, about 15 in across.
Pattern by Clara Parker · Crochet Mom
Materials
Abbreviations (US)
| ch | chain |
|---|---|
| sl st | slip stitch |
| sc | single crochet |
| dc | double crochet |
| st(s) | stitch(es) |
| sp(s) | space(s) |
| rep | repeat |
| puff | puff stitch |
| V-st | (dc, ch 2, dc) in the same stitch |
Special stitches
- Puff stitch
- (Yarn over, insert the hook in the stitch or space, yarn over and pull up a loop to the height of a dc) 3 times, yarn over and draw through all 7 loops on the hook.
- V-stitch (V-st)
- Dc, ch 2 and dc, all in the same stitch.
- Join with a sc
- With a slip knot on the hook, insert the hook in the stitch, yarn over and pull up a loop, yarn over and draw through both loops.
Pattern notes
- Worked in joined rounds with the right side facing. Do not turn.
- The ch 3 at the start of a round counts as the first dc. Join each round with a sl st in the top of the beginning ch 3, and begin the next round in the same stitch.
- From Round 4, each ch-1 space counts as a stitch.
- The border has 20 repeats of 6 stitches over the 120 stitches of Round 10. Work into a ch-1 space as if it were a stitch.
The pattern
Tap a row to tick it off — your place is saved on this device.
Center (blue)
0/1012 repeats per round, 12 stitches added every round.
- Rnd 1 Make a magic ring. Ch 3 (counts as first dc), 11 dc in the ring. Join with a sl st in the top of the beginning ch 3 and pull the ring closed. (12 dc)
- Rnd 2 Ch 3, dc in the same st as the join, 2 dc in each st around. Join. (24 dc)
- Rnd 3 Ch 3, dc in the same st, dc in next st, *2 dc in next st, dc in next st; rep from * around. Join. (36 dc)
- Rnd 4 Ch 3, dc in the same st, dc in next st, ch 1, skip next st, *2 dc in next st, dc in next st, ch 1, skip next st; rep from * around. Join. (48 sts (36 dc, 12 ch-1 sps))
- Rnd 5 Ch 3, dc in the same st, dc in next 2 sts, dc in next ch-1 sp, *2 dc in next st, dc in next 2 sts, dc in next ch-1 sp; rep from * around. Join. (60 dc)
- Rnd 6 Ch 3, dc in the same st, dc in next 3 sts, ch 1, skip next st, *2 dc in next st, dc in next 3 sts, ch 1, skip next st; rep from * around. Join. (72 sts (60 dc, 12 ch-1 sps))
- Rnd 7 Ch 3, dc in the same st, dc in next 4 sts, dc in next ch-1 sp, *2 dc in next st, dc in next 4 sts, dc in next ch-1 sp; rep from * around. Join. (84 dc)
- Rnd 8 Ch 3, dc in the same st, dc in next 5 sts, ch 1, skip next st, *2 dc in next st, dc in next 5 sts, ch 1, skip next st; rep from * around. Join. (96 sts (84 dc, 12 ch-1 sps))
- Rnd 9 Ch 3, dc in the same st, dc in next 6 sts, dc in next ch-1 sp, *2 dc in next st, dc in next 6 sts, dc in next ch-1 sp; rep from * around. Join. (108 dc)
- Rnd 10 Ch 3, dc in the same st, dc in next 7 sts, ch 1, skip next st, *2 dc in next st, dc in next 7 sts, ch 1, skip next st; rep from * around. Join and fasten off. (120 sts (108 dc, 12 ch-1 sps))
Tulip border
0/420 repeats. Fasten off at the end of each round.
- Rnd 11 Green: join with a sc in the first dc after any ch-1 sp. *Ch 3, skip next 2 sts, V-st in next st, ch 3, skip next 2 sts**, sc in next st; rep from * 18 more times, then from * to ** once. Join with a sl st in the first sc and fasten off. (20 sc, 20 V-sts)
- Rnd 12 Pink: join with a sl st in the ch-2 sp of any V-st. Ch 2 (does not count), (puff, ch 1, puff) in the same sp — first tulip made. *Ch 6, skip to the next V-st, (puff, ch 1, puff) in its ch-2 sp; rep from * 18 more times, ch 6. Join with a sl st in the top of the first puff and fasten off. (20 tulips, 20 ch-6 loops)
- Rnd 13 Blue: join with a sc in the ch-1 sp at the center of any tulip. *7 dc in next ch-6 loop, sc in the ch-1 sp of next tulip; rep from * 18 more times, 7 dc in the last ch-6 loop. Join with a sl st in the first sc. (160 sts (140 dc, 20 sc))
- Rnd 14 Ch 1, sc in the same st as the join, *sc in next 3 dc, (sc, ch 2, sc) in next dc, sc in next 3 dc**, sc in next sc; rep from * around, ending the last rep at **. Join with a sl st in the first sc and fasten off. (180 sc, 20 ch-2 picots)
Finishing
- Weave in all ends on the wrong side, following stitches of the same color.
- Wet block: soak in cool water, squeeze gently, roll in a towel, then pin flat in a 15 in (38 cm) circle with one pin in each picot. Let it dry completely.
- Cotton can also be steamed lightly with the iron held above the fabric; let it cool flat before unpinning.
Made one? Leave a note below and tell us about your colours — or save the pattern to Pinterest for later. You are welcome to sell items you make from this pattern; please don’t republish the pattern itself.
© 2026 Crochet Mom · crochet.recipesdad.com/tulip-border-placemat-crochet-pattern/

Clara Parker
I’m Clara — a mom who is never without a hook, and the crochet half of the Recipes Dad family. I write cozy, practical patterns you can actually finish.
More about Clara
Maker notes
Made this pattern? Tell us about your yarn and colors, or ask a question about a row — Clara reads every note.