
Seaming crochet pieces well is what makes a blanket of squares lie flat, a toy look smooth and a bag hold its weight. There are five common ways to join crochet: whipstitch, mattress stitch, a slip stitch seam, a single crochet seam and join as you go. Each one looks different on the front and suits different projects.
This lesson shows each method step by step, how to line up the edges so nothing puckers, and how to weave in the ends so the seam stays closed.
What You Need to Join Crochet Pieces
- Yarn for the seam. Use the yarn the pieces are made of, or a leftover of the same weight and fiber. A thinner yarn makes a weaker seam, and a thicker one shows.
- A blunt yarn needle with an eye big enough for the yarn, for whipstitch and mattress stitch.
- Your crochet hook, the size the pieces were made with, for the slip stitch and single crochet seams.
- Locking stitch markers or clips to hold the edges together, and scissors.
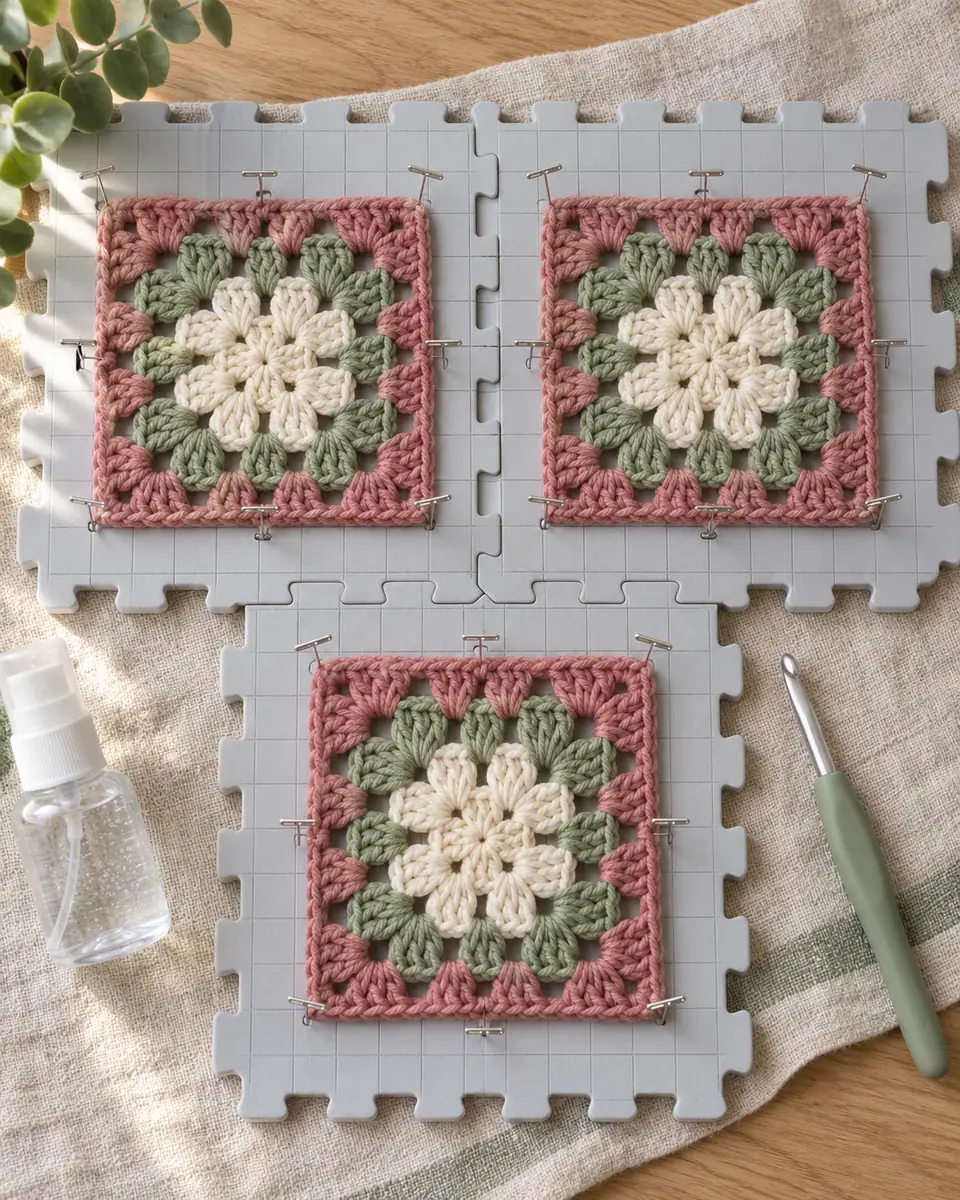
Block the pieces before you join them if they are flat, like squares or the panels of a sweater. It is much easier to match two edges that are the same size and lie straight. The blocking lesson explains how.
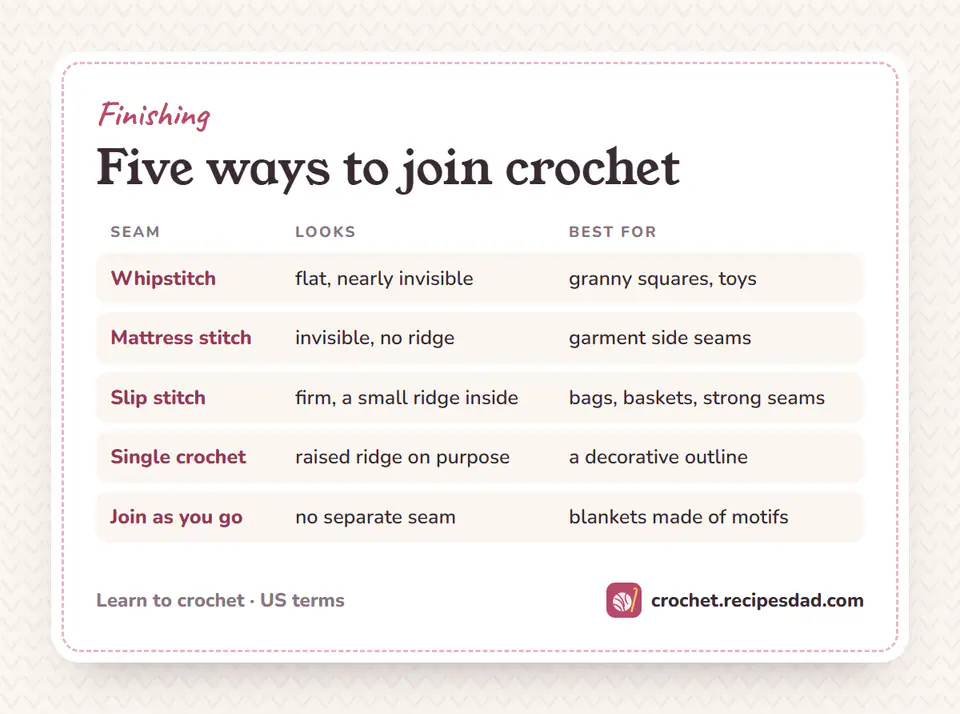
Five Seaming Crochet Methods Compared
No seam is right for everything. Some lie flat and hide, some make a strong ridge, and some stretch with the fabric. Choose by the look you want on the front and by how much the seam has to carry.
Before You Start: Line Up the Edges
Most seams that pucker were pinned badly, not sewn badly. Take two minutes for this part.
- Lay the two pieces side by side with the right sides up and check that the edges have the same number of stitches or rows.
- Match the corners first, then the middle, then the points halfway between. Put a locking marker or a clip at each point.
- On stitch edges (the top or bottom of a piece), join one stitch to one stitch. On row edges (the sides), join one row end to one row end.
- Leave a tail of about 6 in (15 cm) at the start of the seam. You will weave it in at the end.
Whipstitch
Whipstitch is the seam most of us learn first, and it is still the one I reach for with granny squares and toys. Worked through the back loops, it lies flat and almost disappears from the front.
- Hold the two pieces right sides together, edges lined up, the back loops of both edges on the outside.
- Thread the needle and bring it through the back loop of the first stitch on both pieces, from front to back.
- Bring the needle over the top of the edge and through the back loops of the next pair of stitches, always in the same direction.
- Keep going, one pair of stitches at a time. Pull each stitch snug, but not so tight that the edge gathers.
- At the corner, go through the corner stitch twice so the seam does not leave a gap.
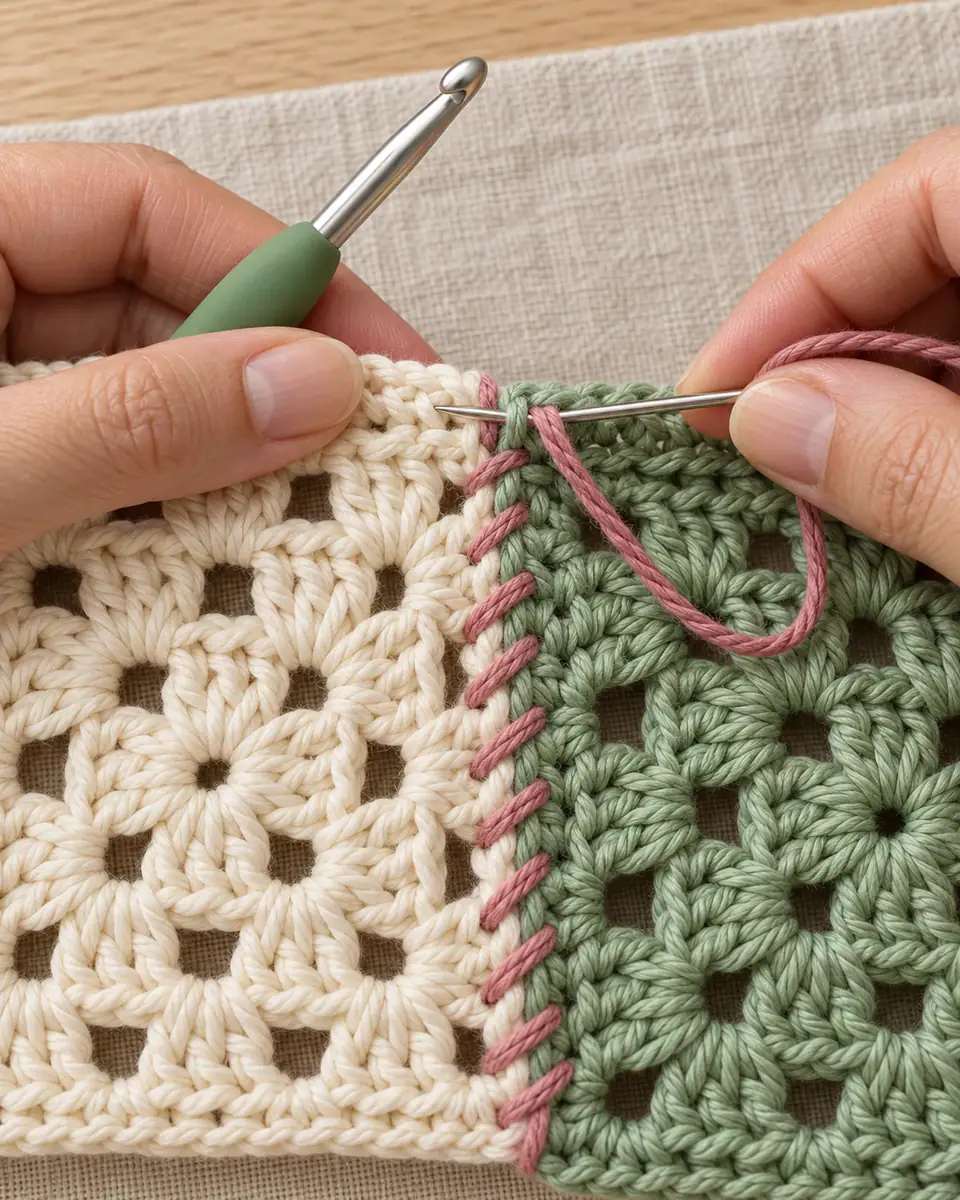
This is how the squares of the sunflower granny square are joined: through the back loops of the green single crochet round, 29 stitches on each side between the corner spaces, one stitch to one stitch. Because the count is the same on every side, the seams line up exactly.
Mattress Stitch
Mattress stitch hides completely, so it is the seam for the side seams of a sweater or a cardigan. It works best on row edges.
- Lay the two pieces flat, right sides up, with the edges to be joined next to each other.
- Bring the needle up through the first row end on the right piece, then pass it under the edge stitch of the first row on the left piece.
- Go back to the right piece and pass the needle under the edge stitch of the same row, then cross again to the left piece.
- Work a few stitches loosely, then pull the yarn gently. The two edges close together and the seam yarn disappears inside.
- Keep the same distance from the edge on both sides, usually the first full stitch, so the seam stays straight.
Slip Stitch Seam
The slip stitch seam is quick and firm, done with the hook instead of a needle. It is the one for bags, baskets and anything that has to hold weight.
- Hold the pieces right sides together, so the seam ends up on the inside.
- Insert the hook through both edges, at the first pair of stitches, and pull up a loop of the seam yarn.
- Insert the hook through the next pair of stitches, yarn over and pull the loop through both edges and the loop on the hook in one movement.
- Repeat along the edge. Work loosely: slip stitches tighten fast, and a tight slip stitch seam is shorter than the edges.
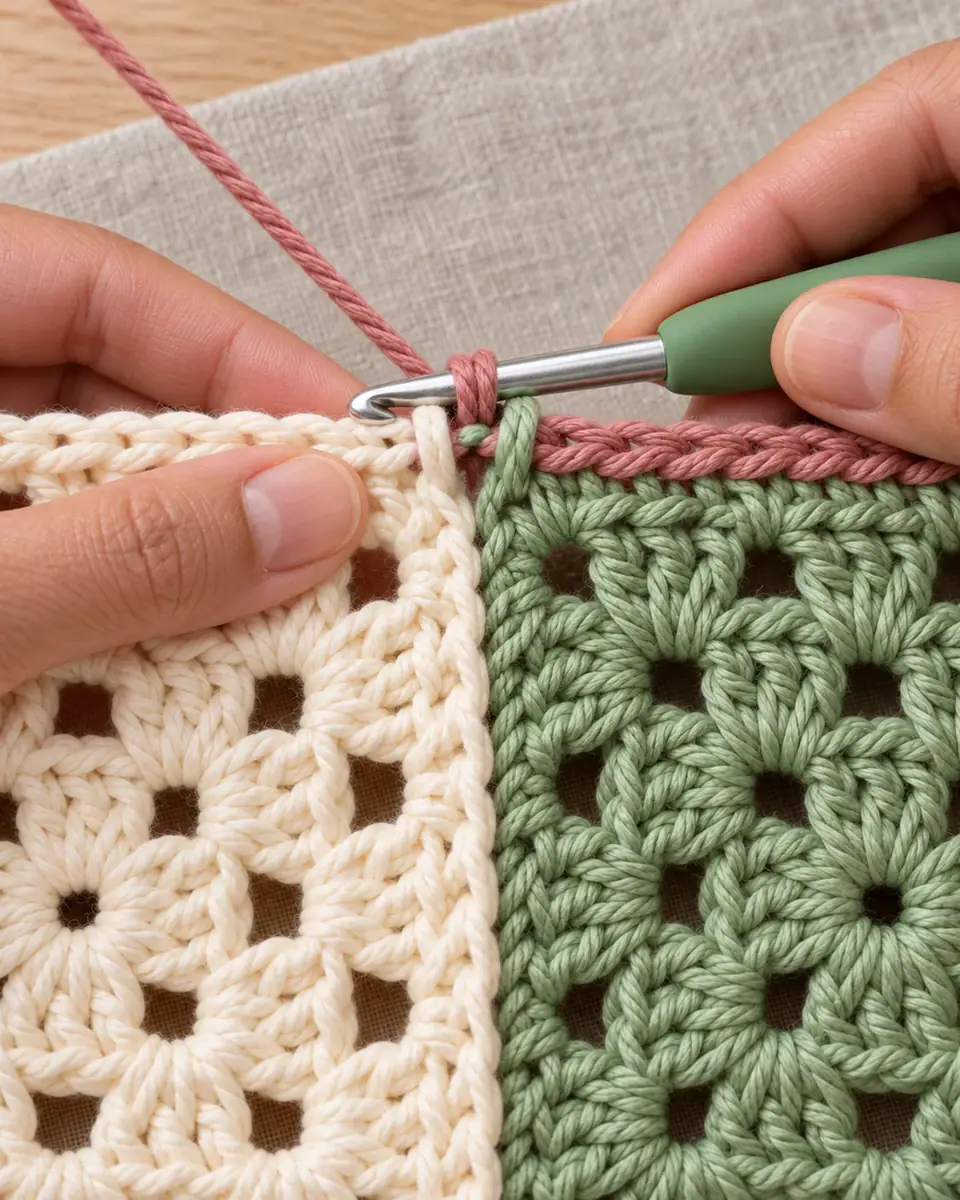
If you have not done many slip stitches yet, the chain and slip stitch lesson shows the stitch on its own first.
Single Crochet Seam
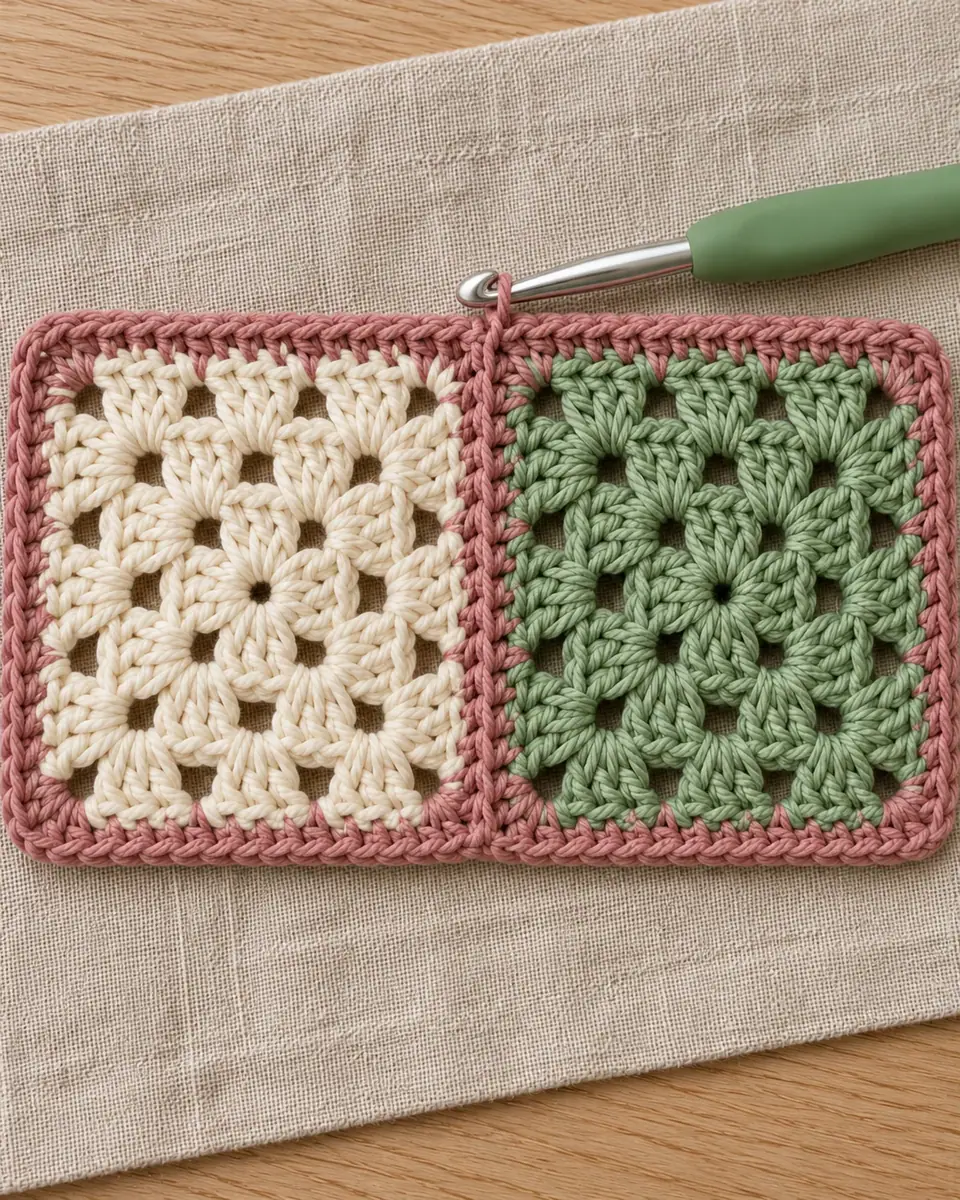
This seam is made to be seen. Worked on the right side, it leaves a raised ridge along the join. Joining granny squares with single crochet in a contrast color outlines every square of a blanket like a frame.
- Hold the pieces wrong sides together, so the ridge will form on the right side.
- Insert the hook through both edges and work a single crochet through both layers.
- Work one single crochet in each pair of stitches along the edge, and 3 single crochets in a corner if you turn one.
- Check every few inches that the seam is not shorter than the edges. If it pulls, go up half a hook size.
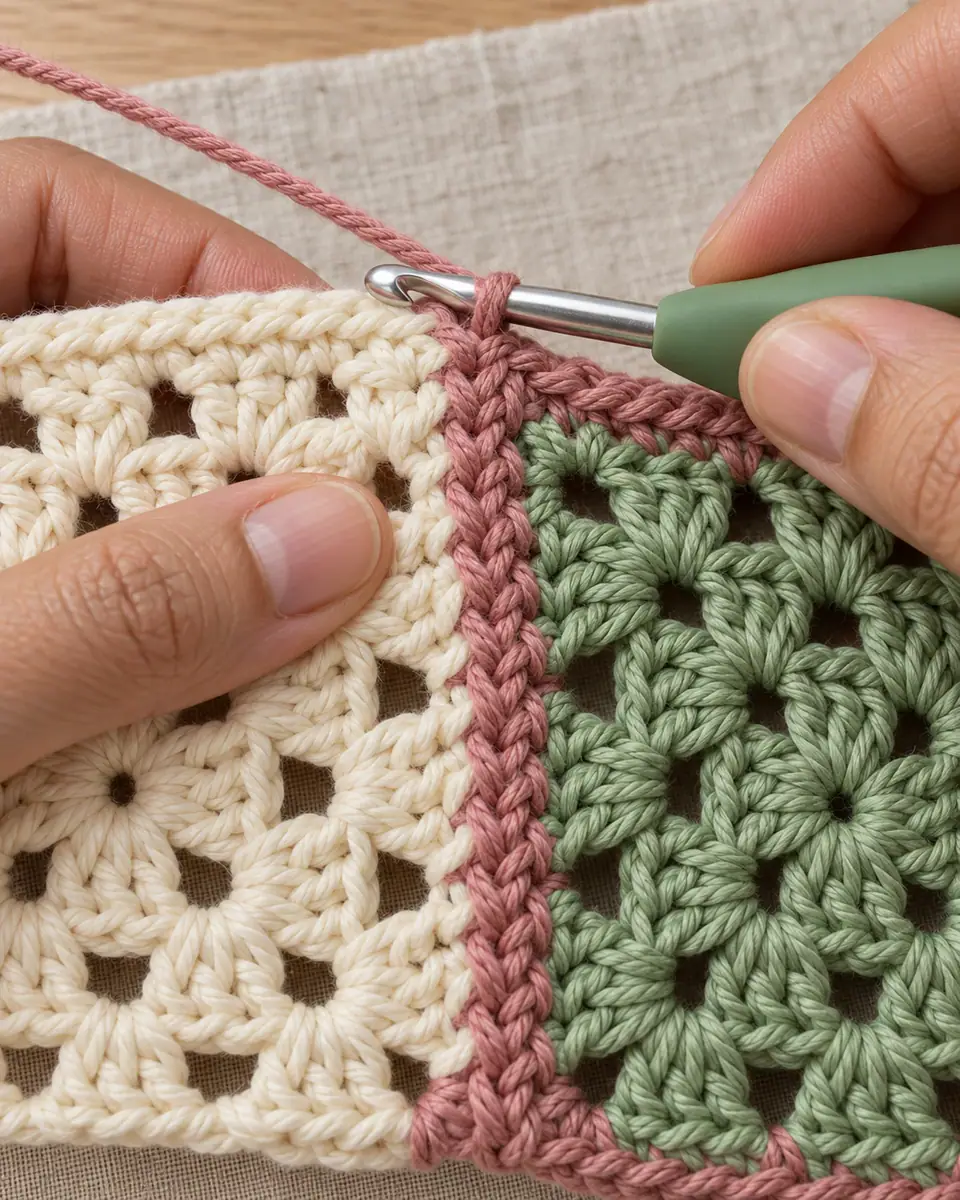
The ears of the chubby crochet bunny are put together the same way: a pink-lined front and a cream back, wrong sides together, joined with a round of single crochet through both layers. The double fabric is what makes them stand up.
Join As You Go
Join as you go skips the separate seam altogether. You work the last round of each new motif and, at the joining points, slip stitch into the matching space of the motif next to it.
- Finish the first motif completely.
- Work the second motif up to the last round, then work that round until you reach the first corner that will be joined.
- Where the pattern has a chain space (for example the ch 2 of a corner), work ch 1 instead, slip stitch into the matching space of the finished motif, then ch 1 again.
- Do the same in every chain space along that side, then finish the round as usual.
- For the next motifs, join along one or two sides as the layout needs.
It saves a lot of sewing on a blanket, but you have to plan the layout before you start, because a motif cannot easily be moved once it is attached.
Sewing Things On: Handles, Ears and Small Parts
Attaching a part to a larger piece follows the same rules: pin first, sew through both layers, keep the stitches even. For parts that carry weight, use a stronger stitch than whipstitch. The handles of the crochet tote bag are sewn inside the bag with a square of backstitches and an X across it, so they hold a full load of shopping.
Weaving In the Ends
Seams are where ends work loose, because the seam is pulled every time the piece is used. Weave the tail along the seam for about 3 in (8 cm), then turn and come back for 1 in (2.5 cm) through different stitches before you cut it. On cotton, which is slippery, go a little longer.
Common Seaming Problems and Fixes
- The seam puckers. The stitches are too tight, or the edges were not matched stitch for stitch. Undo it, pin again at the corners and the middle, and work more loosely.
- One edge is longer at the end. One side has a stitch or a row more. Count both edges before you start, and ease the extra in over several stitches instead of the last one.
- The seam shows on the front. For whipstitch, go through the back loops only. For a hidden join on a garment, switch to mattress stitch.
- Gaps at the corners. Go through the corner stitches twice, and start or finish a seam exactly at a corner, never one stitch away.
- A slip stitch seam that will not stretch. Go up a hook size for the seam, or use a single crochet seam instead.
Once the pieces are joined, an edging often finishes the job: see the crochet edging lesson. All the lessons are in Learn to Crochet.
Frequently Asked Questions
How to seam crochet so it does not show?
Use whipstitch through the back loops for squares and toys, or mattress stitch for garments. Work with the same yarn as the pieces and pull each stitch snug, not tight.
How do you crochet seams together?
Hold the pieces together, insert the hook through both edges and work slip stitches or single crochets along them, one stitch to one stitch. Slip stitch makes a firm seam on the inside; single crochet on the right side makes a raised ridge.
What is the best way of joining granny squares?
For a flat, almost invisible granny square joining, whipstitch through the back loops of the last round. For a decorative look, use a single crochet seam on the right side, or join as you go to skip sewing.
Should I block crochet pieces before seaming?
Yes, for flat pieces. Blocked squares and panels are the same size and lie straight, so the edges match and the seam does not pucker.
What yarn should I use for seaming crochet?
The same yarn as the pieces, or one of the same weight and fiber. A contrast color is fine for a decorative seam, but use a yarn that washes the same way.

Clara Parker
I’m Clara — a mom who is never without a hook, and the crochet half of the Recipes Dad family. I write cozy, practical patterns you can actually finish.
More about Clara
Maker notes
Made this pattern? Tell us about your yarn and colors, or ask a question about a row — Clara reads every note.